 TheWoWDB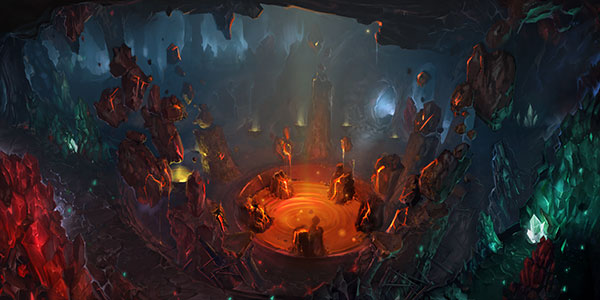
Dungeon - Cataclysm
The Stonecore
4 encounters and 47 drops. Every drop links to its item page; tradeable drops carry a live Auction House price.
Located in Deepholm
Within the Temple of Earth, locked in the heart of Deepholm, lies the Stonecore. It was inside these caverns that the Twilight's Hammer toiled over Deathwing, hammering elementium plates to the Dragon Aspect's body in an attempt to hold his tormented form together. With his renewal complete, Deathwing ascended into Azeroth, shattering the World Pillar and destabilizing the region of Deepholm.
Quick Facts
| Type | Dungeon |
|---|---|
| Expansion | Cataclysm |
| Located in | Deepholm |
| Encounters | 4 |
| Drops | 47 |
| Item level | 30 to 37 |
| Tradeable drops | 0 |
| Difficulties | Normal, Heroic, 10 Player, 25 Player |
Difficulties and Lockouts
The Stonecore has 2 difficulties in the game data: Heroic resets daily; Normal can be run again at any time.
| Difficulty | Players | Lockout |
|---|---|---|
| Normal | 5 | None |
| Heroic | 5 | Daily |
3D Model
First-party render from the game files. Model © Blizzard Entertainment.
Instance Map
The Adventure Guide places 4 bosses of The Stonecore on 1 map. Numbers follow the encounter order; each links to that fight below.
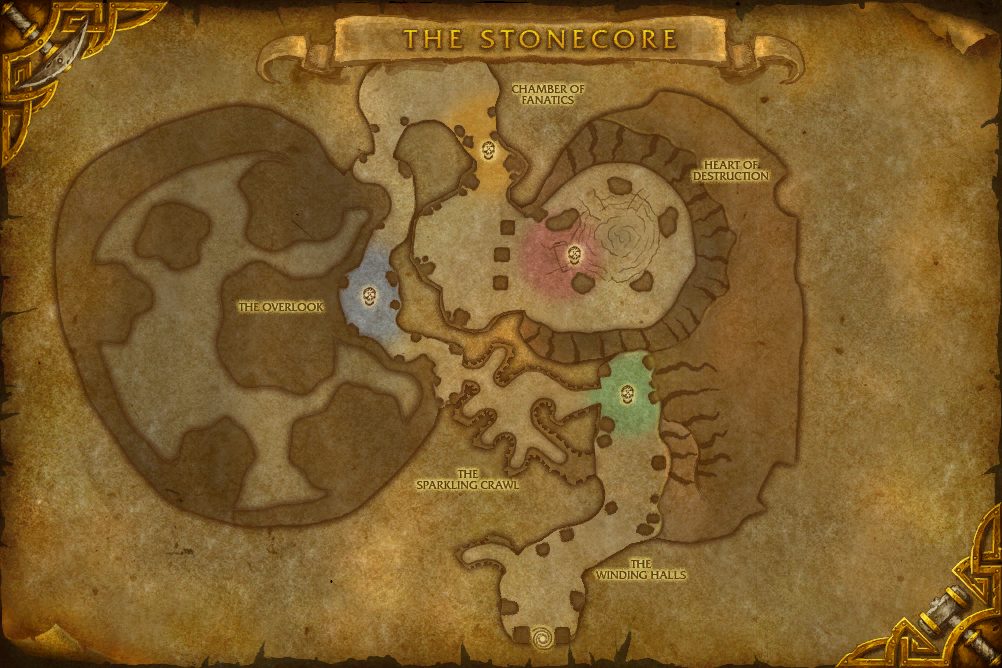 1Corborus2Slabhide3Ozruk4High Priestess Azil
- 1 Corborus 63.0, 59.7
- 2 Slabhide 37.0, 44.8
- 3 Ozruk 50.5, 23.1
- 4 High Priestess Azil 57.5, 38.8
Encounters
NNormalHHeroic10P10 Player25P25 Player
Corborus
Deathwing enslaved the massive gyreworm Corborus and drove it to unearth the vast amounts of elementium required to forge the Dragon Aspect's new plating. With Deathwing's departure, however, Corborus has broken loose and now rampages through the Stonecore in blind fury.
Abilities & Strategy
Crystal Barrage
Corborus channels a barrage of crystals on the location of a random enemy player, inflicting Physical damage in a 5 yard radius around the location every 0.5 second for 4 sec. In Heroic difficulty, the Crystal Barrage also summons a Crystal Shard every 0.5 second within the area.
Crystal Shard
These small shards of crystal have very low health. If a crystal shard ever reaches a player, they will explode and inflict Nature damage and increase damage taken by 0% on all enemies within 5 yards for 15 sec.
Dampening Wave
The energy wave also inflicts each enemy with a heal absorption effect that will prevent healing on the target for 6 sec.
Burrow
After some time has passed, Corborus will burrow into the ground and become unattackable. While Corborus is underground, Rock Borers will periodically emerge from the ground at the location of a random player and begin to attack. Corborus will also violently erupt out of the ground and resubmerge four times with a Thrashing Charge. After the fourth Thrashing Charge, Corborus emerges out of the ground and resumes normal combat.
Thrashing Charge
Before Corborus erupts out of the ground with a Thrashing Charge, the ground where he erupts will be disturbed. Corborus then leaps out of the ground and quickly dives back underground. Any player caught in the path of this movement is dealt Physical damage and knocked back.
Rock Borer
Rock Borers have low health. If not killed quickly, they will inflict Rock Bore on their current target.
Rock Bore
A Rock Borer wounds their current target, inflicting Physical damage every 3 seconds for 15 sec. Rock Bore can stack up to 10 times.
Loot
10 drops · item level 36 to 37 · 5 slots (Finger, Hands, One-Hand, Shoulder, Trinket) · all Bind on Pickup


Slabhide
With his powers as the Aspect of Earth amplified by the Old Gods, Deathwing easily swayed Deepholm's stone wyrms into serving the Twilight's Hammer. One of the most ambitious of these creatures, Slabhide hopes to earn Deathwing's favor by exterminating any intruders brazen enough to enter the Stonecore.
Abilities & Strategy
Lava Fissure
Slabhide creates a crack in the ground under a random player. The lava pool lasts 10 seconds. In Heroic Difficulty the crack erupts after 3 seconds and the lava pool lasts 30 seconds.
Sand Blast
Slabhide breathes out a blast of sand, inflicting Nature damage to all enemies within 15 yards in a forward facing 60 degree cone.
Stalactite
Periodically during the encounter, Slabhide will run to the center of the cavern and lift off into the air. While hovering above the ground, a large number of stalactites then rain down from the ceiling in random locations around the cavern. If a player is underneath a stalactite when it lands, they take Physical damage and are knocked back. The stalactites last 30 sec., and also block movement and line of sight for spells.
Crystal Storm
After Slabhide lifts off and finishes creating stalactites, he then lands. Before the stalactites disappear, he begins to channel Crystal Storm for 6 sec. Every 0.5 second Slabhide inflicts Nature damage to all enemies. Slabhide must have line of sight to an enemy to deal damage with Crystal Storm.
Loot
9 drops · item level 30 to 37 · 3 slots (Finger, Hands, One-Hand) · all Bind on Pickup


Ozruk
Ozruk has served as Stonecore's guardian since Deepholm's creation. It is unknown why Ozruk has remained in the Stonecore, but it has become apparent that the guardian now believes that anyone opposed to Deathwing is a threat to Deepholm, and should therefore be destroyed.
Abilities & Strategy
Ground Slam
Ozruk builds up his strength then slams the ground in front of him dealing Physical damage to all enemies within 4 yards of the impact point.
Rupture
When Ozruk performs a Ground Slam in Heroic Difficulty, the ground ruptures and causes three lines of rock spikes to erupt in the direction he is facing. Any player caught by one of the rock spikes is dealt Physical damage and is knocked upwards.
Elementium Bulwark
The elementium plates grafted onto Ozruk are charged with energy, causing them to have a 0% chance to reflect spells for 10 sec.
Elementium Spike Shield
Spikes erupt from Ozruk's body for 10 sec. This effect stacks up to 5 times, but may only be applied once per second.
Shatter
When the Elementium Spike Shield expires, Ozruk shatters the spikes and launches them in all directions.
Paralyze
Right before Ozruk uses his Shatter ability, Ozruk will cast Paralyze. The Paralyze spell stuns all enemies for 8 sec. Any damage taken while stunned will remove the Paralyze effect. If Paralyze is not prematurely removed, then at the end of the spell's duration the player is dealt Arcane damage.
Loot
10 drops · item level 36 to 37 · 5 slots (Neck, Trinket, Two-Hand, Waist, Wrist) · all Bind on Pickup


High Priestess Azil
High Priestess Azil is one of the few who has survived communing with the Twilight's Hammer cult's eldritch masters, although little remains of her sanity. She instills terror in lesser cultists so that they will sacrifice themselves without hesitation when their masters command it.
Abilities & Strategy
Stage One: Kill the Intruders!
Curse of Blood
High Priestess Azil curses a random enemy player, increasing the player's Physical damage taken for 15 sec.
Force Grip
High Priestess Azil traps her current enemy target in a field of energy for 5 sec, repeatedly lifting them up and then slamming them into the ground. Each time the target is slammed into the ground, they are dealt Physical damage.
Gravity Well
High Priestess Azil summons a Gravity Well at the location of a random player. A Gravity Well will also inflict Shadow damage every 0.5 second to any target within the well. The damage inflicted is increased the closer the target is to the center of the Gravity Well. Gravity Wells have a duration of 20 seconds. In Heroic Difficulty a Gravity Well no longer has a set duration. If a Gravity Well kills a unit, they shrink in size by 25%. So after killing 4 units, they disappear.
Devout Follower
Devout Followers rush to help High Priestess Azil during the fight. These creatures have very low health.
Stage Two: Feel the Fury of Earth!
High Priestess Azil begins this stage by casting Energy Shield, then she hovers up to her altar where she will cast Seismic Shard three times. After finishing casting the Seismic Shard spells, she returns to the ground. Many more Devout Followers rush to help Azil during this stage.
Energy Shield
High Priestess Azil creates an Energy Shield around her which reduces the damage she takes by 0%.
Seismic Shard
High Priestess Azil magically raises up a huge shard of stone, then throws it at the location of a random enemy player.
Loot
18 drops · item level 36 to 37 · 6 slots (Feet, Head, Held In Off-hand, One-Hand, Trinket, Two-Hand) · all Bind on Pickup
 Cowl of the Unseen WorldCowl of the Unseen World
 Darkling StaffDarkling Staff
 Elementium FangElementium Fang
 Helm of Numberless ShadowsHelm of Numberless Shadows
 Leaden DespairLeaden Despair
 Magnetite MirrorMagnetite Mirror
 Prophet's ScepterProphet's Scepter
 Slippers of the Twilight ProphetSlippers of the Twilight Prophet
 Tear of BloodTear of Blood
Achievements
5 achievements tied to The Stonecore, worth 50 achievement points in total.
 Heroic: The Stonecore Guild RunDefeat High Priestess Azil in the Stonecore on Heroic difficulty while in a guild group.10
- The StonecoreDefeat High Priestess Azil in the Stonecore.10
- Heroic: The StonecoreDefeat High Priestess Azil in the Stonecore on Heroic Difficulty.10
- Protocol Inferno: The StonecoreDefeat High Priestess Azil in the Stonecore on Heroic Difficulty while Protocol Inferno is active.10
 Rotten to the CoreDefeat 60 Disciples within 10 seconds during the High Priestess Azil encounter in the Stonecore on Heroic Difficulty.10
More Cataclysm Dungeons
Other dungeons from the same expansion.