Den of Nalorakk is a three boss Midnight dungeon, added in patch 12.0.1 and now in the Season 2 Mythic+ pool. The last boss is a protection fight: Zul'jarra fights alongside you and the encounter is about keeping her from being hit.
Tanks: on The Hoardmonger you choose which resource pile he raids next. On Nalorakk you soak Forceful Slam after each Overwhelming Onslaught.
Healers: dispel the Toxic Spores poison on the first boss and Glacial Torment on the second, and expect three hard hits in a row during Overwhelming Onslaught.
DPS: soak mushrooms, interrupt the Shivercores, and drop your Echoes in one tidy spot away from the group.
Trash and route
Before The Hoardmonger will fight you, the group has to gather six offerings, which come from berry bushes, fishing spots and barrels of apples around the opening area. Keen-Eyed Strikers near the bushes try to steal offerings with Scavenge, so kick that cast. The same area holds two Warding Incense that druids in bear form or players with 25 Midnight Alchemy can use. Since an August 18, 2026 hotfix it grants 5% versatility to every ally in the instance for ten minutes and persists through death. Halfway through the later Harsh Winds gauntlet, on the right side, Snowworn Provisions let a Night Elf, Troll or bear form druid give the group Rune of Anchoring, which halves movement forces for 15 minutes.
On the way to the Sentinel, the Harsh Winds gauntlet pushes you around. Move between pieces of terrain that block the wind, which you can spot by the lack of snow behind them. The Winter Squall standing just before the boss carries a pulsing aura. Method notes that killing it stops the Harsh Winds, but do not drag other packs into it if you choose to fight it.
Trash worth planning for:
Earthwhisper Tender heals its pack with Healing Breeze. Interrupt it every time, and purge the buff from priority mobs if a kick is missed. An August 25 hotfix removed two of them from the first area.
Spirit of Hunger is crowd control immune and channels Feast of Misery for heavy group damage, so use a defensive when it does. Kill its Starvation Effigy quickly to ease the pressure.
Territorial Matriarch enrages when a cub dies, so tanks should have a soothe or a defensive ready.
Frigid Mauler has a roar that should be interrupted on every cast.
Avatar of Determination is crowd control immune and roots everyone in ice with Glacial Tomb. Break the roots or use freedom effects before its next Pulverize, and run out of that hit.
Loa Speaker Nanea is crowd control immune, drops totems that need to die immediately, and casts a Lightning Bolt that should be kicked.
The Hoardmonger
Abilities
Resourceful Measures: at 90%, 70% and 40% health he runs to the nearest unused resource pile and empowers one of his abilities.
Hearty Bellow: the meat pile upgrade to Ravenous Bellow, which adds a knockback to the group hit and damage over time.
Bonespike Slam and Bonespiked: the bone pile upgrade to Earthshatter Slam, which adds extra area denial.
Overflowing Supplies: the mushroom pile upgrade, which makes Spoiled Supplies spawn more Rotten Mushrooms.
Spoiled Supplies: a channel that scatters supplies which grow into Rotten Mushrooms around the room.
Toxic Spores and Putrid Burst: stepping on a mushroom soaks it and gives you a stacking Toxic Spores poison. Any mushroom left alone for about 12 seconds bursts and hits the whole group hard enough to wipe it.
He always raids the nearest unused pile, so you decide the order of the upgrades by where you stand him when he reaches each threshold. Method's recommended order is meat first, bone second and mushroom last, which keeps the mushroom upgrade off the table until late. As the sturdiest player, you can also soak a share of the mushrooms.
Healer
Ravenous Bellow, and later Hearty Bellow, are your big group damage moments, so plan a cooldown for each. Toxic Spores is a poison, so dispel players who soaked mushrooms, especially when several soaks land close together.
DPS
Every mushroom needs a soaker before it bursts. Spread soaks across the group so no single player collects all of the spores. When Earthshatter Slam or Bonespike Slam picks you, step out of the marked area so the cone does not catch anyone else.
Mythic+ notes
The pile order matters more as keys get higher, because the mushroom upgrade multiplies the soaks your group has to cover. Agree on the order before the pull so the tank is not guessing, and save a healing cooldown for Ravenous Bellow.
Snowdrift: a Shivercore leaves a snow pile where it dies, and standing in it makes you immune to forced movement.
Rimeshatter: a dying Shivercore also sends out this soak, which needs one player in it to stop the Rime Detonation that follows.
Frozen Tempest: a channel that deals ticking damage to everyone and keeps pushing players back. Standing in a Snowdrift protects you from the push and much of the damage.
Raging Squall: tornadoes that move around the arena.
Glacial Torment: a damage over time effect that healers should dispel quickly.
Tank
The floor is icy, so every step slides. Keep the boss close to each Shivercore so the group can cleave both, and park the boss on or next to a Snowdrift so the group can shelter from Frozen Tempest without moving far.
Healer
Dispel Glacial Torment as soon as you can, and pour healing into anyone you cannot dispel in time. Frozen Tempest is steady damage for its whole duration, so make sure the group enters it healthy.
DPS
Swap to each Shivercore and interrupt Winter's Shroud. When one dies, someone has to stand in the Rimeshatter soak. Method suggests the group stack so the tornadoes spawn in one area, then rotate around the room away from them, and to dodge the Frostspike circles.
Mythic+ notes
Time the Shivercore kills. Icy Veins recommends killing one quickly, soaking its Rimeshatter, then holding the next one so it dies just as Frozen Tempest starts. The fresh Snowdrift then shelters the group from the push and most of the damage.
Nalorakk
Abilities
Echoing Maul: marks three players, and after a short delay an Echo of Nalorakk forms where each marked player stands. A September 10, 2026 hotfix fixed cases where it could trigger unintentionally.
Spectral Slash: the Echoes swipe at players who get too close.
Overwhelming Onslaught: three large hits on the group. Zul'jarra jumps behind the tank and raises a shield with Defensive Stance, and the whole group needs to stand behind it. The sequence ends with a knockback.
Forceful Slam: a tank buster after Overwhelming Onslaught that the tank has to soak.
Demoralizing Scream: Zul'jarra lets this out if Forceful Slam or a charging Echo hits her, so a clean soak and a clean block avoid it.
Fury of the War God: the Echoes charge at Zul'jarra in the middle of the room.
Echoing Fury: each charging Echo you block hits you with this damage.
Tank
Never stand with your back to an Echo, because Zul'jarra jumps behind you for Overwhelming Onslaught and the whole group has to fit behind her shield. After the knockback at the end of the sequence, run straight back to the boss so you are in place to soak Forceful Slam.
Healer
Overwhelming Onslaught still hits hard even behind the shield, so treat it as a planned cooldown. Fury of the War God also asks for a long stretch of healing while the group blocks the charging Echoes.
DPS
When you are marked by Echoing Maul, take the Echo toward a nearby corner or the edge of the room and drop it near the Echoes already there, without cleaving other players. Stay away from Echoes afterward so Spectral Slash does not catch you. During Fury of the War God, form a wall around Zul'jarra so each charging Echo hits a player instead of her. Each Echo you block hits you with Echoing Fury, so use a defensive if you are low, but that is far better than letting it reach her.
Mythic+ notes
The fight gets harder as Echoes pile up, so clean placement from the first Echoing Maul pays off for the whole encounter. Assign wall spots around Zul'jarra before the first Fury of the War God so nobody leaves a gap.
Driven by voracious greed, the gluttonous Hoardmonger fiercely defends the stashes of food and supplies he has stolen from nearby troll tribes. Nalorakk's first trial is to eliminate him before the tribes go hungry.
The seasons can be kind or cruel. Sentinel of Winter unleashes the harshest of winter storms to test all who face him. To surpass Nalorakk's second trial, endure the biting cold and defeat the embodiment of a winter storm.
Slumbering in his fitful and battle-filled dream, Nalorakk, the Loa of War, will only test the mettle of the worthy. Survive his trial and receive his blessing or die trying.
Den of Nalorakk is a dungeon in the Adventure Guide. See the Den of Nalorakk database page for the raw journal, map, and loot grid. This guide does not invent coordinates or a walking path.
Questions
How many bosses are in Den of Nalorakk?
The Adventure Guide lists 3 encounters.
What loot does Den of Nalorakk drop?
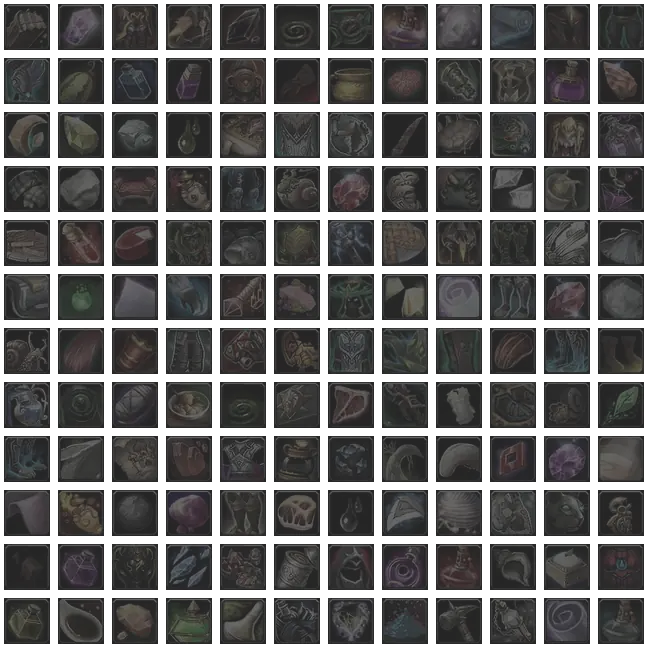
The journal lists 25 drops across its encounters. Open a boss guide or the database page for the per-encounter tables.
Is this the database page for Den of Nalorakk?
No. This is the journal-derived encounter reference, not a strategy guide. The encyclopedia page with the raw journal tree and the full loot grid is linked as Database on this page.
Where does this guide's text come from?
Quoted Adventure Guide sections come from TheWoWDB's retail datamine (client build 12.1.5.70448, ingested 2026-10-16). We do not invent positioning, assignments, or cooldown timings.
Source and build
This page quotes the Adventure Guide. It does not add player strategy such as positioning, assignments, stack or spread calls, or cooldown timings unless that sentence is already in the journal. Quoted sections come from TheWoWDB Adventure Guide datamine (client build 12.1.5.70448, ingested 2026-10-16). Ability names link to first-party spell pages. When a newer retail build is ingested, this page updates with it.
 TheWoWDB
 Earthshatter Slam
 Ravenous Bellow
 Shattering Frostspike
 Winter's Shroud
 Snowdrift
 Rimeshatter
 Frozen Tempest
 Raging Squall
 Glacial Torment
 Echoing Maul
 Spectral Slash
 Overwhelming Onslaught
 Defensive Stance
 Forceful Slam
 Demoralizing Scream
 Fury of the War God
 Echoing Fury
 Idol of the War Loa
 Permafrost Essence
 Fallen Speaker's Staff
 Victor's Flashfrozen Blade
 Tempest's Shelter
 Perennial Frostbound Charm
 Yoke of the Charging Bear

 Resourceful Measures
 Overflowing Supplies
 Bonespike Slam
 Bonespiked
 Hearty Bellow
 Spoiled Supplies
 Toxic Spores
 Putrid Burst
 Autumn's Boon Belt
 Forgotten Tribe Footguards
 Grim Harvest Gloves
 Hoarded Harvest Wrap
 Mycolic Medicine
 Pilfered Precious Band