The Blinding Vale is a four boss Midnight dungeon in southwestern Harandar, where the Lightbloom first took root. It was added in patch 12.0.1 and is now part of the Season 2 Mythic+ pool. Almost every boss is about growth you have to cut back.
Tanks: move the Trinity off scorched ground, keep Ikuzz near rooted players, survive the bleed from Ruia's bear form and the Thornspike hit on Ziekket.
Healers: steady group damage on every boss, peaking at Bedrock Slam, Thorncaller Roar, Spirits of the Vale and Oozing Xylem.
DPS: soak the Loam circles, break roots, and erase dead Lashers with Ziekket's own beam.
Trash and route
At the start you choose between going right toward Ikuzz or left toward the Lightblossom Trinity. Method recommends left for most groups. On that side a Paladin, Priest or a Herbalist with 25 Midnight skill can interact with the Light-Starved Blossom for Flourishing Stride, a two minute buff to movement speed and haste. On the right, Hunters and Druids can free a Baby Grovecrawler that fights with you for a minute. After both opening bosses, a bird carries the group down to Ruia, and many mobs in that area carry Lightwarden's Blight, which makes them deal group damage and leave a puddle when they die.
A hotfix on August 25, 2026 raised the enemy forces requirement to 686 (was 655), thinned the creature density in the last area and removed a Radiant Spellsower before Ziekket.
Trash to respect:
Radiant Spellsower is the most important caster in the dungeon. Stop every Light Bolt Volley and use spare kicks on its Light Bolt. At low health it walks to wake the nearest Lasher camp, so slow or crowd control it and kill it before it arrives.
Underbrush Stalker puts a stacking Thornblade bleed on random players, so count them in each pack.
Lightfeather Petalwing has a Disorienting Screech that should be interrupted every time.
Leafy Grovecrawler is a good place for spare interrupts on Seed Shot.
Luminous Thornmaw is a crowd control immune lieutenant near Ruia with a bleeding tank hit and a breath frontal aimed at a random player.
Overgrown Hydra is crowd control immune. It channels beams into three players, who should use defensives and avoid allies, and it fires seed lines to dodge.
Sporeblight Belcher is crowd control immune, pulses heavy group damage with Spouting Floret and drops spore circles afterward.
Lightgorged Lasher gains a pollination buff. Icy Veins says to interrupt it, and Method says to focus the Lasher until its shield breaks.
Potatoad Matriarch is crowd control immune, lays eggs that should be killed before they hatch, puts a poison on the group that can be dispelled, and tosses the tank high into the air. Since the August 25 hotfix, its eggs finish hatching even if the Matriarch is already dead, so do not ignore them.
Lightblossom Trinity
Abilities
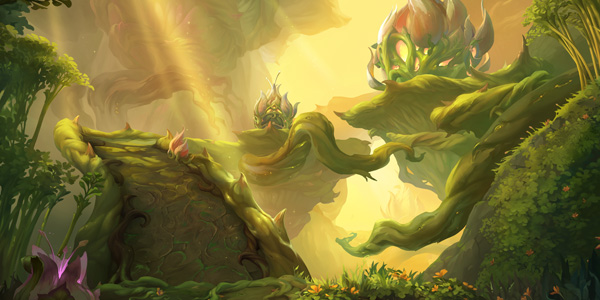
Thicket's Trinity: the encounter is three rutaani fought at once, so keep them together for cleave.
Bedrock Slam: a tank hit that also brings group damage over time and creates three circles of Fertile Loam.
Lightsower Dash: Lekshi's line attack that passes through all three Loam circles.
Lightblossom Beam: Kezkitt's beam turns the circles into soaks that deal ticking damage to anyone inside. Unsoaked circles gain Light and release group damage, so they need bodies in them quickly. When the channel ends the circles become scorched ground that denies the area.
Thornblade: Lekshi marks a random player, applies a heavy bleed, then leaps to them.
Light Bolt: a random target cast from Kezkitt that should be interrupted.
Tank
Use active mitigation on Bedrock Slam, and keep the three bosses stacked so the group can cleave all of them. Park them near one of the Loam circles so you can step into it when the beam starts, then be ready to drag them off the scorched ground before the next Bedrock Slam.
Healer
Thornblade bleeds hurt, so watch the targeted players and expect a bleed cleanse or defensive from them. Bedrock Slam brings group damage over time, so it is a good place for a healing cooldown, and the soaks add ticking damage on the players standing in the circles.
DPS
Interrupt Light Bolt in a rotation. When Lightblossom Beam starts, the circles need soakers right away. Method has the tank and two other players step in. If Thornblade targets you, move so the leap does not cleave allies, then step out of the effect when Lekshi lands. Avoid the Loam swirls outside the soak window and dodge the Lightsower Dash line.
Mythic+ notes
The fight is mostly about floor space. Every beam leaves scorched ground behind, so agree on which circle the tank uses each cycle, and move the bosses early rather than late.
Ikuzz the Light Hunter
Abilities
Bloodthorn Roots: roots that immobilize players who step on them until the roots are destroyed or a freedom effect clears them.
Lightcrazed Frenzy: from 50% health until he dies, Ikuzz frenzies, which makes the rest of the fight a long healing check.
Tank
Watch your position for Verdant Stomp so you are not knocked off an edge or into roots. Keep Ikuzz close to anyone stuck in Bloodthorn Roots so the group can cleave the roots and the boss together.
Healer
Thorncaller Roar is pulsing group damage, so ask for personal defensives during it. Save your major cooldowns for Lightcrazed Frenzy in the second half, especially when it overlaps a roar, and have a big heal ready for anyone who gets caught by the fixate.
DPS
Cleave down roots as they appear, or use freedom effects if you are trapped. After Verdant Stomp, either group up near the boss so the roots that spawn on everyone can be cleaved together, or clear them with a freedom effect. If you are the fixated player, kite Ikuzz over existing roots so his footsteps destroy them while you stay out of reach.
Mythic+ notes
Every Verdant Stomp adds a root per player, so a fixated player who paths over them is doing real work for the group, not just surviving. Roots are most dangerous once the frenzy starts at 50%.
Lightwarden Ruia
Abilities
Warden's Wrath: a Moonkin form cast. Method notes that interrupting it reduces tank damage.
Lightfire: a Moonkin form debuff on three players. When it expires it releases Lightfire Beams that silence anyone caught in their path.
Lightfall: circles on the ground that hit anyone inside them.
Grievous Thrash: a stacking bleed that only ends when the target is healed to full.
Mangling Claws: a Bear form aura that makes Ruia hit the tank harder.
Spirits of the Vale: at 40% health he returns to Haranir form and casts Lightfire, Grievous Thrash, Lightfall and Pulverizing Strikes in rotation, one every eight seconds, until he dies.
Method lays out the phases as Moonkin form from the pull to 70% health, Bear form from 70% to 40%, and Haranir form from 40% to the kill.
Tank
In Bear form, Mangling Claws raises his damage on you, so bring self healing, defensives and anything that removes bleeds for Grievous Thrash. In the final phase you see every form's tools at once, so keep a major cooldown for it.
Healer
Grievous Thrash only falls off at full health, so heal those targets all the way up instead of leaving them at a safe percentage. Spirits of the Vale is the hardest part of the fight, and it ends only when the boss dies.
DPS
Kick Warden's Wrath and stay out of Lightfall circles. If you carry Lightfire, give the group room before it expires so the beams do not silence anyone. Method suggests the debuffed players stand together so the beams are easier to dodge. During Bear form, spread so each Pulverizing Strikes cone only hits its own target. In the last phase, keep cooldowns for a fast kill.
Mythic+ notes
Save defensives and burst for the Haranir phase. Spending them early leaves the group exposed when every mechanic starts overlapping.
Lightspore Shot: the Lashers' cast, which can be interrupted or stopped with crowd control.
Vicious Regrowth: tied to Lashers coming back from their dormant state.
Concentrated Lightbeam: a frontal beam at a player. Dead Lashers it hits are destroyed for good, and it leaves a large Lightsap puddle.
Lightbloom's Essence: orbs that move toward Ziekket. Soaking one applies a stacking effect, Lightbloom's Might, that raises your damage and healing done but also the damage you take. Any orb that reaches Ziekket gives him a shield and sends damage through the whole group. An August 18, 2026 hotfix cut its periodic damage by 25%.
Thornspike: a hit with a knockback on the current tank.
Oozing Xylem: pulsing damage on all players for the whole encounter.
Tank
Thornspike hits hard and knocks you back, so use active mitigation, a defensive or a bleed cleanse. Group the Lashers up quickly so they die to cleave. Method suggests fighting toward the platform edge, so the Lightsap puddles do not eat the middle of the room.
Healer
Oozing Xylem never stops, and the Essence soaks add damage on top. Spot heal anyone holding a high stack of the Essence buff, since they take more damage as it grows.
DPS
Cleave down the Lashers and interrupt or crowd control Lightspore Shot. When Concentrated Lightbeam targets you, aim it through the dead Lasher bodies so they are removed for good instead of coming back, then step out of the Lightsap it leaves. Soak Lightbloom's Essence before it reaches the boss and share the soaks evenly so nobody stacks too high.
Mythic+ notes
Every Lasher body you fail to clear can return on the next Awaken the Lightbloom, so beam aim is the skill that decides this fight on higher keys.
The Lightbloom has suffered a terrible defeat, but like the rutaani it imbues, it changes. These Lightblossomed rutaani fanatically propagate their vicious and invasive garden.
Fought alongside Kezkitt, Lekshi, Lightblossom and Meittik.
Ikuzz is a fearsome carnivore who once stalked prey throughout Harandar. Now the Light Hunter has succumbed to the overwhelming power of the Lightbloom, and his insatiable hunger serves its growth.
The once-respected Rootwarden Ruia could not defeat the Lightbloom on his own. His wounded pride led him to drawing power from the Lightbloom and using it to punish all others instead of aiding his allies.
Born from the Lightbloom's epicenter, Ziekket was spawned and incubated by Light-infested rutaani to create an unstoppable engine of the Lightbloom's expansion.
The Blinding Vale is a dungeon in the Adventure Guide. See the The Blinding Vale database page for the raw journal, map, and loot grid. This guide does not invent coordinates or a walking path.
Questions
How many bosses are in The Blinding Vale?
The Adventure Guide lists 4 encounters.
What loot does The Blinding Vale drop?
The journal lists 30 drops across its encounters. Open a boss guide or the database page for the per-encounter tables.
Is this the database page for The Blinding Vale?
No. This is the journal-derived encounter reference, not a strategy guide. The encyclopedia page with the raw journal tree and the full loot grid is linked as Database on this page.
Where does this guide's text come from?
Quoted Adventure Guide sections come from TheWoWDB's retail datamine (client build 12.1.5.70448, ingested 2026-10-16). We do not invent positioning, assignments, or cooldown timings.
Source and build
This page quotes the Adventure Guide. It does not add player strategy such as positioning, assignments, stack or spread calls, or cooldown timings unless that sentence is already in the journal. Quoted sections come from TheWoWDB Adventure Guide datamine (client build 12.1.5.70448, ingested 2026-10-16). Ability names link to first-party spell pages. When a newer retail build is ingested, this page updates with it.
 TheWoWDB
 Light Bolt
 Bloodthorn Roots
 Bloodthirsty Gaze
 Crushing Footfalls
 Incise
 Crunched
 Verdant Stomp
 Thorncaller Roar
 Lightcrazed Frenzy
 Warden's Wrath
 Lightfire
 Lightfire Beams
 Lightfall
 Pulverizing Strikes
 Pulverized
 Grievous Thrash
 Mangling Claws
 Spirits of the Vale
 Awaken the Lightbloom
 Dormant
 Lightspore Shot
 Vicious Regrowth
 Concentrated Lightbeam
 Lightsap
 Lightbloom's Essence
 Thornspike
 Oozing Xylem
 Seed of Radiant Hope
 Seed of the Devouring Wild
 Lightspire Core
 Pruning Lance
 Thornblade
 Thorntalon Edge
 Doompetal
 Amirdrassil's Reach
 Branch of Pride
 Luminescent Sprout
 Thorned Reply
 Teldrassil's Sacrifice
 Bloodthorn Burnous
 Lightwarden's Bind
 Thicket's Trinity
 Bedrock Slam
 Fertile Loam
 Bedrock Surge
 Lightsower Dash
 Thornblade
 Fan Of Thorns
 Lightblossom Beam