 TheWoWDB
Raid boss strategy guide
Scalecommander Sarkareth Raid Guide (Aberrus, the Shadowed Crucible)
Scalecommander Sarkareth in Aberrus: clear Oppressing Howl, handle Oblivion and the Emptiness Between Stars, and hide behind Astral Formations.
Overview
- Sarkareth is the final boss of Aberrus, a three stage fight. Stage One is about removing a debuff before a raid-wide burst, Stage Two adds a second realm and boss images, Stage Three is a positioning fight around asteroids.
- What kills raids: anyone still carrying Oppressing Howl when Glittering Surge goes out, players outside an Astral Formation's shelter during Scouring Eternity, and Void Bombs that explode in the normal realm.
- Tanks swap on every Burning Claws. Healers prepare for Echoing Howl bursts. DPS prioritize and interrupt the Null Glimmer images.
Scalecommander Sarkareth
Abilities
 Oppressing Howl: pushes everyone back and marks them. The mark is removed by being hit by Searing Breath or Mass Disintegrate, and every removal triggers
 Echoing Howl raid damage.
 Glittering Surge: an arcane pulse on the whole raid. Anyone still marked by the Howl is
 Dazzled, a stun with heavy damage that usually kills.
 Searing Breath: a three-part frontal cone that burns and leaves
 Seared on marked players.
 Mass Disintegrate: an image of the boss fires lines at marked players, damaging everyone along the line and applying
 Disintegrated to Howl carriers.
 Scorching Bomb: bombs on nearby players that burn their surroundings, then go off as
 Scorching Detonation and leave
 Burning Ground.
 Burning Claws: a tank bleed. When it expires,
 Blazing Blast deals raid damage based on how much fire damage the tank took from it.
 Drifting Embers: falling motes that knock back anyone near the impact (Heroic and up).
 Oblivion: stacks from most void abilities in later stages. At ten stacks you are sent into the
 Emptiness Between Stars, where your damage is almost nothing and you must recover your mind fragments before the timer ends or you die.
 Astral Flare: orbs inside the Emptiness that grant stacking haste and movement speed.
 Dimensional Puncture and
 Destabilize: entering the Emptiness tears a hole and pulses stacking damage on the raid, so trips there have a cost.
 Void Bomb: a bomb that can be picked up. It only detonates safely if the carrier is inside the Emptiness when it goes off.
 Abyssal Breath: the boss flies to a player in a damaging line, leaving void residue and spawning his images.
 Ebon Might: every spell the boss casts empowers the images with more damage and speed, and at 10 stacks on Normal (5 on Heroic and up) they can no longer be crowd controlled or interrupted.
 Astral Formation: asteroids that crash into the floor in Stage Three. They are the only cover from
 Scouring Eternity, a supernova that hits and knocks back everyone not behind one.
Phases
Stage One. Everyone starts with Oppressing Howl. Assign a large group to the first Searing Breath with a healing cooldown, a smaller group to the second and the rest to the third; anyone hit by a Mass Disintegrate line no longer needs a breath. Aim Disintegrate lines away from the raid and move away from Scorching Bombs. The stage ends at the second Glittering Surge or when the boss reaches 60%.
Stage Two. It opens by sending the whole raid into the Emptiness Between Stars. Collect Astral Flares for the buff, then step into the three soak pools to return before the debuff expires, and interrupt the boss quickly once everyone is back. From then on, dodge Abyssal Breath, kill and interrupt the Null Glimmer images, and move away from the Desolate Blossom pools he grows. A player who picks up a Void Bomb steps into a Desolate Blossom to reach the Emptiness, waits there until the bomb goes off, and grabs Astral Flares while inside. The stage ends shortly after the third set of Desolate Blossoms or when the boss reaches 40%.
Stage Three. Use Bloodlust after the first Cosmic Ascension. Run out of the 30 yard Cosmic Ascension impact together to a pre-assigned spot so the Astral Formations land where you want them, hide in the safe lines they create when Scouring Eternity goes off, share Embrace of Nothingness damage as a group (the black hole also eats nearby formations) and keep interrupting the images. Void Bomb carriers now use Motes of Oblivion, which grant 5 Oblivion stacks each, to reach the Emptiness.
Tank
- Swap after every Burning Claws; never take a second stack. Use defensives during the bleed to shrink the Blazing Blast that follows.
- In Stage Two, move away from the raid as the Void Claws debuff is about to expire. In Stage Three, keep Void Slash pointed only at yourself, then stand in Motes of Oblivion to wait out the debuff inside the Emptiness so its blast does not land on the raid.
Healer
- Expect Echoing Howl bursts each time a group clears its Howl, and pair cooldowns with the breath assignments.
- Scorching Detonation hits the whole raid each time a bomb expires, and a Void Bomb that goes off in the normal realm causes Void Surge raid damage. In Stage Two and Three, Destabilize adds stacking raid damage every time someone enters the Emptiness.
DPS
- Null Glimmer images can restore their health with Rescind, so focus them down fast and interrupt Blasting Scream. On Heroic and up, a Desolate Blossom strips Rescind from them.
- Astral Flare haste is worth collecting during forced trips into the Emptiness.
Difficulty notes
- Heroic adds Drifting Embers and Infinite Duress. The Duress target moves to the edge of the room; when it is dispelled, the target is knocked up and everyone near them is knocked away, which Stage Three uses to push the raid to safety after Cosmic Ascension.
- Mythic gives each player two applications of Oppressing Howl (a breath and a Disintegrate line each clear one), Dazzled lasts longer, and Oblivion lasts 20 minutes instead of 25 seconds, so stacks carry through the fight.
- Solo today: no cited source covers soloing this boss at current level. As the encounter is written, clear Oppressing Howl with a breath or a Disintegrate line before Glittering Surge, and when you are sent into the Emptiness Between Stars, reach the soak pools before the debuff ends; the ability text says anyone still lost there when it runs out dies.
Loot highlights
Items from this encounter's loot table in our journal data:
 Voice of the Silent Star: a cloak with Agility, Strength and Intellect, usable by any spec.
 Erethos, the Empty Promise and
 Fang of the Sundered Flame: an Intellect staff and an Agility one-hand dagger.
- Beacon to the Beyond: a Mastery trinket with an on-use damage effect.
 Highland Drake: Embodiment of the Hellforged: a drake customization, with a separate Mythic version.
 Sarkareth's Abyssal Embrace,
 Scalecommander's Ebon Schynbalds and
 Coattails of the Rightful Heir: a plate chest, mail legs and cloth legs.
Common mistakes
- Treating breath assignments loosely and leaving someone with Oppressing Howl at the second Glittering Surge.
- Pointing Mass Disintegrate through the raid.
- Leaving the Emptiness without enough Astral Flares, or too late to make the soak pools.
- Letting a Void Bomb detonate in the normal realm.
- Standing in the open instead of behind an Astral Formation when Scouring Eternity finishes.
Mechanics checked against: icy-veins.com, warcraft.wiki.gg. Ability names and spell IDs come from TheWoWDB's own client datamine.
Encounter reference data
Below: the Adventure Guide text, ability list and loot table from the current client datamine, kept as a reference for the guide above.
30-second TL;DR
Adventure Guide says
- Scalecommander Sarkareth begins the fight with Oppressing Howl and attempts to obliterate players with Glittering Surge.
- When weakened, he draws upon the power of the Void to enhance his draconic powers, using Abyssal Breath and Ebon Might to summon and strengthen images of himself.
- Stages named in the Adventure Guide: Stage One: The Legacy of the Dracthyr, Stage Two: A Touch of the Forbidden, Stage Three: The Seas of Infinity.
- Tanks: Blazing Blast inflicts damage to the raid based on the total Fire damage taken from Burning Claws over its duration.
- Healers and damage dealers: When Sarkareth uses Glittering Surge, it applies Dazzled to all players who still have Oppressing Howl.
Background
Adventure Guide says
As leader of the Sundered Flame, Scalecommander Sarkareth broke away from the rest of the dracthyr to forge a new future. He has since led his forces to Aberrus, intent on claiming the legacy he believes rightfully belongs to his kind and willing to do anything to obtain it.
The journal lists 2 other creatures in this encounter: Empty Recollection and Null Glimmer.
Overview
Adventure Guide says
Scalecommander Sarkareth begins the fight with Oppressing Howl and attempts to obliterate players with Glittering Surge. When weakened, he draws upon the power of the Void to enhance his draconic powers, using Abyssal Breath and Ebon Might to summon and strengthen images of himself. When severely wounded, Sarkareth destroys the room to fully draw in powers of the Void and convert his abilities to their most powerful forms.
Encounter phases
Adventure Guide says
- Stage One: The Legacy of the Dracthyr Scalecommander Sarkareth uses the full might of his dracthyr abilities to deter his foes.
- Stage Two: A Touch of the Forbidden Sarkareth draws in power from the Void to enhance his latent abilities.
- Stage Three: The Seas of Infinity Eschewing his draconic abilities, Sarkareth fully embraces the Void in a final bid for power.
Tank mechanics
Adventure Guide says
- Blazing Blast inflicts damage to the raid based on the total Fire damage taken from Burning Claws over its duration.
- When Sarkareth uses Glittering Surge, it applies Dazzled to all players who still have Oppressing Howl.
- Abyssal Breath creates temporal images of Sarkareth, which then gain power over time from Ebon Might.
- Scouring Eternity inflicts lethal damage to players not safely hidden behind an Astral Formation.
Healer mechanics
Adventure Guide says
- When Sarkareth uses Glittering Surge, it applies Dazzled to all players who still have Oppressing Howl.
- Void Bomb erupts for high raid damage unless detonated within the Emptiness Between Stars.
- Scouring Eternity inflicts lethal damage to players not safely hidden behind an Astral Formation.
DPS mechanics
Adventure Guide says
- When Sarkareth uses Glittering Surge, it applies Dazzled to all players who still have Oppressing Howl.
- Void Bomb erupts for high raid damage unless detonated within the Emptiness Between Stars.
- Abyssal Breath creates temporal images of Sarkareth, which then gain power over time from Ebon Might.
- Scouring Eternity inflicts lethal damage to players not safely hidden behind an Astral Formation.
Normal, Heroic, and Mythic
Adventure Guide says
Only sentences the Adventure Guide itself marks as a difficulty change. We do not invent extra Heroic or Mythic strategy.
- On Mythic difficulty, this grants 2 applications of Oppressing Howl.
Boss abilities
| Ability | Adventure Guide | Notes |
|---|---|---|
| Oblivion | ||
| Emptiness Between Stars | The target is stranded alone in the vast infinite of space, reducing damage done by 99%. After 20 sec, if the target has not recovered fragments of their mind, they are lost forever and perish. | |
| Dimensional Puncture | Players entering the Emptiness Between Stars pierce a hole through the reality of all universes for 3 min. Players entering this hole fall through the fabric of space and time. | |
| Destabilize | Whenever a player enters the Emptiness Between Stars, Sarkareth destabilizes reality and inflicts Physical damage to all players every 1 sec, reducing their movement speed by 5% for 5 sec. This effect stacks. | |
| Astral Flare | While stranded within the Emptiness Between Stars, players can absorb Astral Flares to gain 5% increased Haste and 10% increased movement speed for 23 sec. This effect stacks. | |
| Oppressing Howl | On Mythic difficulty, this grants 2 applications of Oppressing Howl. Searing Breath and Mass Disintegrate can each remove one application. | |
| Echoing Howl | When Oppressing Howl is removed from a player, echoing darkness erupts forth and inflicts Shadow damage to all players. | |
| Glittering Surge | Sarkareth releases pure magic, inflicting Arcane damage to all players every 1 sec for 8 sec. If Glittering Surge strikes a player with Oppressing Howl, it removes that effect and applies Dazzled. | |
| Dazzled | The player's senses are dazzled, stunning them and inflicting Arcane damage every 1 sec for 20 sec. | |
| Scorching Bomb | Sarkareth places several Scorching Bombs on nearby players. After 12 sec, the bombs explode with a Scorching Detonation. | |
| Scorching Detonation | A fiery blast consumes the bomb, inflicting Fire damage to all players instantly with an additional Fire damage every 1 sec for 5 sec. | |
| Burning Ground | When a Scorching Bomb erupts, it creates a patch of Burning Ground. This ground inflicts Fire damage every 1 sec to players. | |
| Dimensional Puncture | An exploding bomb pierces a hole through the reality of all universes for 3 min. Players entering this hole fall through the fabric of space and time. | |
| Mass Disintegrate | Sarkareth forms a shimmering image that marks players. After 6 sec, energy erupts from the image in a line towards its targets inflicting Arcane damage. If Mass Disintegrate strikes a target with Oppressing Howl, it removes that effect and applies Disintegrated. | |
| Disintegrated | The target's mind and body are heavily fractured, reducing movement speed by 25% and inflicting Arcane damage every 5 sec. | |
| Searing Breath | If Searing Breath strikes a target with Oppressing Howl, it removes that effect and applies Seared. | |
| Seared | Searing wounds burn the player, inflicting Fire damage every 1 sec. | |
| Drifting Embers | Motes of flame fall from above, inflicting Fire damage and knocking back players within 4.5 yards of the impact. | |
| Burning Claws | This effect stacks. Upon expiration, releases a Blazing Blast. | |
| Blazing Blast | The player erupts with a burning nova, inflicting 15% of the total Fire damage taken from Burning Claws to all players as Fire damage. | |
| Void Bomb | Sarkareth places Void Bombs on nearby players. After 20 sec, the bombs explode with a Void Surge. | |
 Void Surge | The bomb erupts with void energy, inflicting Shadow damage to all players every 1 sec for 4 sec. | |
 Void Fracture | A player stepping into the Void Bomb causes the void energy to dissipate into the player. Upon removal, the void energy erupts with a Void Surge unless that player is within the Emptiness Between Stars. | |
| Abyssal Breath | Sarkareth takes in a deep breath and flies to a location, inflicting Shadow damage in a line and knocking players away. | |
 Desolate Blossom | ||
 Infinite Duress | Sarkareth causes the infinite emptiness of space to weigh heavy on the target's mind, inflicting Shadow damage every 3 sec for 30 sec. Upon removal, this triggers Dread. | |
 Dread | An eruption of dread inflicts Shadow damage to all players and knocks them away. | |
| Ebon Might | Upon casting any spell, Sarkareth empowers his allies with the might of the Black dragons. This effect increases their damage done and movement speed by 20%. | |
 Void Claws | This effect stacks. Upon expiration, releases a Void Blast. | |
 Void Blast | The player erupts with a void nova, inflicting 25% of the total Shadow damage taken from Void Claws to players within 20 yards as Shadow damage. | |
 Cosmic Ascension | ||
| Astral Formation | Sarkareth pulls several asteroids out of space to crash into the ground. These formations inflict Shadow damage to nearby players every 2 sec. | |
| Void Might | After ascending to the stars, Sarkareth empowers himself with Cosmic energy, increasing his damage done by 10%. This effect stacks. | |
 Hurtling Barrage | Sarkareth tears open portals to infinity, conjuring void images of himself that rush out in a line through a player. These images inflict Shadow damage to targets struck. | |
| Scouring Eternity | Sarkareth causes a massive supernova to grow and erupt, inflicting Shadow damage and knocking back all players not behind an Astral Formation. | |
| Astral Eruption | Cosmic energy destabilizes Astral Formations, causing them to explode and inflict Shadow damage to players within 200 yards and knock back players within 10 yards. | |
 Embrace of Nothingness | Sarkareth focuses the crushing weight of space upon a player. After 8 sec, a black hole is formed inflicting Shadow damage, split evenly among players struck. | |
 Motes of Oblivion | ||
| Void Slash | This effect stacks. Upon expiration, releases a Void Blast. | |
| Void Blast | A void nova erupts from the target, inflicting 25% of the total Shadow damage taken from Void Slash to all players as Shadow damage. |
3D Model
First-party render from the game files. Model © Blizzard Entertainment.
Loot
Every name is a TheWoWDB item page. Hover the row for the first-party tooltip.
 Cracked Titan Gem
 Awakened TempostoneBeacon to the Beyond
 Bonds of Desperate AscensionCoattails of the Rightful Heir
 Crechebound Soldier's BootsErethos, the Empty PromiseFang of the Sundered FlameHighland Drake: Embodiment of the HellforgedHighland Drake: Embodiment of the Hellforged
 Oathbreaker's Obsessive Gauntlets
 Oblivion's Immortal CoilSarkareth's Abyssal EmbraceScalecommander's Ebon SchynbaldsVoice of the Silent Star
 Void-Touched Curio
16 drops · item level 1 to 480 · 10 slots (Back, Chest, Feet, Hands, Legs, One-Hand +4 more) · all Bind on Pickup
Mounts, toys, achievements, transmog
Only rows the journal loot table or an achievement title can prove for this encounter.
Achievements
Aberrus, the Shadowed Crucible · Heroic: Aberrus, the Shadowed Crucible · Mythic: Aberrus, the Shadowed Crucible · Mythic: Assault of the Zaqali · Mythic: Echo of Neltharion · Mythic: Kazzara, the Hellforged · Mythic: Magmorax · Mythic: Rashok, the Elder · Mythic: Scalecommander Sarkareth · Mythic: The Amalgamation Chamber · Mythic: The Forgotten Experiments · Mythic: The Vigilant Steward, Zskarn
Entrance and location
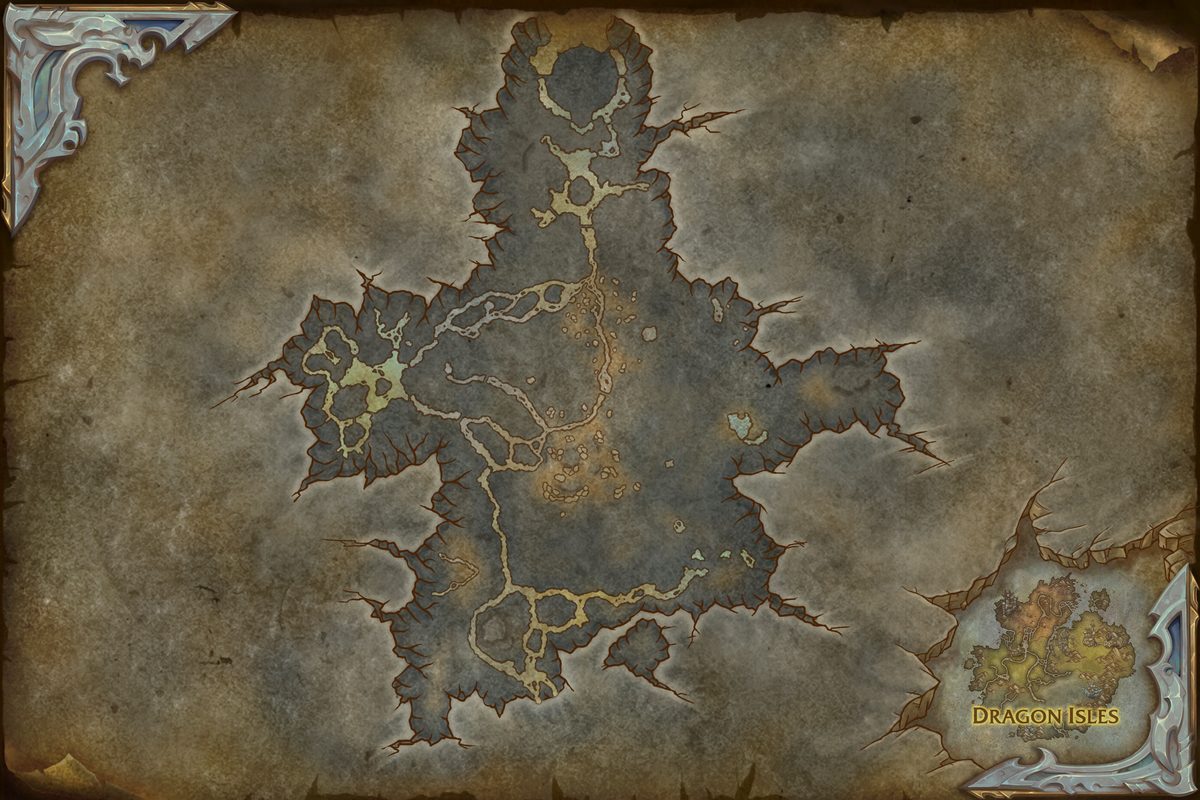 Aberrus, the Shadowed Crucible entrance
The game data places the raid entrance for Aberrus, the Shadowed Crucible in Zaralek Cavern at map coordinates 48.5, 10.0. The Aberrus, the Shadowed Crucible database page carries the raw journal and the full loot grid.
Related bosses
Questions
What does the Adventure Guide say about Scalecommander Sarkareth?
Scalecommander Sarkareth begins the fight with Oppressing Howl and attempts to obliterate players with Glittering Surge.
How many abilities does Scalecommander Sarkareth have?
The current datamine lists 40 named abilities on the Scalecommander Sarkareth encounter.
What does Scalecommander Sarkareth drop?
The Adventure Guide lists 16 drops. Each name links to its TheWoWDB item page. The full table also lives on the Aberrus, the Shadowed Crucible database page.
Does Scalecommander Sarkareth change on Heroic or Mythic?
Yes. The Adventure Guide adds difficulty sentences on the abilities that change; those sentences are collected in the difficulty section. We do not invent additional Heroic or Mythic strategy.
Where does this guide's text come from?
Quoted Adventure Guide sections come from TheWoWDB's retail datamine (client build 12.1.5.70448, ingested 2026-10-16). Player strategy such as positioning, assignments, and cooldown timings is omitted unless that sentence is already in the journal.
Source and build
This page quotes the Adventure Guide. It does not add player strategy such as positioning, assignments, stack or spread calls, or cooldown timings unless that sentence is already in the journal. Quoted sections come from TheWoWDB Adventure Guide datamine (client build 12.1.5.70448, ingested 2026-10-16). Ability names link to first-party spell pages. When a newer retail build is ingested, this page updates with it.
Related
Background
Art © Blizzard Entertainment. Fan reference, not affiliated.