 TheWoWDB
Boss
Siamat
Siamat - Lost City of the Tol'vir
Found In
Adventure Guide Entry
The in-game Adventure Guide text for the Siamat encounter in Lost City of the Tol'vir.
Purging the Neferset tol'vir's curse of flesh left the fearsome elemental Siamat severely drained. It was during this moment of vulnerability that the tol'vir struck and magically imprisoned Siamat at the center of their ancient sand-swept city.
Encounter Facts
In the game's encounter order for Lost City of the Tol'vir, Siamat comes 4th of 4, after Lockmaw.
Instance Entrance: Uldum
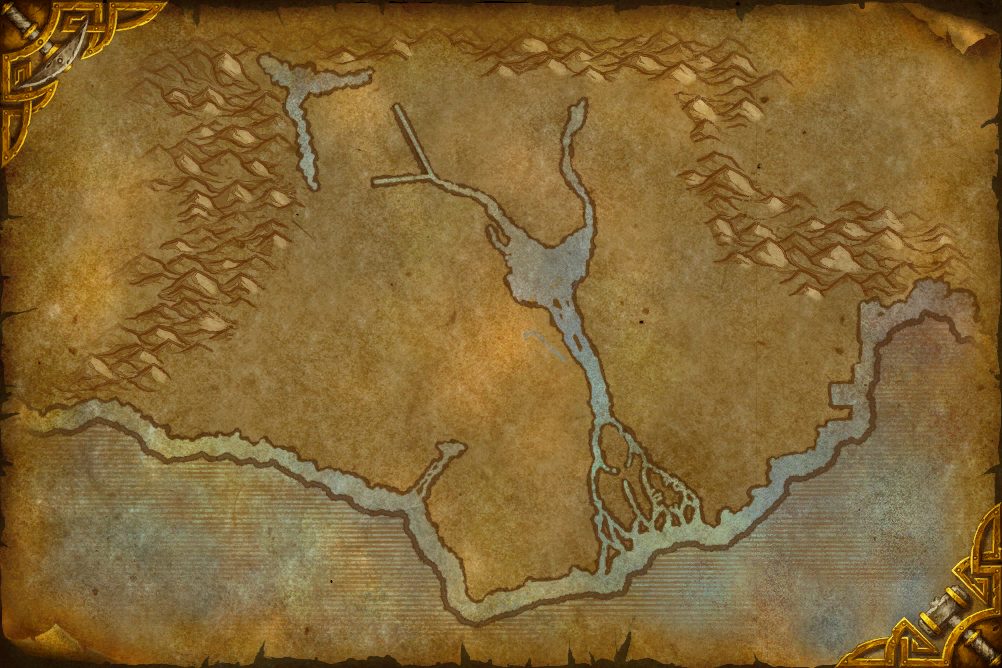 Lost City of the Tol'vir entrance
The Lost City of the Tol'vir entrance is in Uldum, at 60.6, 64.4 on the Uldum map.
Abilities & Strategy
What the in-game dungeon journal describes for this encounter. Every ability links to its spell page.
Abilities & Strategy
Stage One: Winds of the South, Rise!
Siamat begins the encounter flying above his platform, nigh invulnerable to any damage taken.
Storm Bolt
Siamat throws a charged missile at a random enemy player, inflicting Nature damage.
Cloud Burst
Servant of Siamat
Siamat summons three of these large air elementals during Stage 1. A single Servant enters the fight every 45 seconds, or immediately after the previous Servant dies. After all three Servants die, Siamat enters Stage Two.
Lightning Nova
Thunder Crash
The Servant of Siamat builds up a massive charge of electricity then unleashes the energy at his current target inflicting Nature damage.
Lightning Charge
Minion of Siamat
Siamat summons these air elementals to join the fight approximately every 30 seconds in both Stages.
Chain Lightning
The Minion of Siamat strikes a random player with a lightning bolt that then arcs up to 10 yards to four additional players. The bolt inflicts Nature damage to the first target, then 70% less each time the bolt arcs to a new target.
Tempest Storm
Depletion
Stage Two: Cower Before the Storm!
After the players kill three Servants of Siamat, Stage two begins with Siamat landing on the platform and becoming vulnerable to damage.
Wailing Winds
Players are also violently knocked around the platform during the spell.
Storm Bolt
In stage two, the Storm Bolt inflicts Nature damage.
Gathered Storms
Siamat absorbs a Tempest Storm formed by a Minion of Siamat. In Heroic Difficulty Siamat blasts all players instead of two.
Ability Spells
Every ability the Adventure Guide lists for Siamat, with its spell's school, cast time and duration and the description the game gives it.

 Cloud Burst
Nature · Instant
 Lightning Nova
Nature · Instant
Thunder Crash
Nature · 3 sec cast
The unit releases a mighty burst of charged electrical energy, dealing Nature damage to an enemy target.
Lightning Charge
Nature · 2 sec cast
 Chain Lightning
Nature · 1.5 sec cast
Strikes an enemy with a lightning bolt that arcs to another nearby enemy. The spell affects up to 5 targets, inflicting greater Nature damage to each successive target.
 Tempest Storm
Nature · Instant


3D Model
First-party render from the game files. Model © Blizzard Entertainment.
Drops
Loot the dungeon journal lists for this encounter in Lost City of the Tol'vir.


What is shown is the loot the game's own dungeon journal lists for this encounter.
What Each Drop Is
The Siamat encounter lists 19 items in the dungeon journal, item level 37. Equip slots covered: Feet, Waist, Back, One-Hand, Legs, Shoulder, Finger, Trinket and Shield. Every piece binds when picked up, so none of it reaches the Auction House.
- Crafty's Gaiters Feet (Leather), item level 37, requires level 32. Bind on Pickup. Stats: Agility or Intellect, Stamina, Mastery and Haste. A vendor pays 43g 10s for it.
- Crafty's Gaiters Feet (Leather), item level 37, requires level 32. Bind on Pickup. Stats: Agility or Intellect, Stamina, Mastery and Haste. A vendor pays 10g 7s for it.
- Evelyn's Belt Waist (Cloth), item level 37, requires level 32. Bind on Pickup. Stats: Intellect, Stamina, Versatility and Haste. A vendor pays 30g 60s for it.
- Geordan's Cloak Back (Cloth), item level 37, requires level 32. Bind on Pickup. Stats: Strength, Stamina, Critical Strike and Haste. A vendor pays 43g 42s for it.
- Geordan's Cloak Back (Cloth), item level 37, requires level 32. Bind on Pickup. Stats: Agility or Strength or Intellect, Stamina, Critical Strike and Haste. A vendor pays 10g 14s for it.
- Hammer of Sparks One-Hand (One-Handed Mace), item level 37, requires level 32. Bind on Pickup. Stats: Agility, Stamina, Haste and Critical Strike. A vendor pays 82g 57s for it.
- Hammer of Sparks One-Hand (One-Handed Mace), item level 37, requires level 32. Bind on Pickup. Stats: Agility, Stamina, Haste and Critical Strike. A vendor pays 19g 29s for it.
- Leggings of the Path Legs (Leather), item level 37, requires level 32. Bind on Pickup. Stats: Agility or Intellect, Stamina, Versatility and Mastery. A vendor pays 60g 43s for it.
- Mantle of Master Cho Shoulder (Cloth), item level 37, requires level 32. Bind on Pickup. Stats: Intellect, Stamina, Critical Strike and Haste. A vendor pays 43g 75s for it.
- Mantle of Master Cho Shoulder (Cloth), item level 37, requires level 32. Bind on Pickup. Stats: Intellect, Stamina, Critical Strike and Haste. A vendor pays 10g 22s for it.
- Ring of Three Lights Finger, item level 37, requires level 32. Bind on Pickup. Stats: Strength, Stamina, Parry and Mastery. A vendor pays 36g 60s for it.
- Ring of Three Lights Finger, item level 37, requires level 32. Bind on Pickup. Stats: Agility or Strength, Stamina, Versatility and Mastery. A vendor pays 5g 34s for it.
- Sceptre of Swirling Winds One-Hand (One-Handed Mace), item level 37, requires level 32. Bind on Pickup. Stats: Intellect, Stamina, Haste and Critical Strike. A vendor pays 75g 68s for it.
- Sceptre of Swirling Winds One-Hand (One-Handed Mace), item level 37, requires level 32. Bind on Pickup. Stats: Intellect, Stamina, Haste and Critical Strike. A vendor pays 82g 21s for it.
- Sorrowsong Trinket, item level 37, requires level 32. Bind on Pickup. Stats: Mastery. A vendor pays 4s 27c for it. Equip: Crescendo of Suffering.
- Sorrowsong Trinket, item level 37, requires level 32. Bind on Pickup. Stats: Mastery. A vendor pays 8g 5s for it. Equip: Crescendo of Suffering.
- Tia's Grace Trinket, item level 37, requires level 32. Bind on Pickup. Stats: Mastery. A vendor pays 3g 13s for it. Equip: Grace.
- Tia's Grace Trinket, item level 37, requires level 32. Bind on Pickup. Stats: Mastery. A vendor pays 8g 5s for it. Equip: Grace.
- Zora's Ward Shield, item level 37, requires level 32. Bind on Pickup. Stats: Strength, Stamina, Haste, Mastery and Intellect. A vendor pays 55g 45s for it.
Read from the current game build's item data. Listed prices come from our latest US Auction House scan; a drop that binds when picked up never has one.