 TheWoWDB
Raid - Mists of Pandaria
Siege of Orgrimmar
15 encounters and 1065 drops. Every drop links to its item page; tradeable drops carry a live Auction House price.
The tensions stoked by Garrosh Hellscream's arrogance have reached a boiling point with the destruction unleashed upon the Vale of Eternal Blossoms. Leaders of the Alliance and Horde lay siege to Hellscream's capital in order to topple the ruthless Warchief once and for all!
Quick Facts
| Type | Raid |
|---|---|
| Expansion | Mists of Pandaria |
| Encounters | 15 |
| Drops | 1065 |
| Item level | 1 to 42 |
| Tradeable drops | 0 |
| Difficulties | Looking For Raid, 10 Player, 25 Player, 10 Player (Heroic), 25 Player (Heroic) |
Difficulties and Lockouts
Siege of Orgrimmar has 6 difficulties in the game data: 10 Player, 10 Player (Heroic), 25 Player and 25 Player (Heroic) save you to a weekly lockout; Looking For Raid and Flexible can be run again at any time.
| Difficulty | Players | Lockout |
|---|---|---|
| 10 Player | 10 | Weekly |
| 10 Player (Heroic) | 10 | Weekly |
| 25 Player | 25 | Weekly |
| 25 Player (Heroic) | 25 | Weekly |
| Looking For Raid | 25 | None |
| Flexible | 25 | None |
Raid Finder splits Siege of Orgrimmar into 4 wings:
- Vale of Eternal Sorrows
- Gates of Retribution
- The Underhold
- Downfall
3D Model
First-party render from the game files. Model © Blizzard Entertainment.
Instance Map
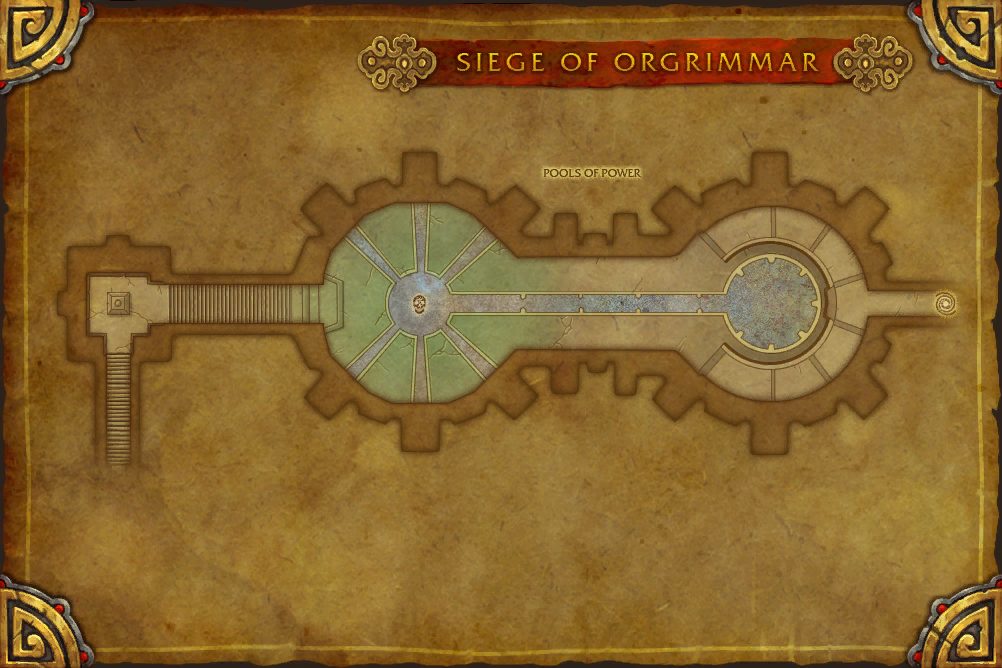
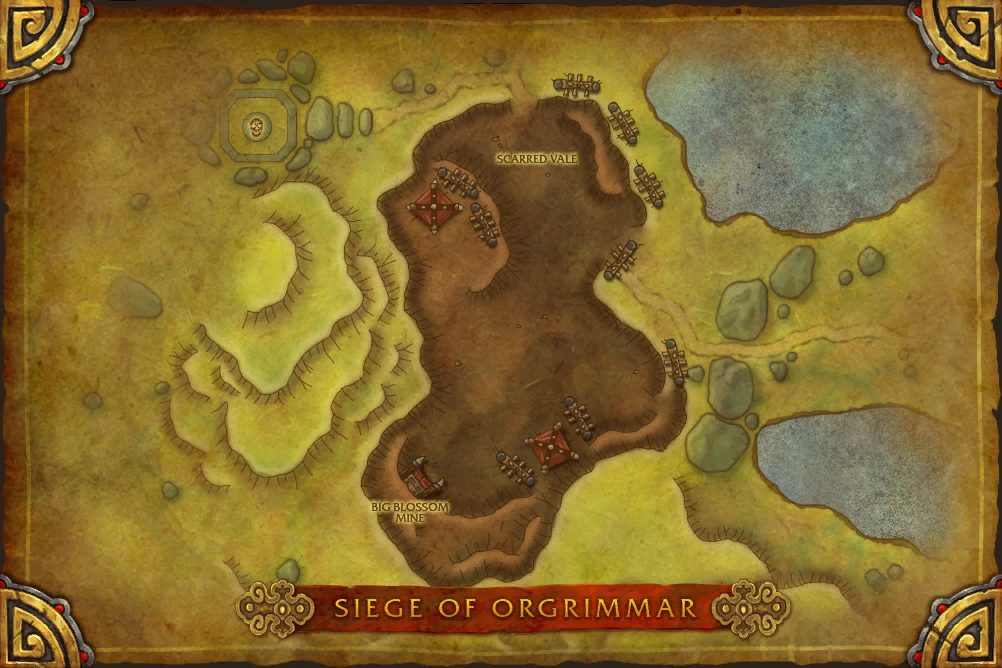
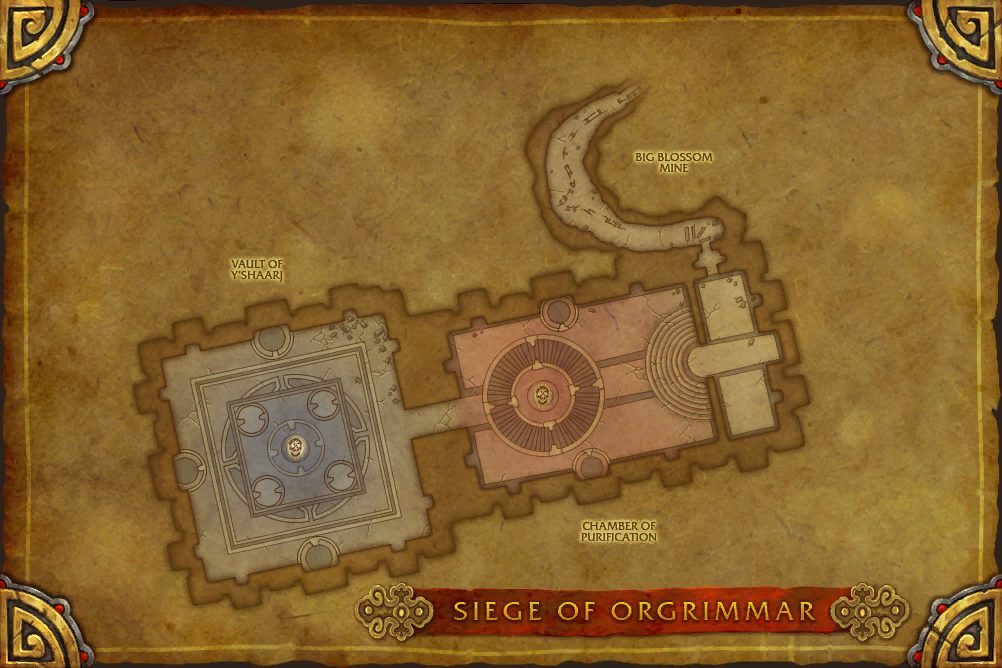
The Adventure Guide places 14 bosses of Siege of Orgrimmar on 11 maps. Numbers follow the encounter order; each links to that fight below.
Siege of Orgrimmar
 1Immerseus
- 1 Immerseus 41.8, 45.6
Siege of Orgrimmar
 2The Fallen Protectors
- 2 The Fallen Protectors 25.8, 18.8
Siege of Orgrimmar
 3Norushen4Sha of Pride
- 3 Norushen 54.3, 59.2
- 4 Sha of Pride 29.4, 66.9
Siege of Orgrimmar
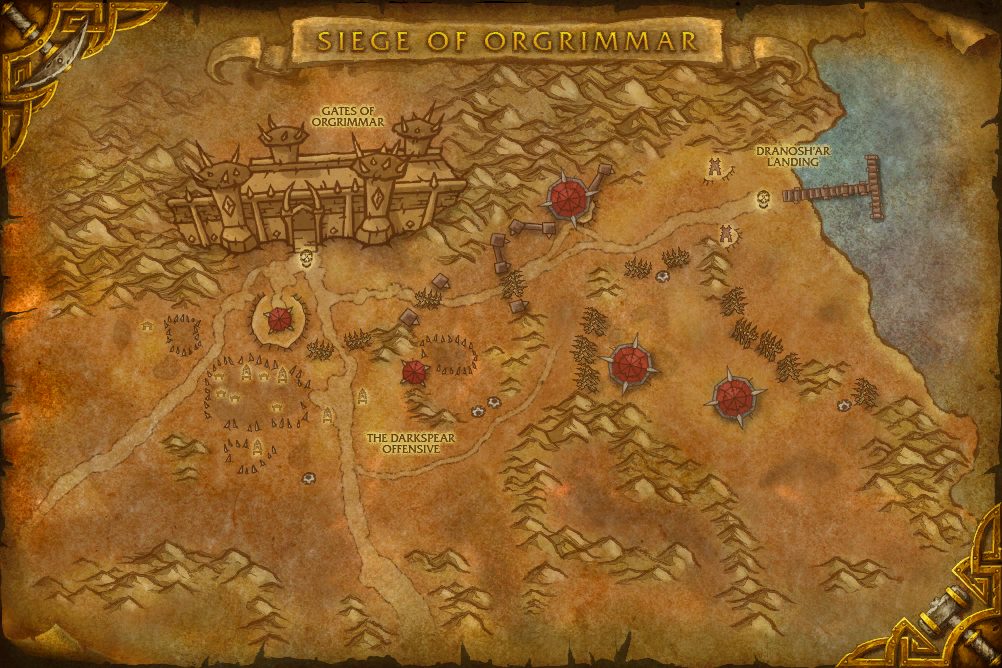 5Galakras6Iron Juggernaut
- 5 Galakras 77.2, 29.7
- 6 Iron Juggernaut 30.6, 38.5
Siege of Orgrimmar
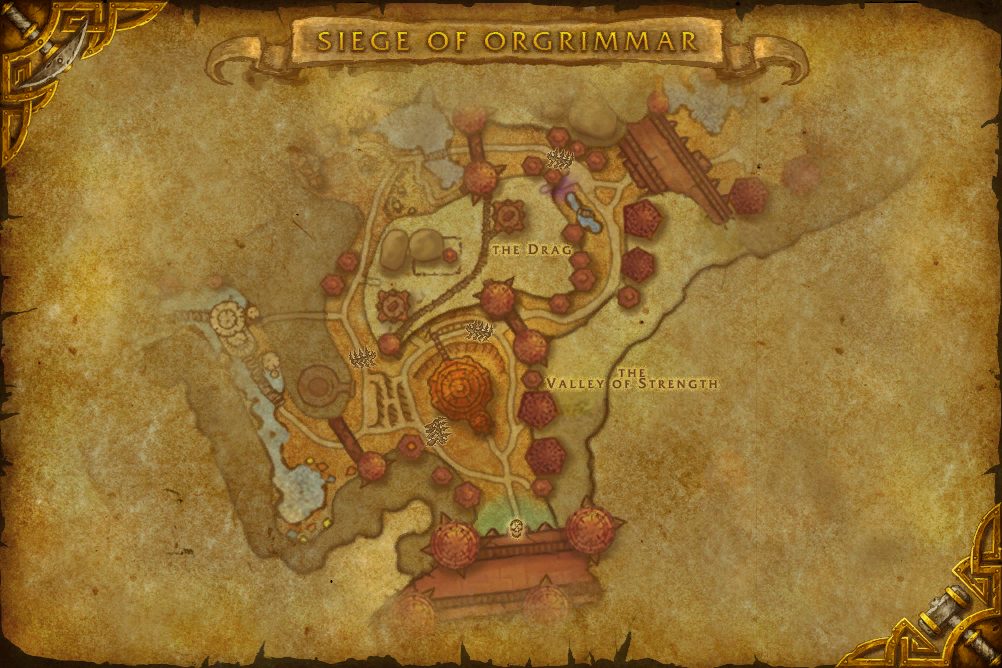 7Kor'kron Dark Shaman
- 7 Kor'kron Dark Shaman 47.5, 61.0
Siege of Orgrimmar
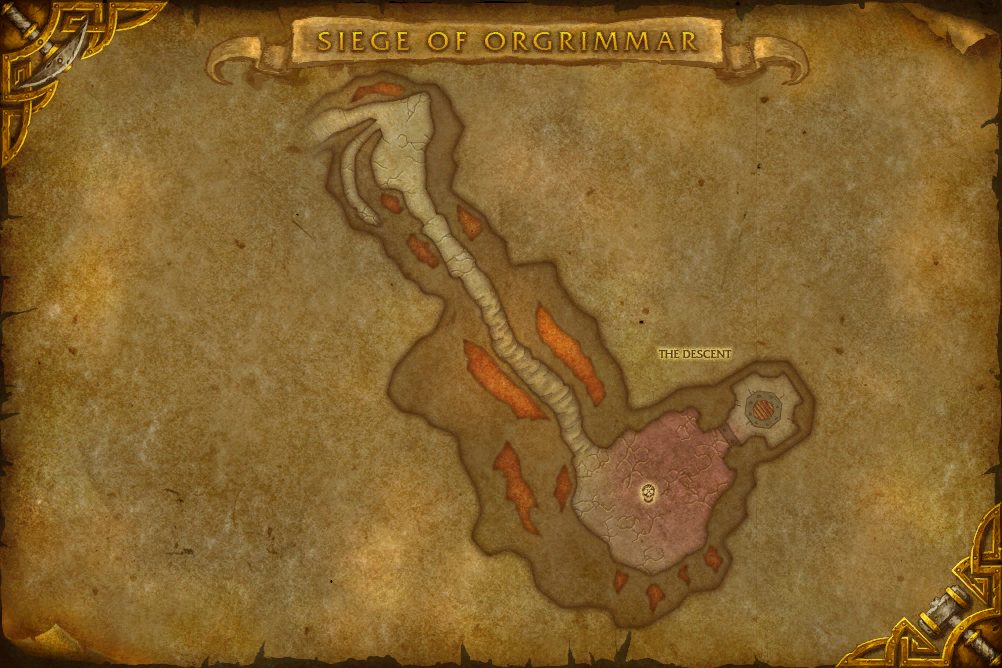 8General Nazgrim
- 8 General Nazgrim 65.3, 73.5
Siege of Orgrimmar
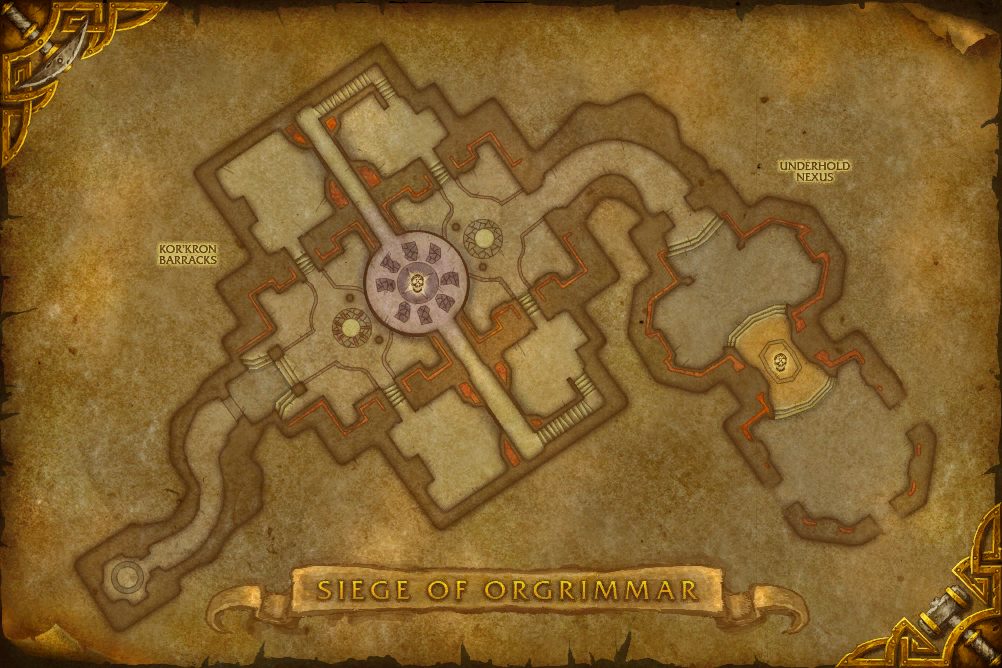 9Malkorok
- 9 Malkorok 41.6, 42.4
Siege of Orgrimmar
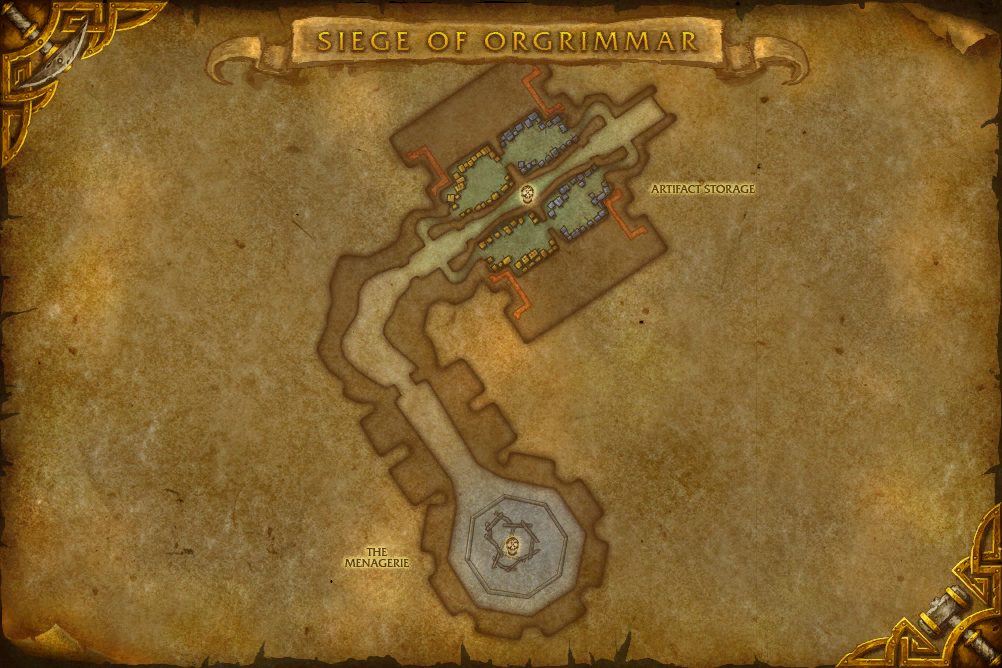 10Spoils of Pandaria11Thok the Bloodthirsty
- 10 Spoils of Pandaria 52.8, 29.2
- 11 Thok the Bloodthirsty 51.3, 82.1
Siege of Orgrimmar
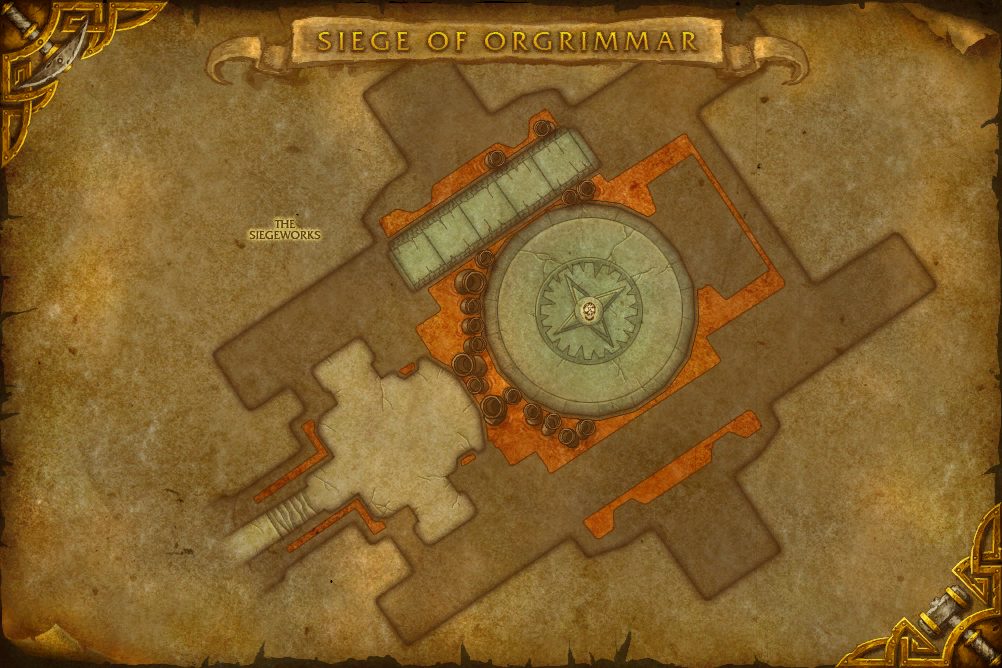 12Siegecrafter Blackfuse
- 12 Siegecrafter Blackfuse 58.8, 46.5
Siege of Orgrimmar
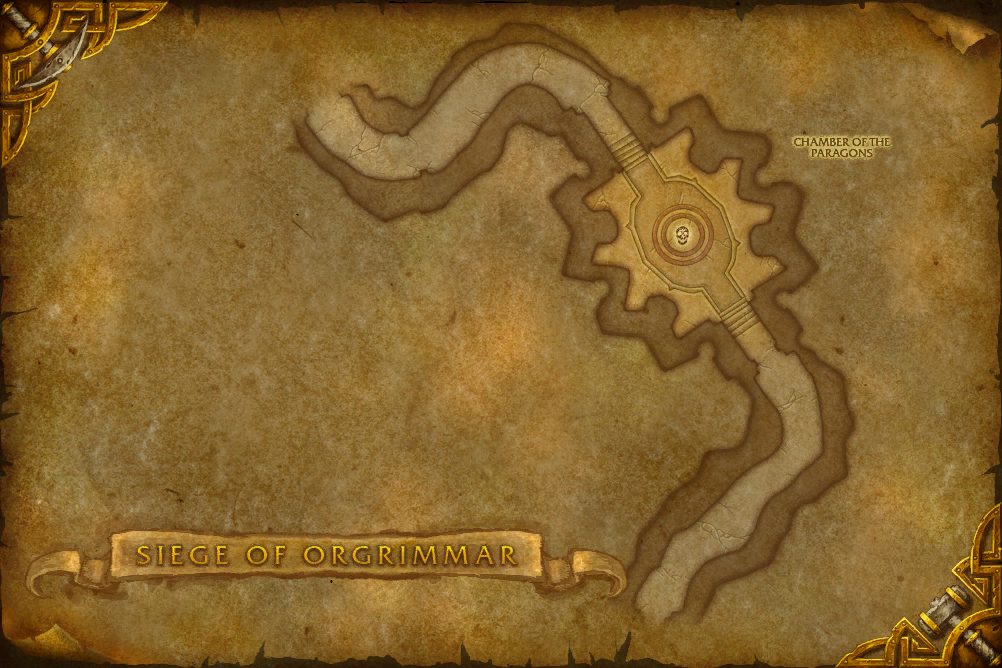 13Paragons of the Klaxxi
- 13 Paragons of the Klaxxi 68.3, 35.3
Siege of Orgrimmar
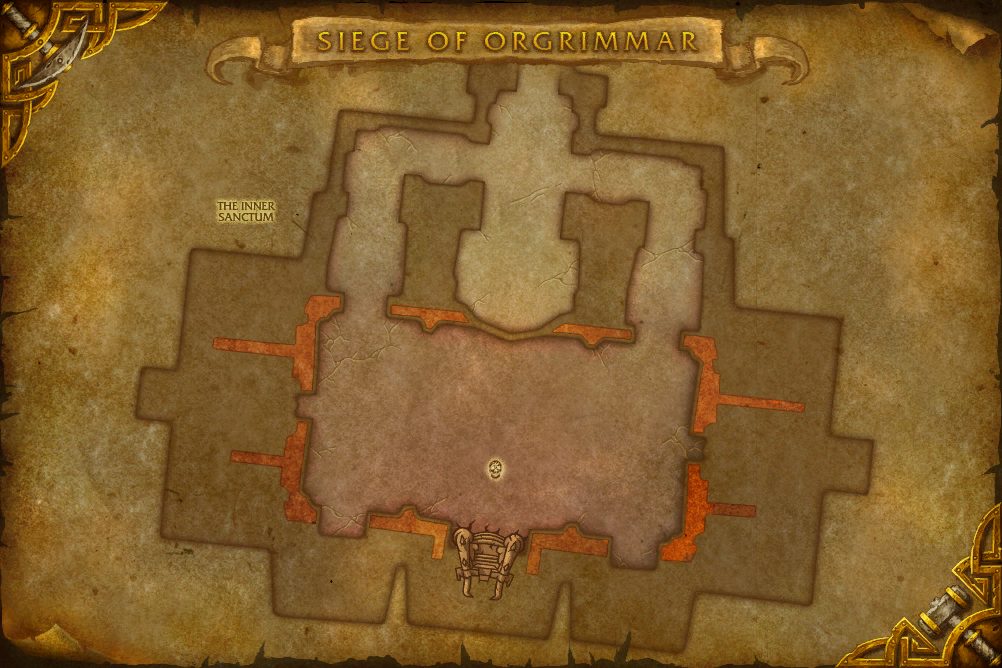 14Garrosh Hellscream
- 14 Garrosh Hellscream 49.4, 71.3
Encounters
LFRLooking For Raid10P10 Player25P25 Player10P H10 Player (Heroic)25P H25 Player (Heroic)
Malkorok
Malkorok has been Garrosh's most loyal and trusted lieutenant throughout the Pandaria campaign. When the Warchief needed a volunteer to infuse with the power of Y'Shaarj, it was only natural that Malkorok would offer without hesitation.
Abilities & Strategy
Ancient Miasma
An Ancient Miasma fills the room, absorbing all healing received but creating an Ancient Barrier that absorbs damage equal to the amount of healing absorbed, up to a cap of 100% of maximum health. In addition, the Miasma inflicts Shadow damage every 2 sec.
Ancient Barrier
Whenever Ancient Miasma absorbs healing it creates an Ancient Barrier on the player, absorbing damage equal to the amount of healing absorbed. The damage absorbed from Ancient Barrier cannot be greater than 100% of the player's maximum health. This effect is able to absorb damage taken from falling.
Essence of Y'Shaarj
The Ancient Miasma forms 2 orbs of corruption every 3 seconds that persist for the remainder of the fight. If a player comes into contact with an orb, it is consumed, removing Ancient Barrier and inflicting Shadow damage to them. In 25-player mode, 5 orbs of corruption are created every 3 sec.
Endless Rage
Malkorok gains Rage over time whenever he is not in a Blood Rage. When Malkorok reaches 100 Rage, he absorbs the Ancient Miasma and enters a Blood Rage.
Blood Rage
When Malkorok reaches 100 Rage, he enters a Blood Rage, causing each melee attack to inflict Physical damage, split among all enemies hit. When Blood Rage expires, Malkorok expels the Ancient Miasma from his body.
Displaced Energy
While in a Blood Rage, energy arcs off of Malkorok's body, afflicting players with Displaced Energy. This effect inflicts Shadow damage every 3 sec for 9 sec. In Heroic Difficulty, Displaced Energy roots the target in place.
Relentless Assault
When Blood Rage expires, Malkorok gains Relentless Assault, increasing all damage done by 0%. This effect stacks.
Might of the Kor'kron
Arcing Smash
Malkorok faces a random player and unleashes a devastating overhead attack, inflicting Physical damage to all players within a 40 yard cone in front of him.
Seismic Slam
Malkorok slams the ground, inflicting Physical damage in a -yard radius around a random player, knocking all injured targets into the air.
Living Corruption
Seismic Slam causes Living Corruption to ooze out of the ground and attack players.
Breath of Y'Shaarj
Malkorok channels the power of Y'Shaarj, causing the areas recently hit by Arcing Smash to explode, inflicting Shadow damage.
Imploding Energy
If the implosion of energy does not hit a player, it instead inflicts Shadow damage to all players. In 25-player mode, Malkorok opens 7 tears with each cast.
Fatal Strike
Malkorok's melee attacks fatally wound his target, increasing their damage taken by% for 30 sec.
Eradicate
Loot
88 drops · item level 40 to 42 · 14 slots (Back, Chest, Feet, Finger, Head, Legs +8 more) · all Bind on Pickup
 Black-Blooded DrapeBlack-Blooded DrapeBlack-Blooded DrapeBlack-Blooded Drape
 Blood Rage BracersBlood Rage BracersBlood Rage BracersBlood Rage Bracers
 Boots of Perilous InfusionBoots of Perilous InfusionBoots of Perilous InfusionBoots of Perilous Infusion
 Bracers of Averted FatalityBracers of Averted FatalityBracers of Averted FatalityBracers of Averted Fatality
 Ebon Blood ChestguardEbon Blood ChestguardEbon Blood ChestguardEbon Blood Chestguard
 Frenzied Crystal of RageFrenzied Crystal of RageFrenzied Crystal of Rage
 Halberd of Inner ShadowsHalberd of Inner ShadowsHalberd of Inner ShadowsHalberd of Inner Shadows
 Hood of Perpetual ImplosionHood of Perpetual ImplosionHood of Perpetual ImplosionHood of Perpetual Implosion
 Kor'kron Hand CannonKor'kron Hand CannonKor'kron Hand CannonKor'kron Hand Cannon
 Lazahk's Lost ShadowrapLazahk's Lost ShadowrapLazahk's Lost ShadowrapLazahk's Lost Shadowrap
 Legplates of Willful DoomLegplates of Willful DoomLegplates of Willful DoomLegplates of Willful Doom
 Malkorok's Giant StompersMalkorok's Giant StompersMalkorok's Giant StompersMalkorok's Giant Stompers
 Malkorok's SkullcleaverMalkorok's SkullcleaverMalkorok's SkullcleaverMalkorok's Skullcleaver
 Malkorok's Tainted Dog TagsMalkorok's Tainted Dog TagsMalkorok's Tainted Dog Tags
 Miasmic SkullbeltMiasmic SkullbeltMiasmic SkullbeltMiasmic Skullbelt
 Ring of Restless EnergyRing of Restless EnergyRing of Restless Energy
 Robes of Riven DreamsRobes of Riven DreamsRobes of Riven DreamsRobes of Riven Dreams
 Seal of Sullen FurySeal of Sullen FurySeal of Sullen Fury
 Terrorguard ChestplateTerrorguard ChestplateTerrorguard ChestplateTerrorguard Chestplate
 Vial of Living CorruptionVial of Living CorruptionVial of Living Corruption
 Visage of the MonstrousVisage of the MonstrousVisage of the MonstrousVisage of the Monstrous
 Wristguards of Ruination
The Fallen Protectors
The Golden Lotus and Shado-Pan guardians of the Vale of Eternal Blossoms were caught in the epicenter of the devastating blast that scarred the Vale, and torn apart by the dark energies. Their spirits linger in the place they once protected, confused and tormented by their failure.
Abilities & Strategy
Overview
Players must do battle with the brewmaster Rook Stonetoe, the rogue He Softfoot, and the priest Sun Tenderheart, as the three fallen protectors assault the raid simultaneously. At 66% and 33% health remaining, each protector will perform Desperate Measures, manifesting spirits of fallen allies to bring new and powerful attacks to bear against the raid until those spirits are defeated. Triggering Desperate Measures on multiple protectors at the same time is inadvisable.
Bond of the Golden Lotus
Rook Stonetoe, He Softfoot, and Sun Tenderheart share a spiritual bond, linking their fates to each other. Upon reaching 1 health, each of them will begin to cast Bond of the Golden Lotus if any of the other Protectors are still in combat, restoring 0% of maximum health upon completion. Bringing all three Protectors to 1 health simultaneously will restore clarity to their clouded minds.
Rook Stonetoe
Desperate Measures
Upon reaching 66% or 33% health remaining, Rook Stonetoe manifests evil forms of his closest friends, making Embodied Misery, Embodied Sorrow, and Embodied Gloom. Once all three spirits are defeated, Rook Stonetoe resumes fighting players.
Embodied Misery
Embodied Sorrow
Embodied Gloom
Shared Torment
Embodied Misery, Sorrow, and Gloom share health.
Vengeful Strikes
Rook Stonetoe enters an offensive stance, stunning his target and inflicting physical damage in a frontal cone twice per second.
Corrupted Brew
In Heroic difficulty, every two casts, Corrupted Brew's travel time is reduced by half a second. This effect resets when Rook Stonetoe begins his Desperate Measures.
Clash
Rook Stonetoe clashes against an enemy, charging each other and meeting halfway. Rook Stonetoe then immediately begins to perform Corruption Kick. In Non-Heroic Difficulty, Rook Stonetoe's Clash will not be cast during any Desperate Measures phase.
Corruption Kick
Additionally torments targets struck, inflicting Shadow damage every two seconds for 6 sec.
He Softfoot
Desperate Measures
Upon reaching 66% or 33% health remaining, He Softfoot manifests a twisted spirit of his brother, creating Embodied Anguish, which fixates upon the raid member who has the Mark of Anguish. Once this spirit is defeated, He Softfoot resumes fighting players.
Mark of Anguish
Mark of Anguish periodically inflicts Shadow damage every second and roots the target. Embodied Anguish's gaze moves to a random target upon killing his current target.
Shadow Weakness
When Embodied Anguish strikes targets, he applies Shadow Weakness, increasing damage taken by Mark of Anguish. Additionally, passing the Mark of Anguish applies one Shadow Weakness to all players. This effect stacks.
Debilitation
Possessing the Mark of Anguish debilitates targets, decreasing their armor by%.
Garrote
Traveling through the shadows, He Softfoot Garrotes targets, inflicting Physical damage every 2 sec. This effect is removed when He Softfoot begins his Desperate Measures.
Gouge
He Softfoot attempts to gouge the eyes of his target, incapacitating them for 6 sec and fixating on a random target until Taunted. If the target is facing away, Gouge will instead knock them away a short distance.
Master Poisoner
He Softfoot is a Master Poisoner and occasionally coats his weapons with various types of poisons. In Heroic Difficulty, Master Poisoner abilities also take effect when using Garrote or Fixate. In Non-Heroic Difficulty, He Softfoot's Master Poisoner abilities will not be cast during any Desperate Measures phase.
Noxious Poison
These pools may be jumped over. This effect is removed when He Softfoot begins his Desperate Measures.
Instant Poison
He Softfoot coats his weapon in an Instant Poison, causing successful melee attacks to inflict additional Nature damage.
Sun Tenderheart
Desperate Measures
Upon reaching 66% or 33% health remaining, Sun Tenderheart manifests an evil form of her protectors, making Embodied Despair and Embodied Desperation. Once both spirits are defeated, Sun Tenderheart resumes fighting players.
Dark Meditation
Sun Tenderheart enters a Dark Meditation, inflicting Shadow damage to all enemies every half second. Players take 0% less damage from Dark Meditation when inside her Meditative Field.
Manifest Emotions
Embodied Despair and Embodied Desperation focus their negative emotions, creating Sha manifestations which attack players. Any damage taken by these manifested emotions will also be suffered by the creature that spawned them.
Meditation Spike
Sha Sear
Shadow Word: Bane
Expels a word of misery upon multiple targets, inflicting Shadow damage every 3 sec for 18 sec. Each time this effect deals damage, it will jump to an additional target, up to a total of 0 times.
Calamity
Calls forth a great Calamity, striking all players for 0% of their maximum health as Shadow damage. This also removes Shadow Word: Bane from all targets. In Heroic difficulty, Calamity increases in magnitude by an additional 0% of maximum health each addtional time it is cast. This effect resets when Sun Tenderheart begins her Desperate Measures. In Non-Heroic Difficulty, Sun Tenderheart's Calamity will not be cast during any Desperate Measures phase.
Loot
84 drops · item level 40 to 42 · 13 slots (Back, Chest, Feet, Finger, Hands, Head +7 more) · all Bind on Pickup
 Darkfallen ShoulderplatesDarkfallen ShoulderplatesDarkfallen ShoulderplatesDarkfallen Shoulderplates
 Death Lotus CrossbowDeath Lotus CrossbowDeath Lotus CrossbowDeath Lotus Crossbow
 Gaze of Echoing DespairGaze of Echoing DespairGaze of Echoing DespairGaze of Echoing Despair
 Gloomwrap GreatcloakGloomwrap GreatcloakGloomwrap GreatcloakGloomwrap Greatcloak
 Grips of the Fallen CouncilGrips of the Fallen CouncilGrips of the Fallen CouncilGrips of the Fallen Council
 Grips of Unending AnguishGrips of Unending AnguishGrips of Unending AnguishGrips of Unending Anguish
 Lifebane BracersLifebane BracersLifebane BracersLifebane Bracers
 Petrified Pennyroyal RingPetrified Pennyroyal RingPetrified Pennyroyal Ring
 Poisonbinder GirthPoisonbinder GirthPoisonbinder GirthPoisonbinder Girth
 Purehearted Cricket CagePurehearted Cricket CagePurehearted Cricket CagePurehearted Cricket Cage
 Robes of the Tendered HeartRobes of the Tendered HeartRobes of the Tendered HeartRobes of the Tendered Heart
 Rook's Unlucky TalismanRook's Unlucky TalismanRook's Unlucky Talisman
 Sabatons of DefilementSabatons of DefilementSabatons of DefilementSabatons of Defilement
 Sha-Seared SandalsSha-Seared SandalsSha-Seared SandalsSha-Seared Sandals
 Shockstriker GauntletsShockstriker GauntletsShockstriker GauntletsShockstriker Gauntlets
 Shoulderguards of Dark MeditationsShoulderguards of Dark MeditationsShoulderguards of Dark MeditationsShoulderguards of Dark Meditations
 Shoulderpads of Dou Dou ChongShoulderpads of Dou Dou ChongShoulderpads of Dou Dou ChongShoulderpads of Dou Dou Chong
 Shoulders of the Roiling InfernoShoulders of the Roiling InfernoShoulders of the Roiling InfernoShoulders of the Roiling Inferno
 Softfoot's Last ResortSoftfoot's Last ResortSoftfoot's Last ResortSoftfoot's Last Resort
 Sorrowpath SignetSorrowpath SignetSorrowpath Signet
 Stonetoe's Tormented TreadsStonetoe's Tormented TreadsStonetoe's Tormented Treads
General Nazgrim
Once a grunt in service of the former warchief, Thrall, General Nazgrim rose quickly through the ranks after overwhelming victories in Grizzly Hills and the sunken city of Vashj'ir. Fiercely loyal to the Horde and bound by a rigorous code of honor and duty, Nazgrim will hold the line for his warchief until his dying breath.
Abilities & Strategy
Sundering Blow
A powerful strike inflicts Physical damage and sunders the target's armor, reducing armor by 0% for 30 sec. Generates Rage plus additional Rage per stack of Sundering Blow on the target.
Bonecracker
Fling a heavy mace at a player to crack their bones, reducing maximum health by 0% and causing the player to bleed for Physical damage every 1 sec for 30 sec.
Execute
Executes a player for Physical damage. This attack pierces immunities and cannot be dodged, blocked, or parried.
Stances
General Nazgrim will take on various stances during the battle.
Battle Stance
A balanced stance that generates Rage every 1 sec.
Berserker Stance
A wild stance that increases damage dealt by 0%, damage taken by 0%, and Rage generated by 0%.
Defensive Stance
A defensive stance that reduces damage taken by 0% and grants Rage when struck. Rage gain cannot occur more than once every one second. Attacks by players affected by Sundering Blow do not cause Nazgrim to generate Rage.
Rage
Several of General Nazgrim's abilities require Rage to use. General Nazgrim will gain Rage from various abilities used during the battle. General Nazgrim prefers to use the ability with the highest Rage cost.
Heroic Shockwave
Costs 30 Rage.
Aftershock
The ground cracks between General Nazgrim's impact location and the location a player target. After several seconds, the cracks will erupt, inflicting Fire damage to players within the Aftershock and granting General Nazgrim Rage for each player struck.
Kor'kron Banner
Places a banner that causes allies' attacks to generate Rage for General Nazgrim. Costs 50 Rage.
War Song
Unleash a hellish scream, inflicting 0% of maximum health as Physical damage to all players. Costs 70 Rage.
Ravager
Throw a whirling blade that will last for the duration of the battle. Costs 100 Rage.
Cooling Off
After using an ability that costs Rage, General Nazgrim must cool off for 15 sec. During this time, General Nazgrim cannot use abilities that cost Rage.
Kor'kron Forces
General Nazgrim will call for the aid of his forces during the battle. At 10% health, General Nazgrim will call in an additional wave of forces.
Orgrimmar Faithful
General Nazgrim begins the battle with a contingent of loyalist Orgrimmar grunts.
Kor'kron Ironblade
Kor'kron Ironblades wield a fierce two-handed blade.
Ironstorm
for 1 min.
Last Stand
Increases maximum health by 0%. Kor'kron Ironblades will use Last Stand when brought below 50% health.
Kor'kron Arcweaver
Kor'kron Arcweavers have mastered the arcane arts.
Arcane Shock
Shock a target, inflicting Arcane damage and increasing Arcane damage dealt by the caster by 0% for 10 sec.
Magistrike
Calls down a burst of Arcane energy, inflicting Arcane damage instantly and Arcane damage every 1 sec.
Unstable Blink
Teleport 1-2 times in a random direction.
Kor'kron Assassin
Kor'kron Assassins strike from the shadows at the enemy's weakest targets.
Stealth
Kor'kron Assassins begin the battle in stealth. Slows movement speed by 0%.
Backstab
Inflicts Physical damage to a player, but only if attacking from behind.
Assassin's Mark
Kor'kron Assassins will fixate on a non-tank target.
Kor'kron Warshaman
Kor'kron Warshaman specialize in aiding their allies.
Earth Shield
Protects the target with an earthen shield that heals the shielded target for 0% of maximum health when damage is taken.
Empowered Chain Heal
Heals an ally for% of their maximum health and jumps to a nearby ally, increasing healing by 50% per jump. Affects 5 total targets.
Healing Tide Totem
Kor'kron Sniper
Hunter's Mark
Kor'kron Snipers will fixate on a non-tank target.
Shoot
Shoots a player, inflicting 0% weapon damage.
Multi-Shot
Fire a volley of arrows, inflicting Physical damage to enemies within a -yard cone.
Loot
56 drops · item level 40 to 42 · 8 slots (Chest, Feet, Head, One-Hand, Shield, Shoulder +2 more) · all Bind on Pickup
 Arcweaver Spell SwordArcweaver Spell SwordArcweaver Spell SwordArcweaver Spell Sword
 Bulwark of the Fallen GeneralBulwark of the Fallen GeneralBulwark of the Fallen GeneralBulwark of the Fallen General
 Crown of Tragic TruthCrown of Tragic TruthCrown of Tragic TruthCrown of Tragic Truth
 Gar'tok, Strength of the FaithfulGar'tok, Strength of the FaithfulGar'tok, Strength of the FaithfulGar'tok, Strength of the Faithful
 Gauntlets of the Cursed ConquerorGauntlets of the Cursed ConquerorGauntlets of the Cursed ConquerorGauntlets of the Cursed ProtectorGauntlets of the Cursed ProtectorGauntlets of the Cursed ProtectorGauntlets of the Cursed VanquisherGauntlets of the Cursed VanquisherGauntlets of the Cursed Vanquisher
 Nazgrim's Burnished InsigniaNazgrim's Burnished InsigniaNazgrim's Burnished Insignia
 Nazgrim's GutripperNazgrim's GutripperNazgrim's GutripperNazgrim's Gutripper
 Ravager's PathwalkersRavager's PathwalkersRavager's PathwalkersRavager's Pathwalkers
 Robes of the Warrior's FallRobes of the Warrior's FallRobes of the Warrior's FallRobes of the Warrior's Fall
 Sandals of Two Little BeesSandals of Two Little BeesSandals of Two Little BeesSandals of Two Little Bees
 Shoulderguards of the Righteous StandShoulderguards of the Righteous StandShoulderguards of the Righteous StandShoulderguards of the Righteous Stand
 Spaulders of Kor'kron FealtySpaulders of Kor'kron FealtySpaulders of Kor'kron FealtySpaulders of Kor'kron Fealty
Thok the Bloodthirsty
When the Isle of Giants was discovered off the coast of Pandaria, teeming with primal devilsaurs, Garrosh sent men to capture some of the most fearsome specimens, hoping to subjugate them and use them as beasts of war. Countless orcish beastmasters have fallen to Thok's jaws as they struggle to tame him, yet the creature's thirst for blood remains unslaked.
Abilities & Strategy
Stage 1: A Cry in the Darkness
Fearsome Roar
Thok's bellowing roar inflicts Physical damage in a frontal cone. The roar incites terror in players' hearts, causing them to take 0% more damage per stack.
Deafening Screech
Upon reaching full energy, Thok lets loose a shrill cry, inflicting Physical damage to all enemies and interrupting spellcasts. Every time Thok Screeches, the rate of his energy regeneration is increased.
Tail Lash
Thok's mighty tail whips about, striking all enemies behind the caster, inflicting Physical damage and stunning them for 2 sec.
Shock Blast
Electricity arcs and snaps around Thok's shock collar, inflicting Nature damage to random enemies.
Bloodied
When players fall beneath 50% health, Thok the Bloodthirsty can smell their blood. If 5 or more players who are Bloodied are within 10 yards of one another, the scent of blood becomes overwhelming and Thok enters a frenzy for blood. If 15 or more players who are Bloodied are within 10 yards of one another, the scent of blood becomes overwhelming and Thok enters a frenzy for blood.
Stage 2: Frenzy for Blood!
The excessive scent of blood sends Thok into a frenzy for blood! In LFR difficulties, this occurs when Thok reaches 80%, 55%, and 30% health.
Blood Frenzy
Thok roars in hunger, knocking away front enemies and going into a frenzy for blood. Any enemies who are caught within reach of Thok's terrible maw are devoured instantly. Thok gradually gains speed during Blood Frenzy. He is also immune to taunt during Blood Frenzy.
Fixate
Thok becomes unable to be tanked, and will fixate on random distant players.
Kor'kron Jailer
Thok's mighty roar when he enters a Blood Frenzy attracts the attention of a nearby jailer. Upon defeating him, you may obtain a prison key that can unlock one of the nearby cells containing Garrosh's prisoners.
Breaking Loose!
Starved Yeti
Captive Cave Bat
Prisoners of War
Garrosh has taken prisoners during his Pandaria campaign, and they remain trapped in cages alongside the beasts, hoping for freedom.
Akolik
Akolik and a band of his Skumblade have been taken captive by Garrosh. Upon being freed, he will invoke the holy order of Kros to subdue a nearby dinosaur. It has... unpredictable results.
An Infusion of Acid
Once Akolik draws Thok's attention, the mighty dinosaur will devour him and absorb the acidic powers of the saurok. This will end Thok's Blood Frenzy.
Waterspeaker Gorai
Waterspeaker Gorai and some denizens of Inkgill Mere have been taken captive by Garrosh. When freed, Waterspeaker Gorai will command his units to aid you, and he will heal the wounds of random players.
An Infusion of Frost
Once Gorai draws Thok's attention, the mighty dinosaur will devour him and absorb the watery powers of the jinyu. This will end Thok's Blood Frenzy.
Warmaster Montak
Warmaster Montak and his firesworn have been taken captive by Garrosh. When freed, nearby units will have their weapons set ablaze, giving them a chance to cause additional Fire damage on successful attacks.
An Infusion of Flame
Once Montak draws Thok's attention, the mighty dinosaur will devour him and absorb the fiery powers of the yaungol. This will end Thok's Blood Frenzy.
Loot
56 drops · item level 40 to 42 · 8 slots (Chest, Finger, Hands, Held In Off-hand, Neck, One-Hand +2 more) · all Bind on Pickup
 Akolik's Acid-Soaked RobesAkolik's Acid-Soaked RobesAkolik's Acid-Soaked RobesAkolik's Acid-Soaked RobesBritomart's Jagged PikeBritomart's Jagged PikeBritomart's Jagged PikeBritomart's Jagged Pike
 Devilfang BandDevilfang BandDevilfang Band
 Festering Primordial GlobuleFestering Primordial GlobuleFestering Primordial GlobuleFestering Primordial Globule
 Gleaming Eye of the DevilsaurGleaming Eye of the DevilsaurGleaming Eye of the Devilsaur
 Helm of the Cursed ConquerorHelm of the Cursed ConquerorHelm of the Cursed ConquerorHelm of the Cursed ProtectorHelm of the Cursed ProtectorHelm of the Cursed ProtectorHelm of the Cursed VanquisherHelm of the Cursed VanquisherHelm of the Cursed VanquisherHvitserk's Formidable ShankerHvitserk's Formidable ShankerHvitserk's Formidable ShankerHvitserk's Formidable Shanker
 Icy Blood ChestplateIcy Blood ChestplateIcy Blood ChestplateIcy Blood Chestplate
 Montak's Grips of Scorching BreathMontak's Grips of Scorching BreathMontak's Grips of Scorching BreathMontak's Grips of Scorching Breath
 Signet of the DinomancersSignet of the DinomancersSignet of the Dinomancers
 Thok's Acid-Grooved ToothThok's Acid-Grooved ToothThok's Acid-Grooved Tooth
 Thok's Tail TipThok's Tail TipThok's Tail Tip
Immerseus
The ancient inhabitants of Pandaria recognized the vital importance of the lifegiving Pools of Power, building an underground system of aqueducts to safeguard the waters and nurture life in the Vale of Eternal Blossoms. The touch of corruption has animated and twisted these waters, and Immerseus stands as an unnatural embodiment of the Vale's sorrow.
Abilities & Strategy
Overview
Immerseus begins with 100 Corruption, displayed as a visible power bar, and the objective of the encounter is to cleanse him by reducing his Corruption level to 0. Each time Immerseus is reduced to zero health, he will Split into a mix of dark Sha Puddles and watery Contaminated Puddles. As the Puddles move back towards the center of the chamber, damage-dealers must destroy Sha Puddles, while healers try to heal Contaminated Puddles in order to fully purify them, before they reach the central pool. Following each Split, Immerseus will reform with reduced health and Corruption depending on how successful the raid was in dealing with the two types of Puddles. This cycle will repeat until Immerseus is cleansed.
Tears of the Vale
As a water elemental, Immerseus attacks players directly.
Sha Bolt
Swirl
Immerseus causes torrents of Sha-corrupted water to burst from beneath the cracks in the ground. Players that come into contact with the tainted waters will suffer Shadow damage and be knocked away.
Corrosive Blast
Immerseus inflicts Shadow damage in a cone aimed at his primary target, increasing Shadow damage taken by 0% for 45 sec. Stacks.
Seeping Sha
Coming into contact with the Seeping Sha that surrounds Immerseus inflicts Shadow damage and knocks players back.
Swelling Corruption
Immerseus surges with power, gaining stacks of Swelling Corruption proportional to his current Corruption level. This power lashes out at players who strike Immerseus with single target abilities, coalescing into a Congealed Sha creature as well as inflicting Sha Corruption upon the attacker, which deals at least Shadow damage every 1 sec for 6 sec, increasing in damage rapidly with each additional stack.
Split
Upon reaching zero health, Immerseus becomes unstable and bursts into a shower of Sha Puddles and Contaminated Puddles, which will attempt to reform in the pool at the center of the chamber. For each Sha Puddle killed and each Contaminated Puddle healed to full, Immerseus's Corruption is reduced by one.
Sha Puddle
When destablized, Immerseus forms one Sha Puddle for every four units of Corruption he has. Destroying a Sha Puddle before it merges back into the central pool will remove one unit of Corruption.
Sha Residue
This effect stacks.
Contaminated Puddle
When destablized, Immerseus forms one Contaminated Puddle for every four units of Corruption that have previously been removed. Healing a Contaminated Puddle to full health before it merges back into the central pool will cause it to become Purified, and remove one unit of Corruption upon reaching Immerseus.
Congealing
The speed of the Contaminated Puddle wanes as it increases in health.
Purified Residue
This effect stacks.
Erupting Sha
When any Puddle reaches Immerseus, it triggers an eruption, inflicting Shadow damage to all players for a Sha or Contaminated Puddle, or Frost damage for a Purified Puddle.
Sha Pool
The Sha Pool grows over time, inflicting at least Shadow damage over 1 sec to enemies who touch it, stacking and increasing rapidly in damage proportional to the number of stacks. Touching the Sha Pool causes it to shrink, whereas it will expand whenever any Puddle reaches it.
Seeping Sha
Coming into contact with the Seeping Sha that surrounds Immerseus inflicts Shadow damage and knocks players back.
Loot
88 drops · item level 40 to 42 · 13 slots (Back, Chest, Feet, Finger, Hands, Head +7 more) · all Bind on Pickup
 Bolt-Burster GripsBolt-Burster GripsBolt-Burster GripsBolt-Burster Grips
 Bracers of Purified SpiritBracers of Purified SpiritBracers of Purified SpiritBracers of Purified Spirit
 Bracers of Sordid SleepBracers of Sordid SleepBracers of Sordid SleepBracers of Sordid SleepBubble-Burst BracersBubble-Burst BracersBubble-Burst BracersBubble-Burst BracersChestplate of Congealed CorrosionChestplate of Congealed CorrosionChestplate of Congealed CorrosionChestplate of Congealed Corrosion
 Cloak of Misguided PowerCloak of Misguided PowerCloak of Misguided PowerCloak of Misguided Power
 Corruption-Rotted GauntletsCorruption-Rotted GauntletsCorruption-Rotted GauntletsCorruption-Rotted Gauntlets
 Encapsulated Essence of ImmerseusEncapsulated Essence of ImmerseusEncapsulated Essence of ImmerseusEncapsulated Essence of Immerseus
 Greatbelt of Living WatersGreatbelt of Living WatersGreatbelt of Living WatersGreatbelt of Living Waters
 Hood of Blackened TearsHood of Blackened TearsHood of Blackened TearsHood of Blackened Tears
 Hood of Swirling SensesHood of Swirling SensesHood of Swirling SensesHood of Swirling Senses
 Ichor-Dripping ShoulderpadsIchor-Dripping ShoulderpadsIchor-Dripping ShoulderpadsIchor-Dripping Shoulderpads
 Immerseus' Crystalline EyeImmerseus' Crystalline EyeImmerseus' Crystalline EyePauldrons of Violent EruptionPauldrons of Violent EruptionPauldrons of Violent EruptionPauldrons of Violent EruptionPuddle PunishersPuddle PunishersPuddle PunishersPuddle Punishers
 Purified Bindings of ImmerseusPurified Bindings of ImmerseusPurified Bindings of ImmerseusSalt Water SandalsSalt Water SandalsSalt Water SandalsSalt Water Sandals
 Seal of Eternal SorrowSeal of Eternal SorrowSeal of Eternal Sorrow
 Soul-Soaked GlovesSoul-Soaked GlovesSoul-Soaked GlovesSoul-Soaked GlovesTreads of Unchained HateTreads of Unchained HateTreads of Unchained HateTreads of Unchained Hate
 Trident of Corrupted WatersTrident of Corrupted WatersTrident of Corrupted Waters
Paragons of the Klaxxi
The nine surviving Klaxxi'va Paragons are ancient champions of the mantid who fought alongside the Wakener against the madness of Empress Shek'zeer. But the paragons, as do all mantid, hold a far deeper loyalty. When Garrosh unearthed the heart of Y'Shaarj, the paragons followed the whispers of their ancient master to the iron halls beneath Orgrimmar.
Abilities & Strategy
Overview
Three Klaxxi Paragons join the fight at the beginning of the encounter. You will only face three Klaxxi Paragons at any time. Any time a Klaxxi Paragon is defeated, any other active Paragons will heal to full and gain Paragon's Purpose. Defeating a Klaxxi Paragon causes the next Klaxxi Paragon to join the fight. You can tell which Klaxxi Paragons will join the fight next by looking for which ones are Ready to Fight. Defeated Klaxxi Paragons can be interacted with, one time, to steal that Paragon's abilities.
Paragon's Purpose
Whenever a Klaxxi Paragon is defeated, all other active Klaxxi Paragons heal to full and gain a 0% damage bonus. Whenever a Klaxxi Paragon is defeated all other active Klaxxi Paragons heal to full. All active Paragons gain a stacking 0% damage bonus every 50 seconds.
Ready to Fight
Klaxxi Paragons with this aura on them will be the next to join the fight. Before the fight begins, three Klaxxi Paragons will have this aura. When the encounter begins all three of these Paragons join the encounter and one other Paragon will gain this aura to indicate that they will join the fight next. Everytime a new Klaxxi Paragon joins the fight, one of the inactive Klaxxi Paragons will gain this aura.
Power of the Paragons
After a Paragon has been defeated, one player may take the fallen Paragon's powers to use as their own. Only one player can take any one Paragon's power, and a player may only take a Paragon's power once during the encounter. Each Paragon's powers can only be acquired by particular class roles.
Skeer the Bloodseeker
Hewn
The attacks of Skeer the Bloodseeker leave the victim more susceptible to the meddling of Rik'kal the Dissector's attacks. The victim suffers 0% more damage per application from Rik'kal the Dissector.
Bloodletting
Skeer swings his weapon in a mighty arc, inflicting Physical damage to the target and causing blood creatures to spawn around the room. Each blood moves to a Paragon and will heal that Paragon based on the remaining health of the blood. In 10 Player Normal Difficulty 2 bloods are summoned. In 25 Player Normal Difficulty 3 bloods are summoned. In 10 Player Heroic Difficulty 3 bloods are summoned. In 25 Player Heroic Difficulty 4 bloods are summoned. In Raid Finder Difficulty 1 blood is summoned. In Flexible Difficulty 2-3 bloods are summoned.
Bloodthirsty
Players of the damage dealer role can acquire this Paragon Power. When activated all attacks over the next 10 sec have a chance to spawn blood orbs that persist for 30 sec. If any player walks through a blood orb they will heal for 0% of their maximum health.
Rik'kal the Dissector
Genetic Alteration
Rik'kal's meddling with his victim's genetic makeup leaves them more susceptible to the attacks of Skeer the Bloodseeker. Victims suffer an additional 0% damage from Skeer the Bloodseeker for each application of Genetic Alteration.
Injection
Rik'kal Injects his victim with a virus that inflicts Nature damage per second per application. When the virus expires, several Parasites will burst from the victim and attack players at random. Injection will not hit tanks that are actively trying to mitigate damage.
Amber Parasite
Amber Parasites are Genetically Modified and fixate on a random player when they spawn. The Amber Parasite Feeds on the fixated target.
Mutate: Amber Scorpion
Rik'kal tosses a vial at a random player, causing them to mutate into an Amber Scorpion. While transformed, the victim suffers Nature damage per second and only has access to the abilities of an Amber Scorpion. Damage inflicted as an Amber Scorpion is based on the player's Attack Power, Ranged Attack Power, or Spell Power, whichever is largest.
Claw
Amber Scorpions can lash out with one of their claws for 100% damage.
Swipe
The Amber Scorpion sweeps both of its claws in front of it, inflicting 150% damage to all targets in the area. Targets currently under the effects of Sting suffer double damage.
Sting
The Amber Scorpion Stings the target, causing it to suffer Nature damage every second.
Prey
Mutated Scorpions can instantly kill an Amber Parasite with this ability. In Heroic Difficulties mutated victims must use this ability or perish from Faulty Mutation.
Mad Scientist
Players of any role can acquire this Paragon Power. When activated the caster mutates into a giant amber scorpion. Damage inflicted by the scorpion is based on the highest available attack or spell power of the caster. While mutated the caster suffers Physical damage per second from the shock. The mutation lasts for 30 sec.
Hisek the Swarmkeeper
Multi-Shot
Hisek the Swarmkeeper fires a shot at several random players for Physical damage.
Rapid Fire
Hisek fires several volleys in rapid succession, with each successive volley moving slightly faster than the previous one. Players caught in the path of the volleys suffer Physical damage each second they are in the volley.
Aim
Hisek the Swarmkeeper selects a player at random and stuns them for 5 sec. If the target is too close they will be knocked back until they are 45 yards from Hisek. After Hisek is finished aiming at the target he will Fire a beam of Physical damage at all targets between him and the victim.
Compound Eye
Players of the damage dealer role can acquire this Paragon Power. When activated, the player fires a shot at the target that inflicts greater Physical damage the further away the target is. Successfully hitting the target afflicts it with Marked for Death, increasing its damage taken by 0% for 10 sec.
Ka'roz the Locust
Flash
Ka'roz charges around the raid toward random targets. All players caught in his path are afflicted by Whirling.
Whirling
Player caught in Ka'roz's path as he Flashes around spin around and suffer Physical damage per second. Any other players caught in the vicinity of a Whirling victim also suffer this damage.
Hurl Amber
Ka'roz will periodically jump up to one of the platforms located about the room and Hurl Amber down at his enemies. Wherever the amber lands a pool of Caustic Amber will form. In non-Heroic Difficulties, Ka'roz hurls three pieces of amber. In Heroic Difficulty Ka'roz hurls four pieces of amber and the pool of Caustic Amber persists for the duration of the encounter.
Strong Legs
Players of the damage dealer role can acquire this Paragon Power. When activated the player leaps to one of the platforms Ka'roz used to Hurl Amber from. If there is no amber at the platform or when the player successfully throws the amber they will jump back down automatically. Hurled Amber will destroy the amber summoned by Korven to heal himself or his allies.
Korven the Prime
Encase in Amber
If Korven the Prime or any other active Paragon is below 50% health remaining Korven will Encase them in Amber for 10 sec. If the amber is not defeated within 10 sec the target will be restored to full health. This ability cannot be used more than once every 30 seconds. The explosion from the Hurl Amber ability acquired from Ka'roz after he has been defeated will destroy the amber summoned by this ability. In Heroic Difficulties the Amber summoned by this ability is immune to all player abilities.
Shield Bash
Korven the Prime slams his shield into his primary tank target, knocking them down and stunning them for 6 sec. The victim is defenseless for the duration. Immediately after using Shield Bash, Korven the Prime unleashes a Vicious Assault.
Vicious Assault
Korven the Prime follows up his Shield Bash with 6 different strikes at all targets in front of him. Each successive strike inflicts greater and greater Physical damage.
Master of Amber
A player of the tank role can acquire this Paragon Power. When activated the caster Encases a friendly target in Amber for 5 sec. While the amber holds the target is immune to all damage.
Iyyokuk the Lucid
Calculate
When Iyyokuk the Lucid enters the fight he perceives the general attributes of all players and notes the result of his calculations on each target. These calculations are noted with a shape, a color, and a number. Possible shapes are: - Mantid - Sword - Staff - Drum - Bomb Possible colors are: - Red - Purple - Blue - Green - Yellow Possible Numbers Range from 1 to 5.
Diminish
Iyyokuk uses his command of the arcane to alter the victim's health by 0% of its current value. If the target is below 25% of their maximum health they will die instantly.
Insane Calculation: Fiery Edge
Iyyokuk peers through the veil of his previous calculations and selects an initial target, then all other targets based on the initial target's criteria to spawn lines of fire between them. All targets and any victims caught in the lines between them suffer Fire damage every second. The damage decreases as the endpoints of the line get further away from one another. In 10 Player Normal and Raid Finder Difficulties, Iyyokuk selects all targets that match one of the intial target's criteria. In Flexible Raid Mode, Iyyokuk selects all targets that match either of one or two of the initial target's criteria. In 25 Player Normal Difficulty, Iyyokuk selects all targets that match any of two of the initial target's three critera. In 10 Player Heroic Difficulty, Iyyokuk selects all targets that match any of two of the initial target's three critera. in 25 Player Heroic Difficulty, Iyyokuk selects all targets that match any of the initial target's three criteria. In Heroic Difficulty, each target creates a line of fire between themselves and two other targets.
Ingenious
Players of the healer role can acquire this Paragon Power. When activated the caster heals the initial target. The heal is then copied to other members of the raid. In Normal and Raid Finder Difficulties the heal is copied to anyone that shares the race or class of the initial target. In Heroic Difficulty the heal is copied to all other raid members who share the class of the initial target.
Xaril the Poisoned Mind
Toxic Injection
When Xaril joins the encounter, he randomly injects all players with one of three different toxins: red, blue, or yellow.
Caustic Blood
Successful melee strikes from Xaril inject a caustic poison into the victim. If the injection is allowed to stack to 10, a Bloody Explosion occurs. Caustic Blood will fail to hit tanks who are using their Active Mitigation abilities.
Bloody Explosion
Allowing Caustic Blood to apply 10 times results in a Bloody Explosion, inflicting Fire Damage to the entire raid.
Tenderizing Strikes
Xaril's dagger strikes tenderize the flesh of his victim. Any attacks received from Kil'ruk the Wind-Reaver will inflict 0% more damage for each application of Tenderizing Strikes.
Choose Catalyst
Xaril the Poisoned Mind selects a catalyst at random and strikes all members of the raid with a toxin that matches the color of the catalyst. This catalyst causes all targets' toxins to react according to the type of toxin.
Catalytic Reaction: Red
Catalytic Reaction: Blue
In 10 Player Difficulty, the maximum number of targets that can split the damage is limited to 2. In 25 Player Difficulty the maximum number of targets that can split the damage is limited to 3.
Catalytic Reaction: Yellow
When this toxin reacts to a yellow catalyst it creates a cloud of Noxious Vapors for 30 sec. Player caught in the cloud suffer Nature damage per second.
Catalytic Reaction: Orange
When either a yellow toxin or a red toxin reacts to this catalyst, a ring of Fire explodes outward. Players do not see or need to react to the ring that forms at their own feet; but must avoid those rings that are created by their allies.
Catalytic Reaction: Purple
When either a blue toxin or red toxin reacts to this catalyst the victim will be forced to run forward, leaving a trail of Canned Heat in their wake for 40 sec.
Catalytic Reaction: Green
When either a blue or yellow toxin reacts to this catalyst a small cloud of Eerie Fog will form and wander about randomly. Players who enter the area suffer Nature damage per second for 9 sec. Entering the area Chills victims to the Bone, increasing the damage received from the Eerie Fog by% for 1 min. Every time a player enters the area the fog reduces in size. When it has been reduced in size 3 times it will dissipate.
Vast Apothecarial Knowledge
Players in the healer role may acquire this Paragon Power. When Apothecary: Knowledge is activated, all healing done for the next 10 sec will leave a Volatile Poultice on the target for an amount equal to the healing done. The next time the target is damaged, the Volatile Poultice releases the stored healing on the target.
Kaz'tik the Manipulator
Hungry Kunchongs
These Hungry Kunchongs are summoned by Kaz'tik the Manipulator. Whenever one dies Kaz'tik will summon another to take its place.
Devour
When Kaz'tik the Manipulator Mesmerizes a player, a Hungry kunchong is selected to feed on the victim. While the Kunchong Feeds the victim suffers Physical damage and the Kunchong gains Energy each second. If the Kunchong suffers 30% of its total health in damage from the time it began to Feed on the victim, the Feeding will stop and the victim will be freed of the Mesmerize.
Devour Whole
Hungry Kunchongs will instantly kill any player who gets too close. The process energizes the Hungry Kunchong to full.
Thick Shell
When not in the process of Feeding, Hungry Kunchongs are immune to all damage. The impact of the player ability, Angel of Death, gained from Kil'ruk after he has been defeated will disable a Hungry Kunchong's Thick Shell.
Molt
A Hungry Kunchong that reaches full energy will Molt. The process transforms the Hungry Kunchong into a Mature Kunchong.
Mesmerize
Kaz'tik selects a random member of the raid and forces them to walk toward one of his Hungry Kunchongs. If the victim is allowed to reach the Kunchong they will be Devoured Whole.
Sonic Projection
Kaz'tik selects a random member of the raid and fires a sonic wave in their direction. Player caught in the path of the wave suffer Physical damage.
Master of Puppets
Players of any role may acquire this power. When activated the player summons an Immature Kunchong to fight at their side for 40 sec.
Kil'ruk the Wind-Reaver
Exposed Veins
Kil'ruk the Wind-Reaver's sharp blades expose the blood vessels of his victims, making them more susceptible to the attacks of Xaril the Poisoned Mind. All damage taken from Xaril the Poisoned Mind is increased 10% for each application of Exposed Veins
Gouge
Kil'ruk the Wind-Reaver incapacitates his current tank target. This attack is followed immediately by Mutilate.
Mutilate
Kil'ruk the Wind-Reaver lashes out with both of his weapons for a devastating attack.
Death from Above
Kil'ruk the Wind-Reaver leaps into the air over a random player and then crashes down.
Reave
Kil'ruk leaps to a random player and begins to spin in place. All players are drawn toward Kil'ruk and suffer Physical damage for 9 sec. The damage each player suffers during Reave is decreased as the player gets away from Kil'ruk. Players of the damage dealer role may acquire this power. If a Hungry Kunchong with a Thick Shell is in the area of impact, the Thick Shell will be disabled.
Loot
57 drops · item level 1 to 42 · 7 slots (Chest, Finger, Hands, One-Hand, Ranged, Trinket +1 more) · all Bind on Pickup
 Amber Parasite WrapsAmber Parasite WrapsAmber Parasite WrapsAmber Parasite WrapsBracers of Sonic ProjectionBracers of Sonic ProjectionBracers of Sonic ProjectionBracers of Sonic ProjectionChestguard of Toxic InjectionsChestguard of Toxic InjectionsChestguard of Toxic InjectionsChestguard of Toxic InjectionsGauntlets of Insane CalculationsGauntlets of Insane CalculationsGauntlets of Insane CalculationsGauntlets of Insane Calculations
 Hisek's Reserve LongbowHisek's Reserve LongbowHisek's Reserve LongbowHisek's Reserve Longbow
 Iyyokuk's Hereditary SealIyyokuk's Hereditary SealIyyokuk's Hereditary Seal
 Kil'ruk's Band of AscendancyKil'ruk's Band of AscendancyKil'ruk's Band of Ascendancy
 Kil'ruk's Furious BladeKil'ruk's Furious BladeKil'ruk's Furious BladeKil'ruk's Furious Blade
 Korven's Crimson CrescentKorven's Crimson CrescentKorven's Crimson CrescentKorven's Crimson Crescent
 Leggings of the Cursed ConquerorLeggings of the Cursed ConquerorLeggings of the Cursed ProtectorLeggings of the Cursed ProtectorLeggings of the Cursed ProtectorLeggings of the Cursed VanquisherLeggings of the Cursed VanquisherLeggings of the Cursed Vanquisher
 Rik'kal's Bloody ScalpelRik'kal's Bloody ScalpelRik'kal's Bloody ScalpelRik'kal's Bloody Scalpel
 Skeer's Bloodsoaked TalismanSkeer's Bloodsoaked TalismanSkeer's Bloodsoaked Talisman
 Kovok
KovokKor'kron Dark Shaman
Haromm and Kardris trained thousands of shaman to whisper reverently to the elements to requisition their aid. The army of Garrosh, however, does not ask - they take what they desire in the name of the True Horde. Dark Shamanism forces the elements into servitude, twisting them into burned-out ash, corrupted waters, and toxic air.
Abilities & Strategy
Spirit Link
Damage dealt is shared between Earthbreaker Haromm and Wavebinder Kardris.
Bloodlust
When the Dark Shaman reach 25% health remaining, they will go into a blood frenzy, increasing all damage dealt by% and haste by%.
Darkfang and Bloodclaw
The riding wolves of the Dark Shaman, Darkfang and Bloodclaw will viciously defend their masters.
Swipe
Inflicts Physical damage to targets in a -yard cone in front of the caster.
Rend
for 15 sec. This effect stacks.
Totems
The Dark Shaman will drop Totems during the fight that grant them new abilities.
Poisonmist Totem
Poisonmist Totem grants Earthbreaker Haromm the Toxic Mist ability, and grants Wavebinder Kardris the Toxic Storm ability. The Dark Shaman drop Poisonmist Totems upon reaching 85% health.
Foulstream Totem
Foulstream Totem grants Earthbreaker Haromm the Foul Stream ability, and grants Wavebinder Kardris the Foul Geyser ability. The Dark Shaman drop Foulstream Totems upon reaching 65% health.
Ashflare Totem
Ashflare Totem grants Earthbreaker Haromm the Ashen Wall ability, and grants Wavebinder Kardris the Falling Ash ability. The Dark Shaman drop Ashflare Totems upon reaching 50% health.
Rusted Iron Totem
Rusted Iron Totem grants Earthbreaker Haromm the Iron Tomb ability, and grants Wavebinder Kardris the Iron Prison ability. The Dark Shaman drop Rusted Iron Totems upon reaching 95% health.
Earthbreaker Haromm
Froststorm Strike
Strikes a player with frost-lined weapons, inflicting Frost damage and causing the player to take% additional damage from Froststorm Strike for 30 sec. This effect stacks.
Toxic Mist
for 30 sec and causing growing Toxicity. Due to the internal nature of the corruption, Toxic Mist pierces all immunities. This ability is granted by Poisonmist Totem.
Toxicity
Increases Nature damage taken by% per stack.
Foul Stream
A stream of foul liquid inflicts Nature damage to all enemies on a line. This ability is granted by Foulstream Totem.
Ashen Wall
Summons a line of stationary Ash Elementals that will attack any nearby enemies. This ability is granted by Ashflare Totem.
Iron Tomb
This ability is granted by Rusted Iron Totem.
Wavebinder Kardris
Froststorm Bolt
Fires a bolt of bitter frost, inflicting Frost damage.
Toxic Storm
and periodically creates Toxic Tornadoes. The storm will move around and lasts for 1 min. This ability is granted by Poisonmist Totem.
Toxic Tornado
and knock them up.
Foul Geyser
for 8 sec. Each splash creates a Foul Slime. This ability is granted by Foulstream Totem.
Foul Slime
Foul Slimes are coated in Foulness.
Falling Ash
This ability is granted by Ashflare Totem.
Iron Prison
Encases the player in a prison of iron that slowly asphyxiates them, inflicting% of maximum health as Physical damage after 1 min. This ability is granted by Rusted Iron Totem.
Loot
84 drops · item level 40 to 42 · 12 slots (Back, Chest, Feet, Finger, Head, Legs +6 more) · all Bind on Pickup
Ashen Wall GirdleAshen Wall GirdleAshen Wall GirdleAshen Wall Girdle Ashflare PendantAshflare PendantAshflare Pendant
 Belt of the Iron PrisonBelt of the Iron PrisonBelt of the Iron PrisonBelt of the Iron Prison
 Bloodclaw BandBloodclaw BandBloodclaw Band
 Breastplate of Shamanic MirrorsBreastplate of Shamanic MirrorsBreastplate of Shamanic MirrorsBreastplate of Shamanic Mirrors
 Damron's Belt of DarknessDamron's Belt of DarknessDamron's Belt of DarknessDamron's Belt of Darkness
 Darkfang MaskDarkfang MaskDarkfang MaskDarkfang Mask
 Haromm's Frozen CrescentHaromm's Frozen CrescentHaromm's Frozen CrescentHaromm's Frozen Crescent
 Haromm's Horrifying HelmHaromm's Horrifying HelmHaromm's Horrifying HelmHaromm's Horrifying Helm
 Haromm's TalismanHaromm's TalismanHaromm's TalismanIron Wolf HoodIron Wolf HoodIron Wolf HoodIron Wolf Hood
 Kardris' ScepterKardris' ScepterKardris' ScepterKardris' Scepter
 Kardris' Toxic TotemKardris' Toxic TotemKardris' Toxic Totem
 Poisonmist NightcloakPoisonmist NightcloakPoisonmist NightcloakPoisonmist Nightcloak
 Ring of the Iron TombRing of the Iron TombRing of the Iron Tomb
 Riou's Vigilant LeggingsRiou's Vigilant LeggingsRiou's Vigilant LeggingsRiou's Vigilant Leggings
 Shackles of Stinking SlimeShackles of Stinking SlimeShackles of Stinking SlimeShackles of Stinking SlimeShoulderguards of Foul StreamsShoulderguards of Foul StreamsShoulderguards of Foul StreamsShoulderguards of Foul Streams
 Shoulderplates of Gushing GeysersShoulderplates of Gushing GeysersShoulderplates of Gushing GeysersShoulderplates of Gushing Geysers
 Toxic Tornado TreadsToxic Tornado TreadsToxic Tornado TreadsToxic Tornado Treads
 Wolf-Rider SpursWolf-Rider SpursWolf-Rider SpursWolf-Rider Spurs
Iron Juggernaut
This mechanical terror, designed nearly as much for intimidation as destruction, is the centerpiece of Garrosh's siege weaponry. Crafted in the image of the mighty Kor'kron war scorpion, the Iron Juggernaut guards the gates of Orgrimmar, crushing any who would rise up to challenge Garrosh's True Horde.
Abilities & Strategy
Pressing the Attack: Assault Mode
The Iron Juggernaut is freely mobile while in Assault mode.
Borer Drill
The Iron Juggernaut bores its drill arm into the ground, causing the earth to crack and shatter. This effect ripples out into many directions, inflicting Physical damage to those caught within its effect.
Laser Burn
The Iron Juggernaut's tail cannon now focuses briefly on random players.
Mortar Cannon
Crawler Mines
The Iron Juggernaut releases several Crawler Mines that scurry in the direction of random players, burying themselves partially into the ground. Once they burrow, they begin a detonation sequence. At the end of the sequence, they will detonate for Physical damage to all players. A particularly brave player may stomp a burrowed Mine into the ground, stifling the explosion but causing a localized detonation at their feet. This explosion inflicts Physical damage and knocks the player high into the air.
Ricochet
The Iron Juggernaut launches the sawblade from its arm, causing Physical damage to players that come into contact with the blade as it whirls and ricochets between distant players.
Flame Vents
The Iron Juggernaut emits flame from its frontal vents, inflicting Fire damage in a frontal cone. This effect stacks.
Breaking the Defense: Siege Mode
The Iron Juggernaut plants itself in its current position, boring deep into the ground. It will no longer focus on a single target. During Siege mode, the Iron Juggernaut releases crawler mines at an increased rate.
Seismic Activity
The Iron Juggernaut's drills deep into the earth, causing a violent earthquake. The seismic activity causes intermittent Shock Pulses.
Shock Pulse
Shock Pulse causes a wave of force that knocks players back significantly.
Demolisher Cannons
Cutter Laser
The Iron Juggernaut's tail cannon now traces the ground as it chases each target.
Explosive Tar
The Iron Juggernaut spews tar in all directions. If a tar puddle comes into contact with the flames of the cutter laser, the puddle will explode, inflicting Fire damage to all players.
Mortar Barrage
Loot
88 drops · item level 40 to 42 · 12 slots (Chest, Feet, Finger, Hands, Held In Off-hand, Legs +6 more) · all Bind on Pickup
 Belt of Ominous TremblesBelt of Ominous TremblesBelt of Ominous TremblesBelt of Ominous Trembles
 Borer Drill BootsBorer Drill BootsBorer Drill BootsBorer Drill BootsBracers of the Broken FaultBracers of the Broken FaultBracers of the Broken FaultBracers of the Broken FaultCastlebreaker BracersCastlebreaker BracersCastlebreaker BracersCastlebreaker BracersCavemaker WristguardsCavemaker WristguardsCavemaker WristguardsCavemaker Wristguards
 Demolisher's Reinforced BeltDemolisher's Reinforced BeltDemolisher's Reinforced BeltDemolisher's Reinforced BeltEarthbreaker's Steaming ChestplateEarthbreaker's Steaming ChestplateEarthbreaker's Steaming ChestplateEarthbreaker's Steaming ChestplateEarthripper GlovesEarthripper GlovesEarthripper GlovesEarthripper Gloves
 Juggernaut's Focusing CrystalJuggernaut's Focusing CrystalJuggernaut's Focusing Crystal
 Juggernaut's Ignition KeysJuggernaut's Ignition KeysJuggernaut's Ignition Keys
 Juggernaut's Power CoreJuggernaut's Power CoreJuggernaut's Power CoreJuggernaut's Power CoreLaser Burn BracersLaser Burn BracersLaser Burn BracersLaser Burn Bracers
 Laser-Slice SignetLaser-Slice SignetLaser-Slice Signet
 Leggings of Furious FlameLeggings of Furious FlameLeggings of Furious FlameLeggings of Furious FlameMinelayer's Padded BootsMinelayer's Padded BootsMinelayer's Padded BootsMinelayer's Padded BootsPrecision CuttersPrecision CuttersPrecision CuttersPrecision Cutters
 Ricocheting ShoulderguardsRicocheting ShoulderguardsRicocheting ShoulderguardsRicocheting Shoulderguards
 Seismic BoreSeismic BoreSeismic BoreSeismic BoreShock Pulse RobesShock Pulse RobesShock Pulse RobesShock Pulse RobesTar-Coated GauntletsTar-Coated GauntletsTar-Coated GauntletsTar-Coated GauntletsTreads of Autonomic MotionTreads of Autonomic MotionTreads of Autonomic Motion
Siegecrafter Blackfuse
Helix Blackfuse was the only goblin with the combination of engineering prowess, professionalism, and ruthlessness to satisfy Garrosh in his search for the engineer of the True Horde. A mercenary at heart, Blackfuse's love for his creations (and the gold they fetch) has forever linked his fate with that of his patron and Warchief.
Abilities & Strategy
Siegecrafter Blackfuse
Launch Sawblade
Siegecrafter Blackfuse launches a magnetized sawblade at a random player. The sawblade will hover in place until it is removed by an Activated Electromagnet.
Serrated Slash
Sawblades inflict Physical damage to any players or Automated Shredders with which they come into contact, knocking back any affected players.
Protective Frenzy
When one of his creations is destroyed, Siegecrafter Blackfuse enters a frenzy, increasing his attack speed by% for 10 sec.
Electrostatic Charge
Siegecrafter Blackfuse charges his target with static electricity, inflicting Nature damage. Electrostatic Charge also leaves a lingering effect increasing the damage taken from Electrostatic Charge by 0% increasing damage dealt to targets with Reactive Armor by 0%. This effect stacks up to 10 times.
Automatic Repair Beam
Overcharge
When activated weapons arrive on the assembly line, Siegecrafter Blackfuse will Overcharge one of them, increasing its power and effectiveness.
Energized Defensive Matrix
If three weapons make it through the Assembly Line and into Blackfuse's assembly machine, the machine will become overcharged and use the excess energy to power the defensive systems on Blackfuse's suit, granting him% reduced damage for 20 sec.
Automated Shredders
Siegecrafter Blackfuse will periodically call in Automated Shredders to join the fight.
Reactive Armor
Automated Shredders have been retrofitted with Reactive Armor, reducing damage taken by 0%. Automated Shredders can also be damaged by Serrated Slash, Shockwave Missile, Detonate! and Superheated.
Death from Above
After landing, the Shredder is stunned and takes% additional damage for 5 sec.
Overload
The Automated Shredder will periodically cast Overload, dealing damage to raid members not currently on the conveyor belt, and increasing its damage dealt by%.
The Assembly Line
Periodically, Siegecrafter Blackfuse will initiate fabrication of a set of weapons on the assembly line in his workshop. Disassembled weapons are brought in via conveyor belts along the northwest side of his room. They then pass through an assembly machine on the northeast wall of his room. Finally, they emerge completed on conveyor belts along the southeast wall of his room, where they attack players. Players can use Transport Pipes to reach the conveyor belt along the northwest side of his room, where they can attack and destroy the disassembled weapons. After players destroy a weapon, the remaining weapons become shielded and cannot be damaged.
Transport Pipes
Transport Pipes line the western edge of Siegecrafter Blackfuse's workshop. Players can jump into these pipes to reach the conveyor belt along the northwest side of the workshop.
Pattern Recognition
After using the transport pipes to reach the conveyor belt, the assembly line recognizes a player's biological signature and will reject further attempts to use them for 1 min.
Matter Purification Beam
Matter Purification Beams line the platform, inflicting Fire damage to any players that come into contact with them.
Shockwave Missile Turret
Shockwave Missile
The Shockwave Missile turret launches a drill-tipped Shockwave Missile into the ground, sending a barrage of drills that ripple out from the impact location and create rings of seismic energy. Each ring of seismic energy inflicts Nature damage to all players caught within it.
Overcharged Missile Turret
When Overcharged, the Shockwave Missile Turret will fire Shockwave Missiles which persist and continuously barrage the platform with drills and seismic energy until destroyed by players.
Laser Turret
Superheated
The ground hit by a Laser Turret's beam burns any players or Automated Shredders who step on it, inflicting Fire damage each second for 7 sec. This effect stacks every second that a player or Automated Shredder remains on Superheated ground, and can stack up to 20 times.
Overcharged Laser Turret
When Overcharged, Siegecrafter Blackfuse's laser turrets will fire a split beam, creating three concentric arcs of Superheated ground.
Electromagnet
Magnetic Crush
When activated, the electromagnet will begin to magnetically crush all players on the platform, inflicting Physical damage each second and pulling them towards the electromagnet. The force of the electromagnet will also pull all sawblades on the platform towards it and off the platform, causing them to damage any players or Automated Shredders in the path of the blades.
Overcharged Electromagnet
When Overcharged, the Electromagnet will periodically reverse polarities, pushing both players and sawblades in and out from the magnet.
Crawler Mine
Assembled Crawler Mines leap down from the conveyor belt, fixating on a random player.
Detonate!
Break-in Period
Crawler mines are vulnerable to roots, snares and stuns for 1 min after joining the battle.
Ready to Go!
After their Break-in Period expires, Crawler Mines lose their vulnerability to stuns, roots and snares, and their speed increases.
Overcharged Crawler Mines
When Overcharged, Crawler Mines activate a construction matrix within their machinery. This construction matrix enables them to create two new Crawler Mines when they are destroyed.
Loot
57 drops · item level 1 to 42 · 8 slots (Feet, Finger, Hands, Neck, One-Hand, Trinket +2 more) · all Bind on Pickup
Asgorathian Blood SealAsgorathian Blood SealAsgorathian Blood Seal Blackfuse's Blasting CordBlackfuse's Blasting CordBlackfuse's Blasting Cord
 Bomber's Blackened WristwatchBomber's Blackened WristwatchBomber's Blackened WristwatchBomber's Blackened Wristwatch
 Bracers of Infinite PipesBracers of Infinite PipesBracers of Infinite PipesBracers of Infinite PipesCalixian BladebreakersCalixian BladebreakersCalixian BladebreakersCalixian Bladebreakers
 Dysmorphic Samophlange of DiscontinuityDysmorphic Samophlange of DiscontinuityDysmorphic Samophlange of Discontinuity
 Fusespark GlovesFusespark GlovesFusespark GlovesFusespark Gloves
 Lever of the Megantholithic ApparatusLever of the Megantholithic ApparatusLever of the Megantholithic ApparatusLever of the Megantholithic ApparatusPowder-Stained Totemic TreadsPowder-Stained Totemic TreadsPowder-Stained Totemic TreadsPowder-Stained Totemic Treads
 Shoulders of the Cursed ConquerorShoulders of the Cursed ConquerorShoulders of the Cursed ConquerorShoulders of the Cursed ProtectorShoulders of the Cursed ProtectorShoulders of the Cursed ProtectorShoulders of the Cursed VanquisherShoulders of the Cursed VanquisherShoulders of the Cursed VanquisherSiegecrafter's Forge HammerSiegecrafter's Forge HammerSiegecrafter's Forge HammerSiegecrafter's Forge Hammer
 Ticking Ebon DetonatorTicking Ebon DetonatorTicking Ebon Detonator
 Blackfuse Bombling
Norushen
Some say that the mogu race was created in the image of this titanic construct, left deep beneath Pandaria to watch over and guard the continent's darkest and most dangerous secret.
Abilities & Strategy
Overview
When the fight begins, Norushen seals all players inside a Quarantine Zone and extracts a portion of each player's corruption to form an Amalgam of Corruption. The object of the encounter is to destroy this creature. Players must reduce their personal level of Corruption in order to inflict full damage to the Amalgam. Players can accomplish this by interacting with the nodes of Purifying Light that active around the room, which will pull them into another phase where they must face a role-specific challenge. Overcoming this challenge will Purify the player and allow them to inflict full damage to the Amalgam.
Corruption
Players start the encounter with 75 points of Corruption. The more corrupt a player is the less damage they will inflict to the Amalgam of Corruption.
Purified
Players who reach 0 Corruption become Purified. Healers who are Purified gain bonus healing, tanks who are Purified take less damage, and damage dealers inflict greater damage by virtue of having less Corruption. Purified persists until the player is once again Corrupted.
Quarantine Measures
If the Amalgam of Corruption proves too dangerous, Norushen will have no choice but to activate the zone's safety measures and destroy all life within.
Amalgam of Corruption
Unleashed Anger
The Amalgam slashes at its current tank target, inflicting Physical damage.
Self Doubt
The Amalgam inflicts doubt on its current tank target. Self Doubt increases the damage of Unleashed Anger by% per application.
Blind Hatred
The Amalgam creates a zone of corruption that extends outward and slowly turns in place.
Fusion
Every Expelled Corruption that reaches the Amalgam of Corruption will increase the damage the Amalgam inflicts by% for 15 sec.
Icy Fear
This damage increases as the Amalgam loses health.
Frayed
When the Amalgam reaches 50% health remaining, and for every 10% health lost thereafter, the Amalgam spawns an Unleashed Manifestation of Corruption.
Draw
The Amalgam searches the souls of all its enemies and Draws upon their Corruption. Any targets found with 75 Corruption or more will cause an Unleashed Manifestation of Corruption to spawn. This ability is only used when the Amalgam is below 40% health remaining.
Look Within
Players can interact with Purifying Light to Look Within. Doing so transports the player to their own realm where they face a personal challenge based on their role. Successfully completing the challenge will return the player to the normal realm with zero Corruption. Players cannot Look Within while under the effects of Purified. In Raid Finder Difficulty, players are automatically selected to Look Within. There are no Purifying Light objects to interact with.
Test of Serenity
Players of the DPS role face the Test of Serenity. To complete this challenge, players must defeat the elements of corruption present. Whenever one of these elements of corruption is defeated, it will be unleashed into the normal realm. Failure to complete the challenge will unleash all remaining elements of corruption to the normal realm at once.
Manifestation of Corruption
These sha creatures repeatedly cast Tear Reality, which inflict Shadow damage to all enemies in a cone in front of the caster.
Essence of Corruption
These lesser sha creatures repeatedly cast Expel Corruption, which fires a ball of corrupted energies in a straight line, dealing Shadow damage to anyone it strikes.
Test of Reliance
Players of the Healer role face the Test of Reliance. To complete this challenge, players must defeat a Greater Corruption. Healers are aided by several allies while Looking Within. Failure to complete the challenge will unleash a Manifestation of Corruption to the normal realm. Success returns the player to the normal realm cleansed of all Corruption.
Greater Corruption
Test of Confidence
Players of the Tank role face the Test of Confidence. To complete this challenge, the tank must survive for 1 min against a Titanic Corruption. Success returns the player to the normal realm with zero corruption.
Titanic Corruption
Unleashed Corruption
Whenever players successfully defeat an element of corruption during the Test of Serenity it will be unleashed in the normal realm.
Foul Link
The creatures released from the Test of Serenity copy their damage to the Amalgam of Corruption.
Manifestation of Corruption
Burst of Anger
Inflicts Shadow damage to all players within the Quarantine Zone.
Residual Corruption
When an Unleashed Manifestation of Corruption dies, it leaves behind a small amount of corruption that will periodically inflict Shadow damage to all players in the Quarantine Zone until it is picked up. Players are unable to pick up the Residual Corruption unless they have removed sufficient corruption of their own first. In LFR, Flexible, and Normal difficulties, Residual Corruption gives the player 25 Corruption. In Heroic difficulties, Residual Corruption gives the player 25 Corruption.
Essence of Corruption
Expel Corruption
A ball of corrupted energy travels outward from the caster, inflicting Shadow damage to the first enemy in its path. Every Expelled Corruption that reaches the Amalgam of Corruption will increase the damage the Amalgam inflicts by% for 15 sec.
Loot
88 drops · item level 40 to 42 · 14 slots (Back, Chest, Feet, Finger, Hands, Head +8 more) · all Bind on Pickup
Blight HurlersBlight HurlersBlight HurlersBlight Hurlers Boots of Broken RelianceBoots of Broken RelianceBoots of Broken RelianceBoots of Broken RelianceBracers of Blind HatredBracers of Blind HatredBracers of Blind HatredBracers of Blind Hatred
 Bracers of Broken CausationBracers of Broken CausationBracers of Broken CausationBracers of Broken CausationBracers of Final SerenityBracers of Final SerenityBracers of Final SerenityBracers of Final Serenity
 Confident GripsConfident GripsConfident GripsConfident GripsDrape of the Despairing PitDrape of the Despairing PitDrape of the Despairing PitDrape of the Despairing Pit
 Fusion-Fire CoreFusion-Fire CoreFusion-Fire Core
 Gloves of the Golden ProtectorGloves of the Golden ProtectorGloves of the Golden ProtectorGloves of the Golden Protector
 Leggings of Unabashed AngerLeggings of Unabashed AngerLeggings of Unabashed AngerLeggings of Unabashed Anger
 Norushen's Enigmatic BarrierNorushen's Enigmatic BarrierNorushen's Enigmatic BarrierNorushen's Enigmatic Barrier
 Norushen's ShortbladeNorushen's ShortbladeNorushen's ShortbladeNorushen's Shortblade
 Quarantine ShoulderguardsQuarantine ShoulderguardsQuarantine ShoulderguardsQuarantine Shoulderguards
 Rage-Blind GreathelmRage-Blind GreathelmRage-Blind GreathelmRage-Blind Greathelm
 Reality Ripper RingReality Ripper RingReality Ripper RingRime-Rift ShouldersRime-Rift ShouldersRime-Rift ShouldersRime-Rift ShouldersRobes of the Blackened WatcherRobes of the Blackened WatcherRobes of the Blackened WatcherRobes of the Blackened Watcher
 Sash of the Last GuardianSash of the Last GuardianSash of the Last GuardianSash of the Last Guardian
 Shadow-Binder's KiltShadow-Binder's KiltShadow-Binder's KiltShadow-Binder's Kilt
 Untainted Guardian's ChainUntainted Guardian's ChainUntainted Guardian's ChainWristplates of Broken DoubtWristplates of Broken DoubtWristplates of Broken Doubt
Sha of Pride
The seventh sha, the Sha of Pride, was the final burden to which Emperor Shaohao clung, shrouding the land in mist and biding its time for millennia. When Garrosh awakened the Heart of Y'Shaarj, the force of his arrogance caused this dark energy to coalesce in the chamber where the Heart was unearthed.
Abilities & Strategy
Pride
Players start the encounter with 0 points of Pride. Whenever hit by an ability from the Sha of Pride or one of its minions, players gain 5 Pride. As a player's Pride increases to 25, 50, 75 and 100, Swelling Pride will inflict additional effects on that player.
Gift of the Titans
Norushen periodically grants players immunity to Pride for 20 sec.
Power of the Titans
Power of the Titans increases haste and all damage and healing done by%.
Swelling Pride
When the Sha of Pride reaches 100 energy, it releases a wave of dark energy, inflicting Shadow damage to all players, giving them 5 Pride. In addition, Swelling Pride will trigger a secondary effect on any player with 25 or more Pride.
Bursting Pride
When Swelling Pride hits a player that has 25 to 49 Pride, it creates a mass of Sha corruption at their location. Any player damaged by this explosion gains 5 Pride.
Projection
When Swelling Pride hits a player that has 50 to 74 Pride, a projection forms 15 yards from their current location. Projections explode after 6 seconds, inflicting Shadow damage to all players, unless the projection's creator is standing within it. Any player damaged by a projection's explosion gains 5 Pride.
Aura of Pride
When Swelling Pride hits a player that has 75 to 99 Pride, it afflicts them with Aura of Pride for 25 sec. Any player damaged by Aura of Pride gains 5 Pride.
Overcome
When players reach 100 Pride, they are Overcome, increasing their damage and healing done by%. Players hit by Swelling Pride while Overcome are permanently mind controlled and have their health increased by%.
Mark of Arrogance
This effect stacks. This effect is only removed by single target dispels and gives the dispeller 5 Pride when removed. In 25-player mode, the Sha of Pride marks 5 players.
Wounded Pride
The Sha of Pride wounds his current target for 15 sec. Wounded players gain 5 Pride whenever they suffer melee damage from the Sha of Pride.
Manifestation of Pride
The Sha of Pride periodically summons Manifestations of Pride to attack players.
Mocking Blast
Manifestations of Pride blast a random player, inflicting Shadow damage, giving them 5 Pride.
Last Word
When a Manifestation of Pride dies, it gives 5 Pride to the 2 closest players.
Self-Reflection
The Sha of Pride causes up to 5 players to reflect on their actions, creating a Reflection of Pride at their location. With each tick of Self-Reflection, the Sha focuses on players with higher levels of Pride, only targeting those with 25, 50, and then 75 Pride.
Reflection
Any player damaged by this explosion gains 5 Pride.
Corrupted Prison
The Sha of Pride activates 2 titan prisons, trapping a player inside each. Players remain stunned until all titan locks surrounding the prison have been activated. Titan locks are activated by having a player stand within the lock's rune and remain there until the prison is deactivated. In 25-player mode, the Sha of Pride activates 4 prisons.
Banishment
The Sha of Pride banishes a random player to the corrupted Sha Realm. Banished players leave behind a physical form of their pride and remain banished until it is destroyed. Players within the Sha realm move 50% faster and are compelled to continually run forward, unable to stop. Any player damaged by the Sha realm gains 5 Pride. In 25-player mode, the Sha of Pride banishes 3 players with each cast.
Orb of Light
Orbs of Light form within the corrupted Sha realm that heal players for% of the maximum health and weaken their corrupt image left behind in the corporeal world. Each orb increases the physical form's damage taken by%. This effect stacks.
Ethereal Corruption
Ethereal Corruption lurks within the corrupted Sha realm, instantly killing any player it comes into contact with.
Unstable Corruption
Players struck by the bolts suffer Shadow damage and gain 5 Pride. Closing a rift afflicts players with Weakened Resolve, preventing them from closing another rift for 1 min.
Reaching Attack
The Sha of Pride strikes at a distant target, inflicting% of weapon damage as Shadow and increasing Shadow damage taken by% for 8 sec. The Sha uses this ability when no targets are in melee range.
Unleashed
When the Sha of Pride reaches 30% health remaining, it becomes Unleashed. With its unleashed power, the Sha focuses on Norushen, instantly killing him. Players gain 5 Pride each time they are damaged by Unleashed.
Final Gift
As Norushen dies, he purifies all players, reducing their Pride to zero.
Loot
54 drops · item level 1 to 42 · 6 slots (Feet, Head, Neck, Shield, Trinket, Two-Hand) · all Bind on Pickup
 Assurance of ConsequenceAssurance of ConsequenceAssurance of Consequence
 Chest of the Cursed ConquerorChest of the Cursed ConquerorChest of the Cursed ConquerorChest of the Cursed ProtectorChest of the Cursed ProtectorChest of the Cursed ProtectorChest of the Cursed VanquisherChest of the Cursed VanquisherChest of the Cursed Vanquisher
 Choker of the Final WordChoker of the Final WordChoker of the Final WordCrown of Boastful WordsCrown of Boastful WordsCrown of Boastful WordsCrown of Boastful Words
 Gaze of ArroganceGaze of ArroganceGaze of ArroganceGaze of Arrogance
 Greatsword of Pride's FallGreatsword of Pride's FallGreatsword of Pride's FallGreatsword of Pride's FallGreaves of Sublime SuperiorityGreaves of Sublime SuperiorityGreaves of Sublime SuperiorityGreaves of Sublime Superiority
 Necklace of Fading LightNecklace of Fading LightNecklace of Fading Light
 Prismatic Prison of PridePrismatic Prison of PridePrismatic Prison of PrideSelf-Reflecting MaskSelf-Reflecting MaskSelf-Reflecting MaskSelf-Reflecting MaskShield of MockeryShield of MockeryShield of MockeryShield of Mockery
 Droplet of Y'Shaarj
 Gooey Sha-ling
Galakras
Warlord Zaela formed a close bond with Garrosh during events in the Twilight Highlands, and she and her Dragonmaw orcs have pledged loyalty to Garrosh's cause. Riding atop the fearsome Galakras, a direct descendant of the cataclysmic progenitor of all dragonkind, Zaela oversees the naval defense of Orgrimmar.
Abilities & Strategy
Prelude: Clear the Landing
The naval ships cannot land while the beachfront is still fortified with cannons. Take out the cannons to secure the landing.
Phase 1: Bring Her Down!
Warlord Zaela sends her finest Dragonmaw soldiers to battle. Two guardians keep watch over the Towers above, protecting the Anti-Air turrets. Defeating these guardians will give players access to the Anti-Air turrets. Two well-timed Anti-Air turret shots will send Galakras spiraling towards the ground.
Ranking Officials
Master Cannoneer Dagryn
Lieutenant General Krugruk
High Enforcer Thranok
Korgra the Snake
Foot Soldiers
Dragonmaw Bonecrusher
These deadly warriors will charge to a distant faction leader, stunning them. While stunned, they will perform a barrage of deadly attacks to the victim.
Dragonmaw Tidal Shaman
The Dragonmaw Tidal shaman will cast healing spells on their allies, and summon violent Tidal waves to damage their enemies.
Dragonmaw Flameslinger
These deadly archers shoot fire-tipped arrows at random players. The effect inflicts Fire damage on impact, and then burns the ground and any players standing within.
Dragonmaw Grunt
Dragonmaw Grunts wade into battle, crushing their enemies with devistating blows. They will also hurl a mighty axe at distant enemies.
Dragonmaw Wind Reaver
On the wings of their proto-drakes, Dragonmaw Wind Reavers hurl axes at random players, inflicting Physical damage. They will also net random players, rooting them in place.
Dragonmaw Proto-Drake
Dragonmaw Proto-Drakes channel a frontal cone of flame on their enemies.
Dragonmaw Flagbearer
Dragonmaw Flagbearers inspire those around them, dropping a banner that increases melee, ranged, and spell casting speed by%. It also increases damage dealt by% for all friendly targets within 15 yards for 2 min.
Kor'kron Demolisher
Warlord Zaela turns her seige weapons against her own towers, bombarding those inside. Bombard inflicts Physical damage and knocks down players inside the bombarded tower.
Allies
Lady Sylvanas Windrunner
Lady Sylvanas fires with precision at her enemies, occasionally awakening the dead to do her bidding.
Archmage Aethas Sunreaver
Lor'themar Theron
Lor'themar fights with fervor charging enemies with his blade, the Great Sword of the Sin'dorei, and picking off stragglers with his enchanted bow.
Demolition Crew
The Demolition crew will attempt to breach the doors barring the Anti-Air towers. If they are not protected, then the door breaching progress will be interrupted.
Phase 2: Galakras, The Last of His Progeny
Flames of Galakrond
Galakras spews the raw Flames of Galakrond at a random player. However, each player it passes through will decrease the severity of the flames, reducing the damage it deals to subsequent players. When the ball of flame reaches its final destination it will erupt, inflicting Fire damage to all players. This damage is also reduced in severity for each player that diminishes the Flame.
Pulsing Flames
Galakras erupts with molten fury, inflicting Fire damage to all players. Each pulse increases Galakras' Fire damage dealt by%.
Loot
88 drops · item level 40 to 42 · 11 slots (Feet, Finger, Hands, Head, Legs, Ranged +5 more) · all Bind on Pickup
Arcsmasher BracersArcsmasher BracersArcsmasher BracersArcsmasher BracersBone-Inlaid SandalsBone-Inlaid SandalsBone-Inlaid SandalsBone-Inlaid Sandals Cannoneer's Multipocket GunbeltCannoneer's Multipocket GunbeltCannoneer's Multipocket GunbeltCannoneer's Multipocket Gunbelt
 Dagryn's Discarded LongbowDagryn's Discarded LongbowDagryn's Discarded LongbowDagryn's Discarded LongbowDagryn's Fuselight BracersDagryn's Fuselight BracersDagryn's Fuselight BracersDagryn's Fuselight Bracers
 Dragonmaw Emergency StrapDragonmaw Emergency StrapDragonmaw Emergency StrapDragonmaw Emergency Strap
 Drakebinder GreatstaffDrakebinder GreatstaffDrakebinder GreatstaffDrakebinder Greatstaff
 Evil Eye of GalakrasEvil Eye of GalakrasEvil Eye of Galakras
 Extinguished Ember of GalakrasExtinguished Ember of GalakrasExtinguished Ember of Galakras
 Flameslinger's Fiery CowlFlameslinger's Fiery CowlFlameslinger's Fiery CowlFlameslinger's Fiery CowlGalakrond Control BandGalakrond Control BandGalakrond Control BandGrips of Tidal ForceGrips of Tidal ForceGrips of Tidal ForceGrips of Tidal Force
 Korgra's Venom-Soaked GauntletsKorgra's Venom-Soaked GauntletsKorgra's Venom-Soaked GauntletsKorgra's Venom-Soaked Gauntlets
 Krugruk's Rigid ShoulderplatesKrugruk's Rigid ShoulderplatesKrugruk's Rigid ShoulderplatesKrugruk's Rigid Shoulderplates
 Scalebane BracersScalebane BracersScalebane BracersScalebane BracersShoulderpads of Pulsing ProtectionShoulderpads of Pulsing ProtectionShoulderpads of Pulsing ProtectionShoulderpads of Pulsing ProtectionSkydancer BootsSkydancer BootsSkydancer BootsSkydancer BootsSmoldering Drakescale BracersSmoldering Drakescale BracersSmoldering Drakescale BracersSmoldering Drakescale Bracers
 Swift Serpent SignetSwift Serpent SignetSwift Serpent Signet
 Thranok's Shattering HelmThranok's Shattering HelmThranok's Shattering HelmThranok's Shattering HelmUnrepentant HeelsUnrepentant HeelsUnrepentant HeelsUnrepentant Heels
Garrosh Hellscream
Garrosh, son of Grommash Hellscream, first learned of his father's heroism when Thrall encountered the young orc in Outland. The seeds of pride were planted. Garrosh spearheaded Horde victories in Northrend and, as Warchief, consolidated Horde power amidst the chaos of the Cataclysm. But his visions of orc supremacy by any means have brought the armies of the world crashing down upon Orgrimmar... a final reckoning that Garrosh himself awaits with brutal relish.
Abilities & Strategy
Overview
At the beginning of the encounter Garrosh calls Kor'kron Warbringers and Far Seers to assault the players alongside him. Siege Engineers periodically join the battle and try to activate the Kor'kron Iron Stars on the sides of the room. Killing a Siege Engineer will prevent him from activating his Iron Star, but an active Iron Star will also crush any Kor'kron orcs in its path. When Garrosh reaches 10% health remaining, he will draw upon the power of Y'Shaarj to heal himself, gaining new abilities and no longer calling orc soldiers to his aid. During this phase, Garrosh will periodically pull all players into the Realm of Y'Shaarj, where they must battle their way through Sha minions to reach Garrosh and interrupt his efforts to draw more power from the heart. Every 25 energy Garrosh is allowed to gain will empower one of his abilities. Upon being reduced to 10% health a second time, Garrosh will fully drain the Heart of Y'Shaarj, granting him 100 energy and empowering all his abilities until he is defeated.
Stage One: The True Horde
Garrosh, wielding his new weapon with his True Horde and siege machines at his disposal, brings his might to bear upon any intruders. The True Horde join the battle more frequently as the fight progresses. This phase will continue until Garrosh reaches 10% health remaining.
Garrosh Hellscream
Warchief of the True Horde.
Desecrate
Hellscream's Warsong
Hellscream's Warsong inspires his allies, increasing Physical damage dealt by% and increasing health by%.
Kor'kron Warbringer
Warbringers stream in from the sides of the room and join the battle more frequently as the phase progresses.
Hamstring
Inflicts% of normal damage and reduces move speed by% for 10 sec.
Blood Frenzied
Blood Frenzied causes the Kor'kron Warbringers to attack nearby enemies.
Farseer Wolf Rider
The Farseers will join the battle less frequently than the grunts, but they too join the battle more frequently as the phase progresses.
Ancestral Fury
Being interrupted causes Fury, increasing cast speed by%. This effect stacks.
Ancestral Chain Heal
Heals a friendly target for a percentage of their max health, chaining to nearby friendly targets.
Chain Lightning
Inflicts Nature damage, chaining to nearby enemies.
Siege Engineer
The Siege Engineers enter from the side balcony and begin to power the Iron Star which will become active after 15 sec if the Siege Engineer is not killed.
Kor'kron Iron Star
After becoming activated by the Siege Engineers the Iron Star will roll across the room, slamming into the opposite wall.
Iron Star Impact
Inflicts massive damage to any players or Kor'kron that are caught in its path, knocking them back.
Exploding Iron Star
The impact of the Iron Star causes it to explode, inflicting Fire damage to nearby enemies. The damage inflicted decreases the farther away an enemy is from the explosion.
Intermission: Realm of Y'Shaarj
Periodically the call of Y'Shaarj will transport Garrosh and the players into the Realm of Y'Shaarj for 61 sec. Garrosh will heal for% of his total health and begin to Absorb Energy from the Heart of Y'Shaarj until players have defeated all Minions of Y'Shaarj inside the realm and interrupt Garrosh.
Y'Shaarj's Protection
Immune to damage. Defeating the Sha minions will dispel the protection. While under the protection of Y'Shaarj, Garrosh will absorb energy from the Heart.
Annihilate
Embodied Fear
Found in the Terrace of Endless Spring. Once all Embodied Fear are defeated Y'Shaarj's Protection will fade from Garrosh.
Consumed Courage
Causes Courage to spawn nearby when the Embodied Fear is defeated. Courage reduces damage taken by%.
Crushing Fear
While in the Terrace of the Endless Spring, random enemies are targeted with Crushing Fear.
Embodied Doubt
Found in the Temple of the Jade Serpent. Once all Embodied Doubt are defeated Y'Shaarj's Protection will fade from Garrosh.
Consumed Faith
Causes Faith to spawn nearby when the Embodied Doubt is defeated. Faith reduces damage taken by%. This effect stacks.
Embodied Doubt
Any Embodied Doubt in the Temple of the Jade Serpent will cast Embodied Doubt, inflicting Shadow damage to all enemies within the realm of Y'Shaarj. Increases damage taken by Embodied Doubt by%. Stacks.
Embodied Despair
Found in the Temple of the Red Crane. Once both Embodied Despair are defeated Y'Shaarj's Protection will fade from Garrosh.
Consumed Hope
Causes Hope to spawn nearby when the Embodied Despair is defeated. Hope reduces damage taken by%.
Ultimate Despair
Death of an Embodied Despair causes the other to cast Ultimate Despair. Inflicting Shadow damage and increases damage taken by Ultimate Despair by%. Stacks.
Stage Two: Power of Y'Shaarj
After absorbing the Power of Y'Shaarj, Garrosh will heal to full health as Y'Shaarj's blood grants Garrosh new powers.
Whirling Corruption
The damage inflicted decreases the farther away the enemy is from Garrosh. When Garrosh reaches 25 Energy, Whirling Corruption becomes Empowered.
Empowered Whirling Corruption
Touch of Y'Shaarj
Garrosh will afflict players with Touch of Y'Shaarj. Touched players will try to spread the Touch of Y'Shaarj. Touch of Y'Shaarj is removed when the player is reduced to 20% of max health. When Garrosh reaches 50 Energy, Touch of Y'Shaarj becomes Empowered.
Empowered Touch of Y'Shaarj
At 50 Energy, Garrosh will afflict players with Empowered Touch of Y'Shaarj, transforming them into a Sha that is immune to loss of control effects and has increased health. Touched players will try to spread the Touch of Y'Shaarj. Touch of Y'Shaarj is removed when the player is reduced to 20% of max health.
Desecrate
When Garrosh reaches 75 Energy, Desecrate becomes Empowered.
Desecrated Weapon
The power of Y'Shaarj seeps from the Desecrated Weapon. As the health of the weapon gets lower, the radius of the Desecrated ground becomes smaller.
Empowered Desecrate
At 75 Energy, Garrosh creates an Empowered Desecrated Weapon that gains Power of Y'Shaarj, causing it to become indestructible and regain health over time.
Gripping Despair
This effect stacks. When Garrosh reaches 100 Energy, Gripping Despair becomes Empowered.
Stage Three: MY WORLD
Upon reaching 10% health a second time, Garrosh will absorb the remaining power of Y'Shaarj, gaining full energy, healing and empowering all of his abilities.
Empowered Whirling Corruption
Minion of Y'Shaarj
A minion of Y'Shaarj will cast Empowering Corruption when it is killed. Empowering Corruption heals nearby Minions of Y'Shaarj to full and increases max health by% and increases damage dealt by%. This effect stacks.
Empowered Touch of Y'Shaarj
Garrosh will afflict players with Empowered Touch of Y'Shaarj, transforming them into a Sha that is immune to loss of control effects and has increased health. Touched players will try to spread the Touch of Y'Shaarj. Touch of Y'Shaarj is removed when the player is reduced to 20% of max health.
Empowered Desecrate
Empowered Gripping Despair
When Empowered Gripping Despair expires or is removed it causes Explosive Despair.
Explosive Despair
Inflicts Shadow damage equal to the value of Gripping Despair. Increases damage taken by Explosive Despair by% for each stack of Empowered Gripping Despair when it expired or was removed.
Loot
93 drops · item level 10 to 42 · 9 slots (Chest, Head, Held In Off-hand, Legs, One-Hand, Shoulder +3 more) · all Bind on Pickup
Belt of the Broken PactBelt of the Broken PactBelt of the Broken PactBelt of the Broken Pact Black Blood of Y'ShaarjBlack Blood of Y'ShaarjBlack Blood of Y'Shaarj
 Chestguard of Relentless TyrannyChestguard of Relentless TyrannyChestguard of Relentless TyrannyChestguard of Relentless TyrannyChestplate of Fallen PassionChestplate of Fallen PassionChestplate of Fallen PassionChestplate of Fallen PassionCord of Black DreamsCord of Black DreamsCord of Black DreamsCord of Black DreamsCowl of Smoking DreamsCowl of Smoking DreamsCowl of Smoking DreamsCowl of Smoking Dreams
 Curse of HubrisCurse of HubrisCurse of HubrisEbon Ritual HoodEbon Ritual HoodEbon Ritual HoodEbon Ritual Hood
 Essence of the Cursed ConquerorEssence of the Cursed Conqueror
 Essence of the Cursed ProtectorEssence of the Cursed Protector
 Essence of the Cursed VanquisherEssence of the Cursed VanquisherGreathelm of the WarchiefGreathelm of the WarchiefGreathelm of the WarchiefGreathelm of the WarchiefHopeglow SpauldersHopeglow SpauldersHopeglow SpauldersHopeglow Spaulders
 Horned Mace of the Old OnesHorned Mace of the Old OnesHorned Mace of the Old OnesHorned Mace of the Old Ones
 Kor'kron Elite SkullmaskKor'kron Elite SkullmaskKor'kron Elite SkullmaskKor'kron Elite Skullmask
 Kor'kron Juggernaut
 Kor'kron Spire of SupremacyKor'kron Spire of SupremacyKor'kron Spire of SupremacyKor'kron Spire of Supremacy
 Legplates of Unthinking StrifeLegplates of Unthinking StrifeLegplates of Unthinking StrifeLegplates of Unthinking StrifeMantle of Looming DarknessMantle of Looming DarknessMantle of Looming DarknessMantle of Looming DarknessPenetrating Gaze of Y'ShaarjPenetrating Gaze of Y'ShaarjPenetrating Gaze of Y'ShaarjPenetrating Gaze of Y'Shaarj
 Revelations of Y'ShaarjRevelations of Y'ShaarjRevelations of Y'ShaarjRevelations of Y'Shaarj
 Seal of Karmic ReturnSeal of Karmic ReturnSeal of Karmic ReturnSeal of Karmic ReturnShoulderguards of Intended PowerShoulderguards of Intended PowerShoulderguards of Intended Power
Spoils of Pandaria
When Garrosh gazed across Pandaria, he saw untapped power. During the course of his campaign, Garrosh has plundered weapons, treasures, and artifacts of the pandaren, the mogu, and the mantid. They are kept in a warehouse deep within his underground base, guarded by a mysterious security system that appears to be of Titan origins.
Abilities & Strategy
Overview
Players must do battle with animated creatures, objects, and spirits in each quadrant of the warehouse before the defense system fully powers up. Defeating these enemies releases trapped Titan Energy to power four manual override levers to deactivate the defense system. Players initially have access to two of the four quadrants of the room, and gain access to additional quadrants by using the manual override levers. Opening crates throughout the room reveals the entities inside, but opening too many crates at the same time may overwhelm the raid.
Massive Crate of Goods
These massive crates of goods carry monstrous war-torn creatures. A large amount of Titan Energy powers them, but it may take considerable effort to defeat them.
Mogu Crate
Shao-Tien Elder Council
Jun-Wei
Zu Yin
Xiang-Lin
Kun-Da
Mantid Crate
Mantid Commanders
Stout Crate of Goods
These hefty crates of goods carry seasoned enemies. A medium amount of Titan Energy fuels their animation and caution should be taken to defeat them.
Mogu Crate
Modified Anima Golem
Mogu Shadow Ritualist
The soul of a powerful Shao-Tien Archritualist emerges to defend his phylactery. Any damage inflicted to the Archritualist is copied to the phylactery, and defeating either destroys the other.
Mantid Crate
Zar'thik Amber Priest
Set'thik Wind Wielder
Lightweight Crate of Goods
These small crates of goods carry front-line enemy forces. A small amount of Titan Energy fuels their creation and can be defeated with fewer players.
Mogu Crate
Animated Stone Mogu
Burial Urn
Quilen Guardians
Mantid Crate
Sri'thik Bombardier
Amber-Encased Kunchong
Kor'thik Warcaller
Crate of Pandaren Relics
These small crates of goods carry rare artifacts of Pandaren origin. Titan Energy does not fuel their animation, instead they are guarded by powerful Pandaren spirits.
Ancient Brewmaster Spirit
Upon reaching low health, the Ancient Brewmaster Spirit allows players to consume the weapon's blessing.
Keg Toss
Breath of Fire
Bellows out a channel of fire, inflicting Fire damage.
Blade of the Hundred Steps
Imbues all players of the tank role in the current quadrant of this warehouse with a boon. This effect bypasses a creature's immunity to stuns and has a 15-second cooldown.
Wise Mistweaver Spirit
Upon reaching low health, the Wise Mistweaver Spirit allows players to consume the weapon's blessing.
Eminence
When the Monk deals damage, she will heal equal to% of the damage dealt.
Gusting Crane Kick
Staff of Resonating Water
Imbues all players of the healer role in the current quadrant of this warehouse with a boon. Heals have a chance to create a wave of force that contains healing energy which travels forward yards. Any friendly targets in the wave's path consume healing energy based on their missing health. This effect has an 8-second cooldown. The wave also damages enemies for Nature damage. After or once all healing energy has been consumed, the wave dissipates.
Nameless Windwalker Spirit
Upon reaching low health, the Nameless Windwalker Spirit allows players to consume the weapon's blessing.
Path of Blossoms
These blossoms linger.
Claw of Burning Anger
Imbues all players of the damage dealer role in the current quadrant of this warehouse with a boon. Attacks have a chance to damage a target for Fire damage. This effect has a 5-second cooldown.
Unstable Spark
In a last ditch effort, any being animated by the Unstable Titan Energy transforms into a raw Unstable Spark, leaps to a distant quadrant and attempts to go Supernova. Successfully casting Supernova inflicts Nature damage to all nearby enemies.
Lift Hook
Players may use crate lifting hooks to travel from the warehouse subfloor to the main platform throughout the fight.
Loot
84 drops · item level 40 to 42 · 13 slots (Chest, Feet, Finger, Hands, Head, Legs +7 more) · all Bind on Pickup
Ancient Archer's ChestguardAncient Archer's ChestguardAncient Archer's ChestguardAncient Archer's ChestguardAncient Mogu Tower ShieldAncient Mogu Tower ShieldAncient Mogu Tower ShieldAncient Mogu Tower ShieldArrowflight GirdleArrowflight GirdleArrowflight GirdleArrowflight GirdleAvool's Ancestral BracersAvool's Ancestral BracersAvool's Ancestral BracersAvool's Ancestral BracersBracers of the Pristine PurifierBracers of the Pristine PurifierBracers of the Pristine PurifierBracers of the Pristine PurifierChitin-Link Chain BeltChitin-Link Chain BeltChitin-Link Chain BeltChitin-Link Chain Belt Enchanted Shao-Tien SaberEnchanted Shao-Tien SaberEnchanted Shao-Tien SaberEnchanted Shao-Tien SaberHelm of the Night WatchmanHelm of the Night WatchmanHelm of the Night WatchmanHelm of the Night Watchman
 Immaculately Preserved WandImmaculately Preserved WandImmaculately Preserved WandImmaculately Preserved WandKlaxxi Grips of RejuvenationKlaxxi Grips of RejuvenationKlaxxi Grips of RejuvenationKlaxxi Grips of Rejuvenation
 Lost Necklace of the Mogu EmpressLost Necklace of the Mogu EmpressLost Necklace of the Mogu EmpressMantid Carapace AugmentsMantid Carapace AugmentsMantid Carapace AugmentsMantid Carapace AugmentsMantid Vizier's RobesMantid Vizier's RobesMantid Vizier's RobesMantid Vizier's RobesMogu Mindbender's GreavesMogu Mindbender's GreavesMogu Mindbender's GreavesMogu Mindbender's GreavesOminous Mogu GreatbootsOminous Mogu GreatbootsOminous Mogu GreatbootsOminous Mogu GreatbootsPandaren RoofsprintersPandaren RoofsprintersPandaren RoofsprintersPandaren RoofsprintersPlate Belt of the War-HealerPlate Belt of the War-HealerPlate Belt of the War-HealerPlate Belt of the War-Healer
 Seal of the Forgotten KingsSeal of the Forgotten KingsSeal of the Forgotten Kings
 Shado-Pan Reliquary KiltShado-Pan Reliquary KiltShado-Pan Reliquary KiltShado-Pan Reliquary KiltSigil of RampageSigil of RampageSigil of RampageUntarnishable GreatbeltUntarnishable GreatbeltUntarnishable Greatbelt
Galakras
Warlord Zaela formed a close bond with Garrosh during events in the Twilight Highlands, and she and her Dragonmaw orcs have pledged loyalty to Garrosh's cause. Riding atop the fearsome Galakras, a direct descendant of the cataclysmic progenitor of all dragonkind, Zaela oversees the naval defense of Orgrimmar.
Abilities & Strategy
Prelude: Clear the Landing
The naval ships cannot land while the beachfront is still fortified with cannons. Take out the cannons to secure the landing.
Phase 1: Bring Her Down!
Warlord Zaela sends her finest Dragonmaw soldiers to battle. Two guardians keep watch over the Towers above, protecting the Anti-Air turrets. Defeating these guardians will give players access to the Anti-Air turrets. Two well-timed Anti-Air turret shots will send Galakras spiraling towards the ground.
Ranking Officials
Master Cannoneer Dagryn
Lieutenant General Krugruk
High Enforcer Thranok
Korgra the Snake
Foot Soldiers
Dragonmaw Bonecrusher
These deadly warriors will charge to a distant faction leader, stunning them. While stunned, they will perform a barrage of deadly attacks to the victim.
Dragonmaw Tidal Shaman
The Dragonmaw Tidal shaman will cast healing spells on their allies, and summon violent Tidal waves to damage their enemies.
Dragonmaw Flameslinger
These deadly archers shoot fire-tipped arrows at random players. The effect inflicts Fire damage on impact, and then burns the ground and any players standing within.
Dragonmaw Grunt
Dragonmaw Grunts wade into battle, crushing their enemies with devistating blows. They will also hurl a mighty axe at distant enemies.
Dragonmaw Wind Reaver
On the wings of their proto-drakes, Dragonmaw Wind Reavers hurl axes at random players, inflicting Physical damage. They will also net random players, rooting them in place.
Dragonmaw Proto-Drake
Dragonmaw Proto-Drakes channel a frontal cone of flame on their enemies.
Dragonmaw Flagbearer
Dragonmaw Flagbearers inspire those around them, dropping a banner that increases melee, ranged, and spell casting speed by%. It also increases damage dealt by% for all friendly targets within 15 yards for 2 min.
Kor'kron Demolisher
Warlord Zaela turns her seige weapons against her own towers, bombarding those inside. Bombard inflicts Physical damage and knocks down players inside the bombarded tower.
Allies
Lady Jaina Proudmoore
Vereesa Windrunner
Vereesa Windrunner fires with precision at her enemies, occasionally striking multiple enemies.
King Varian Wyrnn
King Varian Wrynn devastates his enemies with a storm of swords. He will occasionally taunt enemies to engage them face-to-face.
Demolition Crew
The Demolition crew will attempt to breach the doors barring the Anti-Air towers. If they are not protected, then the door breaching progress will be interrupted.
Phase 2: Galakras, The Last of His Progeny
Flames of Galakrond
Galakras spews the raw Flames of Galakrond at a random player. However, each player it passes through will decrease the severity of the flames, reducing the damage it deals to subsequent players. When the ball of flame reaches its final destination it will erupt, inflicting Fire damage to all players. This damage is also reduced in severity for each player that diminishes the Flame.
Pulsing Flames
Galakras erupts with molten fury, inflicting Fire damage to all players. Each pulse increases Galakras' Fire damage dealt by%.
Loot
88 drops · item level 40 to 42 · 11 slots (Feet, Finger, Hands, Head, Legs, Ranged +5 more) · all Bind on Pickup
Arcsmasher BracersArcsmasher BracersArcsmasher BracersArcsmasher BracersBone-Inlaid SandalsBone-Inlaid SandalsBone-Inlaid SandalsBone-Inlaid SandalsCannoneer's Multipocket GunbeltCannoneer's Multipocket GunbeltCannoneer's Multipocket GunbeltCannoneer's Multipocket GunbeltDagryn's Discarded LongbowDagryn's Discarded LongbowDagryn's Discarded LongbowDagryn's Discarded LongbowDagryn's Fuselight BracersDagryn's Fuselight BracersDagryn's Fuselight BracersDagryn's Fuselight BracersDragonmaw Emergency StrapDragonmaw Emergency StrapDragonmaw Emergency StrapDragonmaw Emergency StrapDrakebinder GreatstaffDrakebinder GreatstaffDrakebinder GreatstaffDrakebinder GreatstaffEvil Eye of GalakrasEvil Eye of GalakrasEvil Eye of GalakrasExtinguished Ember of GalakrasExtinguished Ember of GalakrasExtinguished Ember of GalakrasFlameslinger's Fiery CowlFlameslinger's Fiery CowlFlameslinger's Fiery CowlFlameslinger's Fiery CowlGalakrond Control BandGalakrond Control BandGalakrond Control BandGrips of Tidal ForceGrips of Tidal ForceGrips of Tidal ForceGrips of Tidal ForceKorgra's Venom-Soaked GauntletsKorgra's Venom-Soaked GauntletsKorgra's Venom-Soaked GauntletsKorgra's Venom-Soaked GauntletsKrugruk's Rigid ShoulderplatesKrugruk's Rigid ShoulderplatesKrugruk's Rigid ShoulderplatesKrugruk's Rigid ShoulderplatesScalebane BracersScalebane BracersScalebane BracersScalebane BracersShoulderpads of Pulsing ProtectionShoulderpads of Pulsing ProtectionShoulderpads of Pulsing ProtectionShoulderpads of Pulsing ProtectionSkydancer BootsSkydancer BootsSkydancer BootsSkydancer BootsSmoldering Drakescale BracersSmoldering Drakescale BracersSmoldering Drakescale BracersSmoldering Drakescale BracersSwift Serpent SignetSwift Serpent SignetSwift Serpent SignetThranok's Shattering HelmThranok's Shattering HelmThranok's Shattering HelmThranok's Shattering HelmUnrepentant HeelsUnrepentant HeelsUnrepentant HeelsUnrepentant HeelsAchievements
38 achievements tied to Siege of Orgrimmar, worth 340 achievement points in total.
 Vale of Eternal SorrowsDefeat the bosses in the scarred Vale of Eternal Blossoms in the prelude to the Siege of Orgrimmar.10
 Gates of RetributionDefeat the bosses in the exterior of Orgrimmar in the Siege of Orgrimmar raid.10
 The UnderholdDefeat the bosses at the entrance to Garrosh's secret compound in the Siege of Orgrimmar raid.10
 DownfallDefeat the bosses within Garrosh's inner sanctum in the Siege of Orgrimmar raid.10
 Conqueror of OrgrimmarDefeat Garrosh Hellscream in Siege of Orgrimmar on Normal or Heroic difficulty.Title Reward: Conqueror of Orgrimmar10
- Liberator of OrgrimmarDefeat Garrosh Hellscream in Siege of Orgrimmar on Normal or Heroic difficulty.Title Reward: Liberator of Orgrimmar10
 Heroic: ImmerseusDefeat Immerseus in Siege of Orgrimmar on Heroic difficulty.10
 Heroic: Fallen ProtectorsDefeat the Fallen Protectors in Siege of Orgrimmar on Heroic difficulty.10
 Heroic: NorushenComplete Norushen's trial in Siege of Orgrimmar on Heroic difficulty.10
 Heroic: Sha of PrideDefeat the Sha of Pride in Siege of Orgrimmar on Heroic difficulty.10
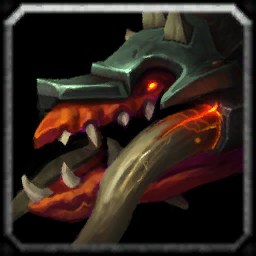 Heroic: GalakrasDefeat Galakras in Siege of Orgrimmar on Heroic difficulty.10
 Heroic: Iron JuggernautDefeat the Iron Juggernaut in Siege of Orgrimmar on Heroic difficulty.10
 Heroic: Kor'kron Dark ShamanDefeat the Kor'kron Dark Shaman in Siege of Orgrimmar on Heroic difficulty.10
 Heroic: General NazgrimDefeat General Nazgrim in Siege of Orgrimmar on Heroic difficulty.10
 Heroic: MalkorokDefeat Malkorok in Siege of Orgrimmar on Heroic difficulty.10
 Heroic: Spoils of PandariaComplete the Spoils of Pandaria event in Siege of Orgrimmar on Heroic difficulty.10
 Heroic: Thok the BloodthirstyDefeat Thok the Bloodthirsty in Siege of Orgrimmar on Heroic difficulty.10
- Heroic: Siegecrafter BlackfuseDefeat Siegecrafter Blackfuse in Siege of Orgrimmar on Heroic difficulty.10
 Heroic: Paragons of the KlaxxiDefeat the Klaxxi Paragons in Siege of Orgrimmar on Heroic difficulty.10
 Heroic: Garrosh HellscreamDefeat Garrosh Hellscream in Siege of Orgrimmar on Heroic difficulty.Title Reward: Hellscream's Downfall10
 No More TearsDefeat Immerseus after killing 10 Tears of the Vale in Siege of Orgrimmar on Flexible, Normal, or Heroic difficulty.10
 Go LongTransfer the Mark of Anguish to at least 5 unique players over a total of 200 yards or more during a single Desperate Measures phase, and then defeat the Fallen Protectors in Siege of Orgrimmar on Flexible, Normal, or Heroic difficulty.10
 None Shall PassDefeat the Amalgam of Corruption without allowing any unleashed corruption to fuse with it in Siege of Orgrimmar on Flexible, Normal, or Heroic difficulty.10
 Swallow Your PrideDefeat the Sha of Pride in Siege of Orgrimmar on Flexible, Normal, or Heroic difficulty after no player has gained Pride from Manifestations of Pride while Norushen is alive.10
 The Immortal VanguardDefeat Galakras without having allowed a single friendly NPC to perish in battle in Siege of Orgrimmar on Flexible, Normal, or Heroic difficulty.10
 Fire in the Hole!Stomp on 6 superheated Crawler Mines and then defeat the Iron Juggernaut in Siege of Orgrimmar on Flexible, Normal, or Heroic difficulty.10
 Rescue RaidersRescue a set of caged prisoners, a group of unwilling combat participants, and Ji Firepaw before defeating the Kor'kron Dark Shaman in Siege of Orgrimmar on Flexible, Normal, or Heroic difficulty.10
 Gamon Will Save Us!Defeat General Nazgrim while Gamon is alive and participating in the battle in Siege of Orgrimmar on Flexible, Normal, or Heroic difficulty.10
 Unlimited PotentialTransform a Corrupted Skullsplitter into a Corrupted Amalgamation and then defeat Malkorok in Siege of Orgrimmar on Flexible, Normal or Heroic difficulty.10
 Lasers and Magnets and Drills! Oh My!Defeat Siegecrafter Blackfuse without destroying each of the following weapons in Siege of Orgrimmar on Flexible, Normal or Heroic difficulty:10
 Criss CrossComplete the Spoils of Pandaria encounter in Siege of Orgrimmar on Flexible, Normal, or Heroic difficulty without any raid member defeating both a Mantid and a Mogu enemy.10
 Giant Dinosaur vs. Mega SnailOpen the Thrice-Locked Cage during the Thok the Bloodthirsty encounter in Siege of Orgrimmar on Flexible, Normal, or Heroic difficulty, and then allow its inhabitant to feast upon Thok's corpse once you have defeated the encounter.10
- Now We are the ParagonDefeat the Paragons after assuming the mantle of three different Paragons in Siege of Orgrimmar on Flexible, Normal, or Heroic difficulty.10
 Strike!Kill 18 Kor'kron Warbringers with a single Iron Star and then defeat Garrosh in Siege of Orgrimmar on Flexible, Normal, or Heroic difficulty.10
 Ahead of the Curve: Garrosh Hellscream (10 player)Defeat Garrosh Hellscream on 10-Player Normal difficulty, prior to the release of the next tier of content.Reward: Reins of the Kor'kron War Wolf
- Cutting Edge: Garrosh Hellscream (10 player)Defeat Garrosh Hellscream on 10-Player Heroic difficulty, prior to the release of the next tier of content.
- Ahead of the Curve: Garrosh Hellscream (25 player)Defeat Garrosh Hellscream on 25-Player Normal difficulty, prior to the release of the next tier of content.Reward: Reins of the Kor'kron War Wolf
- Cutting Edge: Garrosh Hellscream (25 player)Defeat Garrosh Hellscream on 25-Player Heroic difficulty, prior to the release of the next tier of content.
More Mists of Pandaria Raids
Other raids from the same expansion.