 TheWoWDB
If you are unable to use the smoke bomb in stage 3, try reloading your UI. (/reloadui)
Quest

The Unseen Blade
Quest facts and objectives from the current retail game data.
The highest voted Wowhead comments for this page. They are community notes, not TheWoWDB comments.
If anybody has come here frustrated because they keep aggroing the guards and dying, don't give up. I'm an older player with slow reactions and if I can do it, anybody can :)
Just use lots of Sap and Shadowstep. Sap the regular guards and other characters that you have to get close to. When you see a patroller (or anybody else with a blue circle over their head) Shadowstep them then Sap quickly before they aggro.
Apologies if this is obvious - I just thought it might help anybody (like me) who's not an expert player and is tearing their hair out :)
Video Guide: https://www.youtube.com/watch?v=_k9lTf4IVRA
1. The Unseen Blade (Scenario)
• Accept the quest, The Unseen Blade, from [npc=107979] at coords 36.8, 52.6 (Elwynn Forest).Stage 1 - On High Alert
• Travel northwest to just outside the gates of Stormwind City, at coords 32.2, 49.7.
• Listen to [npc=98094] converse with [npc=108015].
• Activate/maintain your Stealth and proceed into Stormwind City.Stage 2 - Live Drop
• Travel down the Valley of Heroes, into the Stormwind City Trade District (toward coords 66.1, 76.8), and use Sap on any of the [npc=108058] mobs. They are identifiable with the blue-green "eye" above their heads, while you are under Stealth.
- - The key is to target these mobs well outside of both your and their range, and use Sap as soon as they enter range. It should be noted that they can see through your Stealth at almost the same time as when Sap is available.
- - If you don't Sap them in time, they will use a [spell=218105], and break through your Stealth. If that happens, activate Vanish.
• After reaching 66, 76, proceed into Trias Cheese shop, and go upstairs.
• Click on the [object=251016], located on the table near [npc=108054].Stage 3 - Tricks of the Trade
• Activate your Stealth, and go downstairs.
• Travel northwest to the Trade District Auction House at 61.6, 72.3.
• Go inside the Auction House/Trader's Hall and use the [spell=214645], you were provided.Stage 4 - To Catch a Cultist
• Go outside, and use Pick Pocket on a [npc=109966] until you find the [item=139178]. After you receive the it, [spell=218893].Stage 5 - Rendezvous
• Travel northeast, into the Old Town District to coords 73.9, 61.7.
• Cut through the alley, continuing to 74.7, 55.9.Stage 6 - We Need Answers
• Click on the door to the tavern to pick the lock, and go inside.
• Kill the [npc=108217] first, followed next with the pair of [npc=108216] mobs.
• After killing the first group, you will face off against [npc=108218] and her pets: [npc=109730] and [npc=109731].Stage 7 - On the Trail
• After killing [npc=108218], activate your Stealth and exit the building. Proceed northwest toward 70.1, 52.9.
• Sap the nearby [npc=108435], as he can also see through your Stealth.
• Once you reach the canals, turn right, proceeding to coords 72.4, 47.2, in the direction of the Keep.
• Use [spell=36554] on [npc=108399], but don't attack him! Instead, continue northeast, and up the stairs, to 82.6, 29.8.
- - Remember to Sap any guards that can see through your stealth, but now also avoid the semi-stealth Explosive Traps located on the ground.
• Enter the Keep, continuing northeast, toward the throne to 84.6, 32.1.
• Use [spell=36554] on the [npc=108333].Stage 8 - Marked for Death
• After the cut-scene, defeat Melris Malagan.Stage 9 - Dark Gift
• After killing the Herald, [npc=108222] will drop her daggers on the ground, for you to pick up.
• Pick up [object=251107], to claim your artifact weapon.Stage 10 - Taking Your Leave (Final Stage)
• [npc=108367] shows up to kick you out of Stormwind City.
• After listening to [npc=108367], you and [npc=108222] will travel southeast to 86.9, 37.2.
• Click the [object=251123].
• Travel back to your Order Hall.
- - One of the entrances is located southeast, in the Glorious Goods store at 52, 70. Enter the store and show your insignia to [npc=97004].
- - Enter the Hidden Corridor and follow it downstairs. Follow the subsequent tunnel to the [zone=8012].
• Turn in the quest to [npc=94141], located at 42.3, 73.8.
Quest facts
Quest ID42504
Check whether you have already completed this quest
in-game: /run print(C_QuestLog.IsQuestFlaggedCompleted(42504))
Requirements
FactionAlliance only
ClassRogue
Read from the Blizzard quest API.
What to do
WhereDalaran, Dalaran, Elwynn Forest
StorylineThe Kingslayers, step 6 of 7
Rewards20g 22s, 27,650 XP
Description
We can't let Stormwind fall to the Legion, and I don't trust Shaw or his SI:7 goons to take care of the Hand on their own. The two of us need to handle this while there's still time. The entire city is on edge from murmurs of the cult's activities. They're as likely to turn on you as they are the cultists if you aren't careful. The other Shadows spoke highly of your skills. Are you in?
Where to go
Pins are the quest’s own POI points from the current retail client, projected onto the in-game zone map. The game marks one blob as the quest’s turn-in; the rest are objective areas. Points that fall outside a map’s window are dropped rather than guessed at.
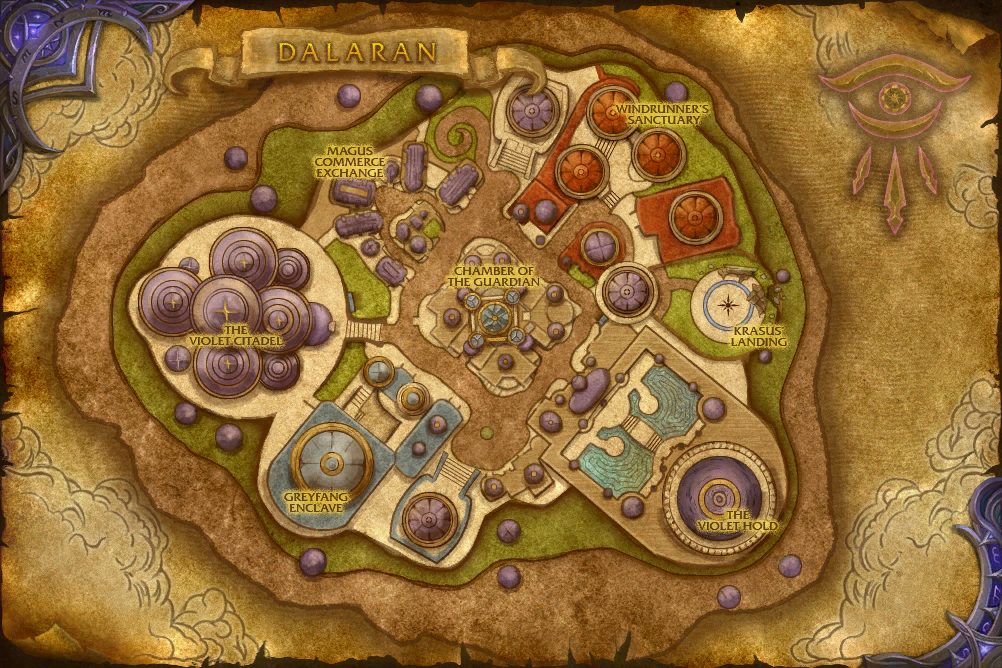 Turn-inObjective area
In-game waypoint: /way #627 53.4 71.0
 Objective areaObjective area
In-game waypoint: /way #37 33.2 50.0
Coordinates
- Turn-inDalaran 53.4, 71.0
/way #627 53.4 71.0 - Objective areaDalaran 53.5, 71.2
/way #627 53.5 71.2 - Objective areaElwynn Forest 33.2, 50.0
/way #37 33.2 50.0 - Objective areaElwynn Forest 36.8, 52.6
/way #37 36.8 52.6
Map coordinates of the pins above. An area the client draws as a shape is given by the centre of its points.
Nearby on the Dalaran map
- Champion: Tess Greymane same spot
- The Dreadblades same spot
- Convincin' Old Yancey same spot
- Fancy Lads and Buccaneers same spot
- Champion: Fleet Admiral Tethys same spot
- Champion: Valeera Sanguinar same spot
- Fangs of the Devourer same spot
- Black Rook Hold: Into Black Rook Hold same spot
- Throwing SI:7 Off the Trail same spot
- The Raven's Eye same spot
Quests whose map markers the client places closest to this one on Dalaran, nearest first. Distances are straight lines between the markers.
Getting there
Alliance flight points closest to the quest’s turn-in marker on Dalaran:
- Dalaran
- Western Suramar
- Deliverance Point, Broken Shore
From the turn-in, the objective areas lie:
- Objective area
- Objective area
Straight-line distances in yards between the quest’s own map markers (QuestPOI) and the client’s flight-point positions (TaxiNodes); flight paths and terrain are not modelled.
Community notes from Wowhead · 74 comments
Top 3 shown aboveThe comments below were written by Wowhead users. They are community notes, not TheWoWDB comments. See them in context on Wowhead.
The top 3 are shown in Top Comments above. Read all 74 on Wowhead.
Money20 gold22 silver
Experience27,650 XP
Storyline
The Kingslayers
Part 6 of 7.
Previous: Preparation · Next: The Unseen Blade
- 1Finishing the Job
- 2No Sanctuary
- 3Codebreaker
- 4Cloak and Dagger
- 5Preparation
- 6The Unseen Blade
- 7The Unseen Blade
Storyline order is the client’s own QuestLine data from the current retail build.
Where this quest fits
Before this quest
Taken from the storyline's own step order.
- Preparation
<With Althea's escape there is only one place to go: Stormwind.> <If Garona is keeping a similar pace on the cult's trail, she's bound to be making preparations to enter the city herself.> <Finding her is paramount before moving into the city.>
Other quests with this name
This one: Alliance only · Rogue · Level 10-45.
The storyline at a glance
The Kingslayers has 7 steps, from Finishing the Job to The Unseen Blade.
Maps its steps are placed on (steps per map): Dalaran (3), Duskwood (2), Blasted Lands (1), Elwynn Forest (1).
Other storylines on the Dalaran map
- Saga of the Shadowblade I
- The Uncrowned
- Saga of the Shadowblade III
- Saga of the Shadowblade IV
- Saga of the Shadowblade II
Steps, storylines and map placement from the client’s QuestLine, prerequisite and QuestPOI data; neighbouring quest text is Blizzard’s own (quest API), shortened to its opening sentences.