 TheWoWDB
Raid - The Burning Crusade
Black Temple
9 encounters, 102 boss abilities and 237 drops, with the Adventure Guide’s own ability and strategy notes for each fight. Every drop links to its item page; tradeable drops carry a live Auction House price.
Quick Facts
| Type | Raid |
|---|---|
| Expansion | The Burning Crusade |
| Encounters | 9 |
| Boss abilities | 102 |
| Drops | 237 |
| Item level | 1 to 33 |
| Tradeable drops | 0 |
| Difficulties | Normal, Timewalking |
Difficulties and Lockouts
Black Temple has 2 difficulties in the game data: Normal and Timewalking save you to a weekly lockout.
| Difficulty | Players | Level range | Lockout |
|---|---|---|---|
| Normal | 30 | 30 | Weekly |
| Timewalking | 30 | 30+ | Weekly |
Loot Table Value
Every one of Black Temple’s 237 drops is Bind on Pickup, so none of this loot can ever reach the Auction House. The table below the bosses is the complete reward list; its value is item level, not gold.
Where It Is
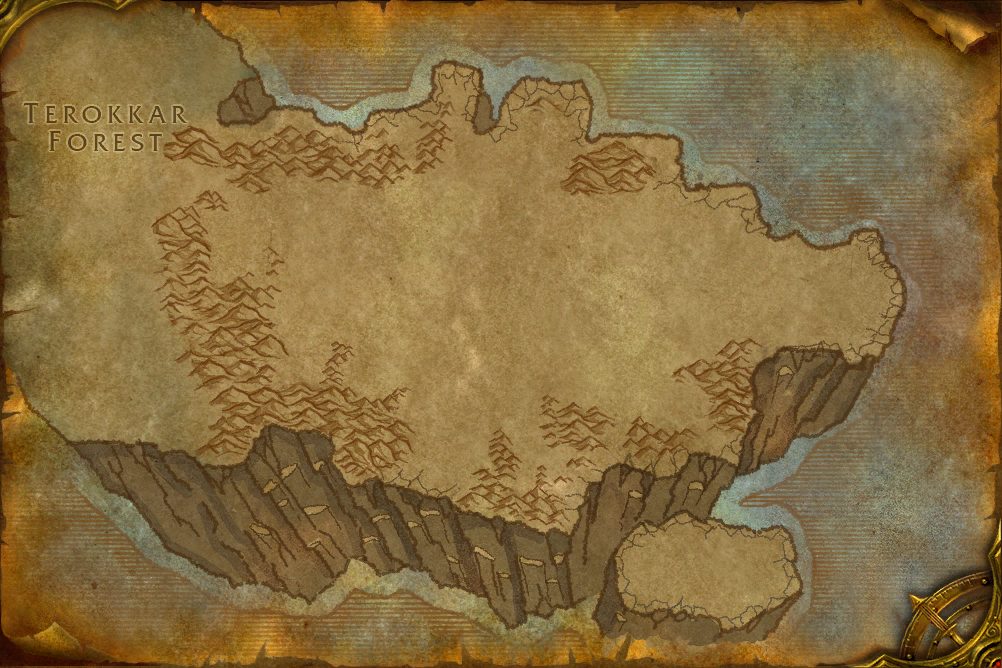
The entrance to Black Temple is in Ruins of Karabor, Shadowmoon Valley at 71.0, 47.0.
 Fel Pit FracasShadowmoon SlamEntrance 71.0, 47.0
Shadowmoon Valley, from the game’s own world map art. The framed marker is the Adventure Guide entrance; gold diamonds are the zone’s landmarks.
3D Model
First-party render from the game files. Model © Blizzard Entertainment.
Instance Map
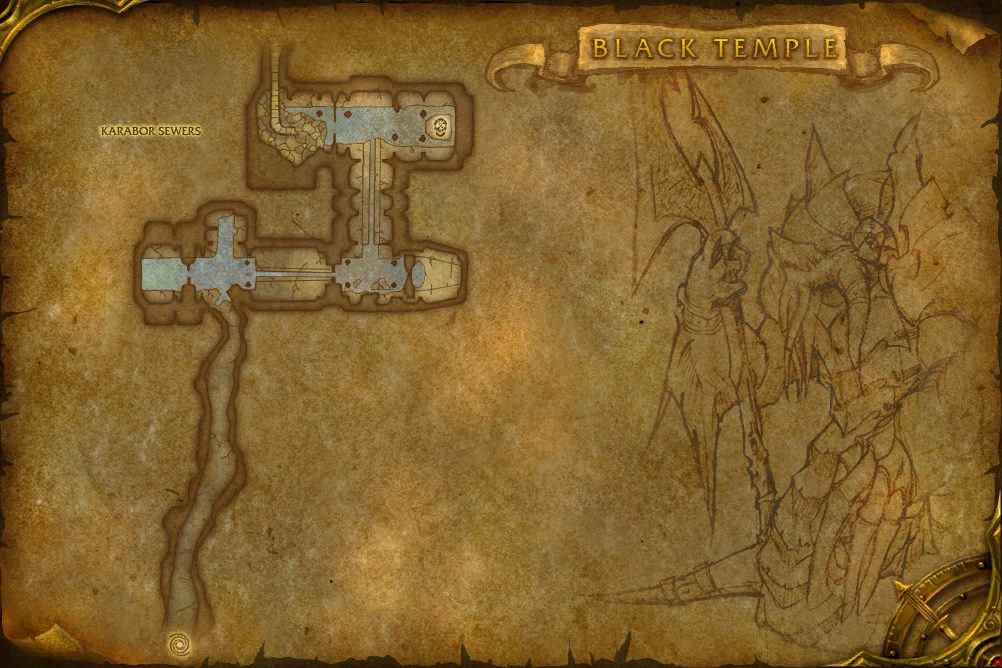
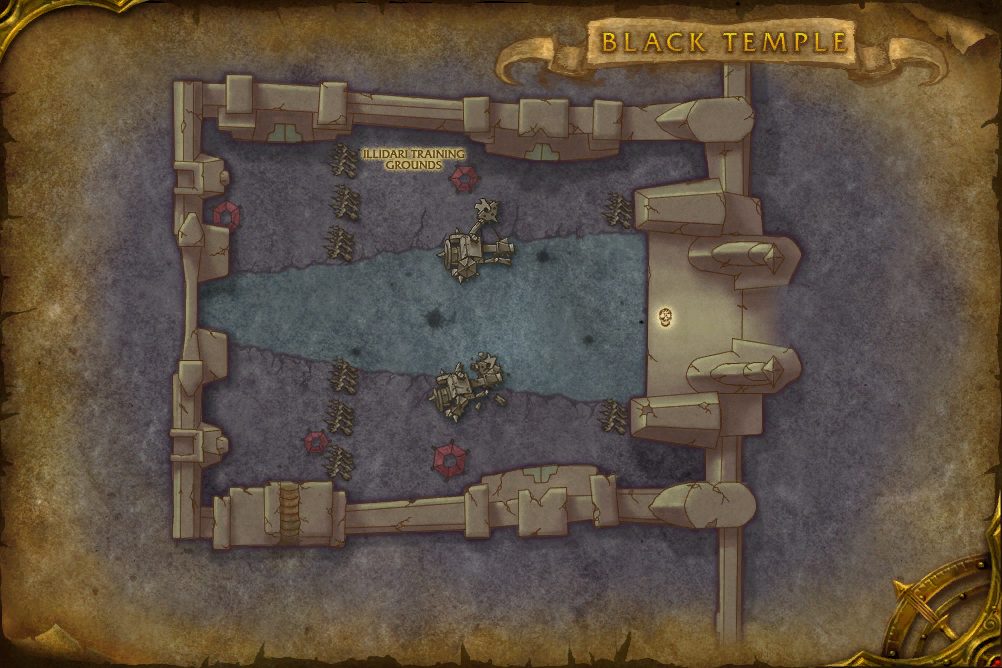
The Adventure Guide places 9 bosses of Black Temple on 8 maps. Numbers follow the encounter order; each links to that fight below.
Black Temple
 1High Warlord Naj'entus
- 1 High Warlord Naj'entus 44.0, 18.8
Black Temple
 2Supremus
- 2 Supremus 66.3, 47.4
Black Temple
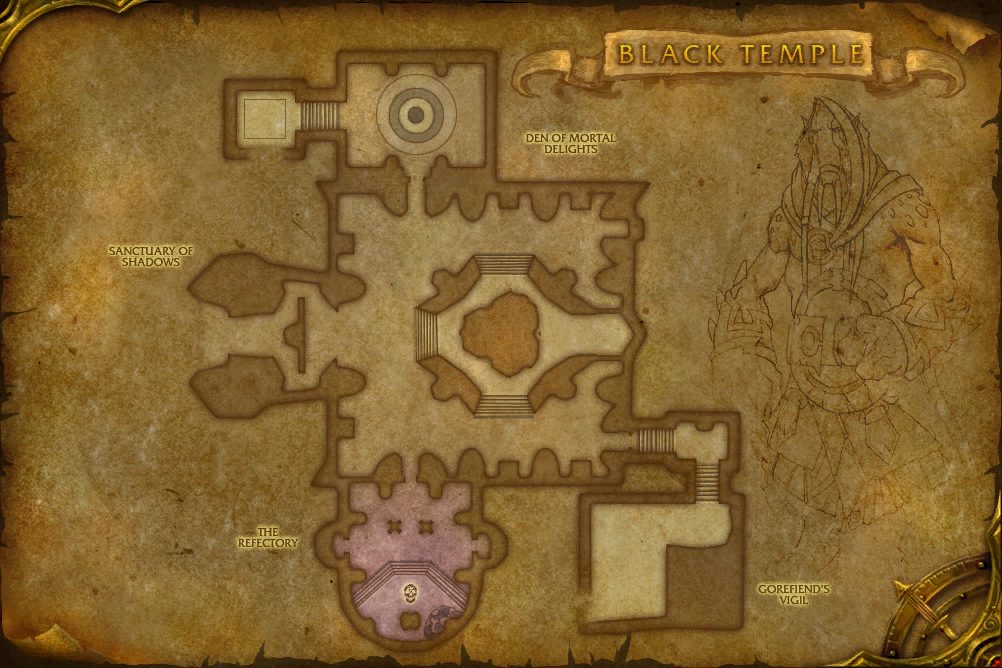 3Shade of Akama
- 3 Shade of Akama 41.0, 88.9
Black Temple
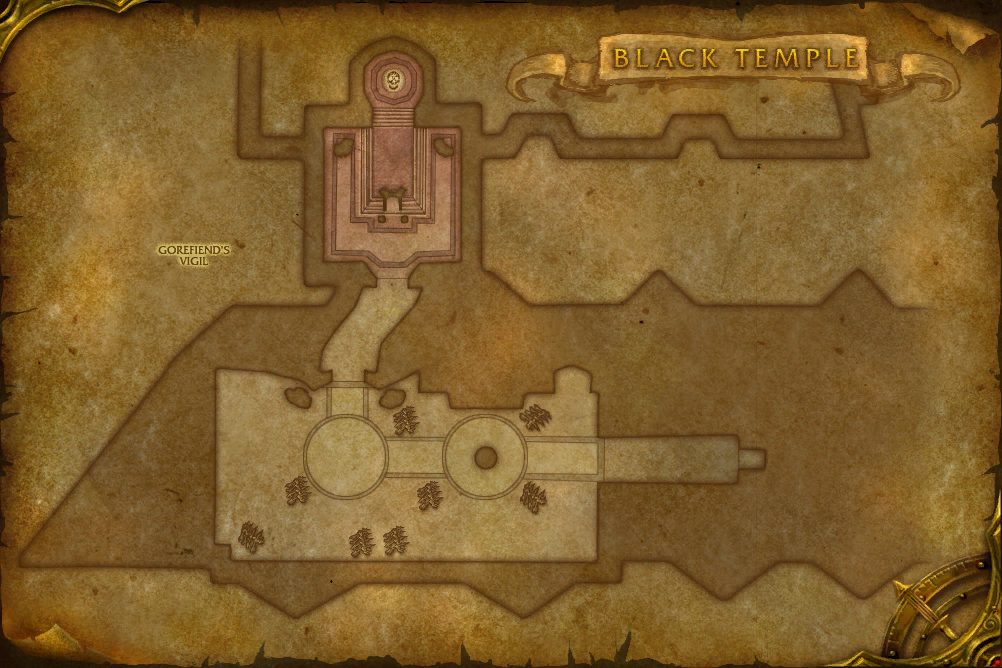 4Teron Gorefiend
- 4 Teron Gorefiend 39.4, 11.8
Black Temple
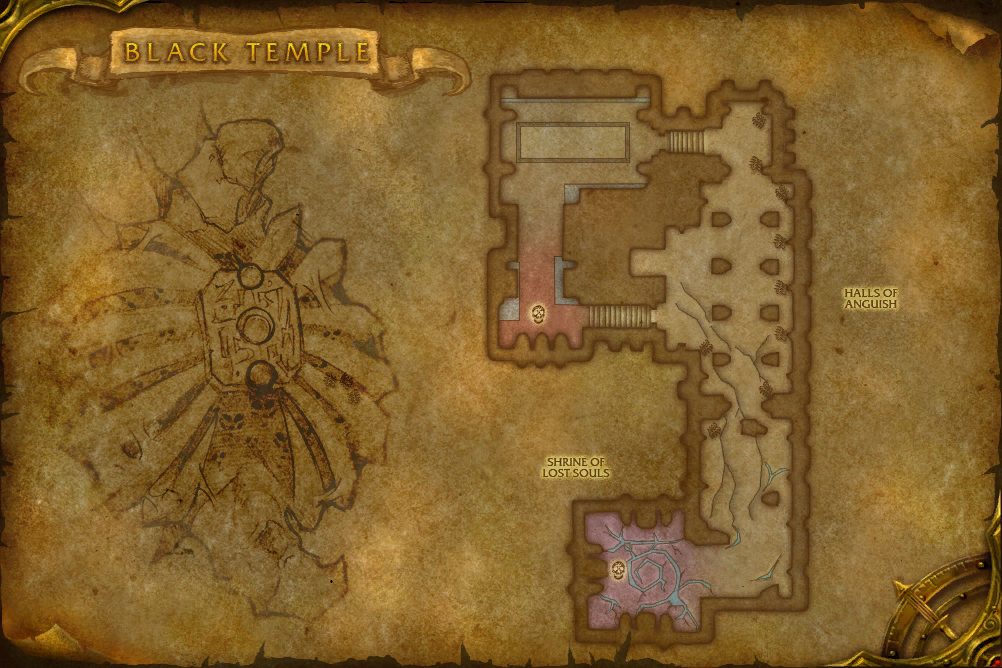 5Gurtogg Bloodboil6Reliquary of Souls
- 5 Gurtogg Bloodboil 54.0, 47.7
- 6 Reliquary of Souls 61.4, 85.1
Black Temple
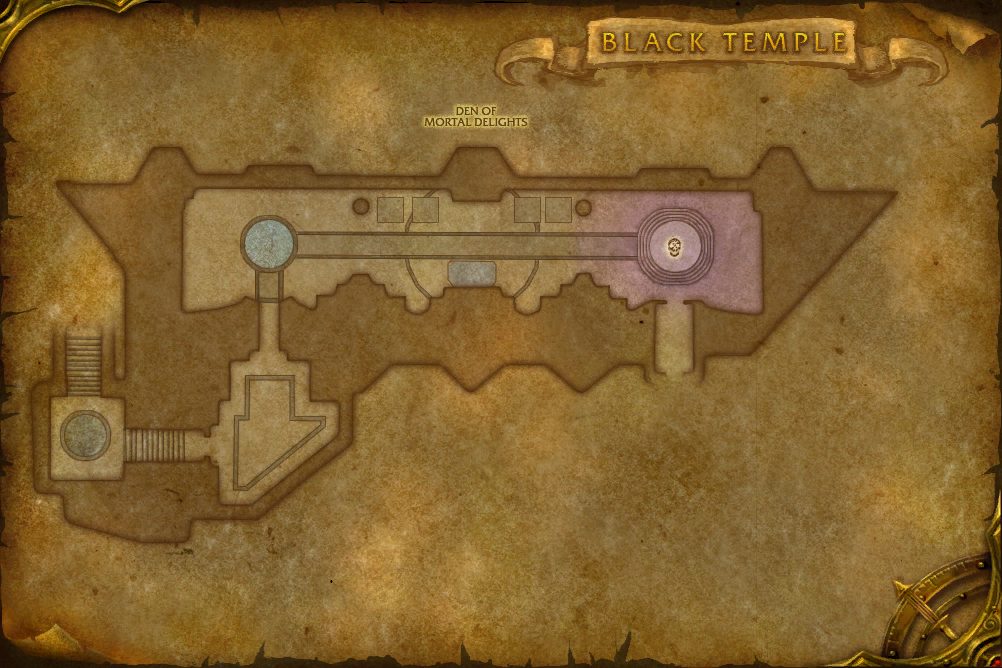 7Mother Shahraz
- 7 Mother Shahraz 67.5, 36.8
Black Temple
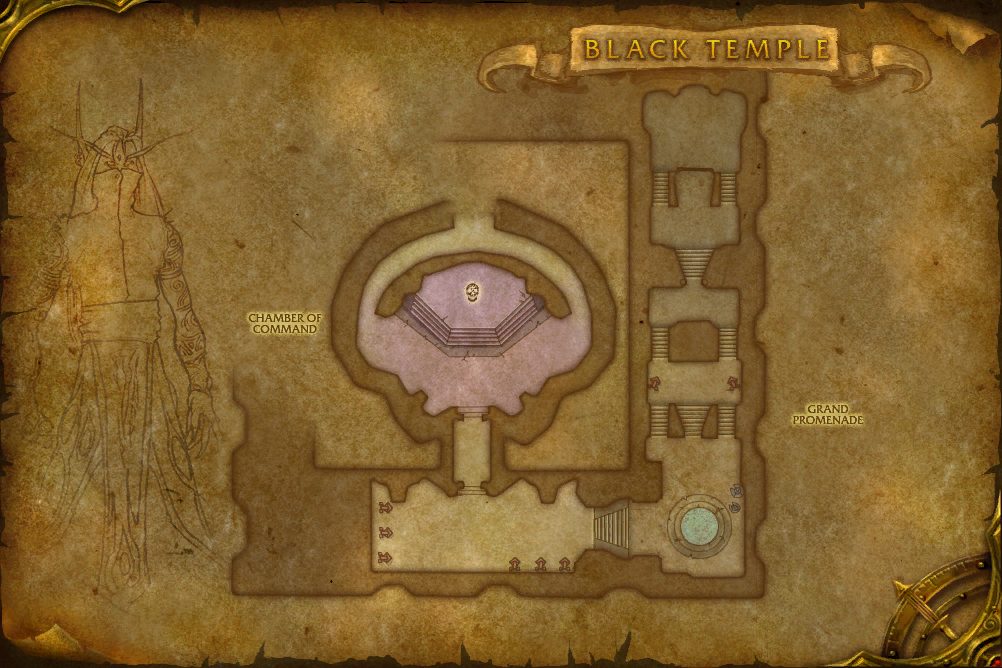 8The Illidari Council
- 8 The Illidari Council 47.3, 43.9
Black Temple
 9Illidan Stormrage
- 9 Illidan Stormrage 52.8, 70.5
Encounters
NNormalTWTimewalking
High Warlord Naj'entus
Abilities & Strategy
Overview
High Warlord Naj'entus periodically skewers players with his Impaling Spines, stunning them until freed by allies. Over the course of the encounter, Naj'entus casts Tidal Shield, becoming immune to damage and restoring health over time until a player hurls a Spine back at him to pierce the bubble.
Damage Dealers
- Spread out to reduce damage taken from Needle Spine.
- Interact with Naj'entus' Spine to free a player stunned by Impaling Spine.
- Throw Naj'entus' Spine at High Warlord Naj'entus to cancel Tidal Shield.
Healers
- Spread out to reduce damage taken from Needle Spine.
- Interact with Naj'entus' Spine to free a player stunned by Impaling Spine.
- Throw Naj'entus' Spine at High Warlord Naj'entus to cancel Tidal Shield.
Tanks
- Avoid facing High Warlord Naj'entus at allies to avoid damage from Horseshoe Swipe.
- Interact with Naj'entus' Spine to free a player stunned by Impaling Spine.
- Throw Naj'entus' Spine at High Warlord Naj'entus to cancel Tidal Shield.


Loot
27 drops · item level 1 to 32 · 8 slots (Feet, Finger, Hands, Head, One-Hand, Shoulder +2 more) · all Bind on Pickup
 Boots of Oceanic FuryBoots of Oceanic Fury
 Cowl of Benevolence
 Eternium Shell BracersEternium Shell Bracers
 Fists of MukoaFists of Mukoa
 Guise of the Tidal LurkerGuise of the Tidal Lurker
 Halberd of DesolationHalberd of Desolation
 Helm of Soothing Currents
 Mantle of DarknessMantle of Darkness
 Pearl Inlaid BootsPearl Inlaid Boots
 Ring of Calming Waves
 Ring of Captured Storms
 Rising TideRising Tide
 Slippers of the SeacallerSlippers of the Seacaller
 The Maelstrom's FuryThe Maelstrom's Fury
 Tide-Stomper's GreavesTide-Stomper's Greaves
 Leviathan Egg
Supremus
Abilities & Strategy
Overview
The gatekeeper Supremus cycles between striking a primary target while creating rivers of fel flame, and fixating on random players while littering the area with volcanic geysers.
Damage Dealers
- Avoid Molten Flame caused by Molten Punch.
- Run from Supremus when you are Fixated.
Healers
- Avoid Molten Flame caused by Molten Punch.
- Run from Supremus when you are Fixated.
Tanks
- Avoid Molten Flame caused by Molten Punch.
- Use Active Mitigation to reduce damage from Hateful Strike.
Stage One: Supremus


Stage Two: Pursuit


Loot
21 drops · item level 1 to 32 · 10 slots (Chest, Finger, Legs, Neck, One-Hand, Ranged +4 more) · all Bind on Pickup
 Band of the Abyssal LordBand of the Abyssal Lord
 Bands of the Coming Storm
 Choker of Endless Nightmares
 Felstone BulwarkFelstone Bulwark
 Leggings of Devastation
 LegionkillerLegionkiller
 Naturalist's Preserving CinchNaturalist's Preserving Cinch
 Nether Shadow Tunic
 Pauldrons of Abyssal Fury
 Syphon of the NathrezimSyphon of the Nathrezim
 The Brutalizer
 Veil of Turning Leaves
 Waistwrap of InfinityWaistwrap of Infinity
 Wraps of Precise Flight
 Shard of Supremus
Shade of Akama
Abilities & Strategy
Overview
The objective of the encounter is to assist Akama in defeating the Shade of Akama. Defeat Ashtongue Channelers and Sorcerers to allow the Shade of Akama to reach Akama, starting Stage Two. Once Stage Two begins, defeat the Shade of Akama to win the encounter before Akama is slain.
Damage Dealers
- In Stage One, defeat the Ashtongue Channelers as fast as possible.
- Defeat the Shade of Akama once he is freed.
Healers
- In Stage One, defeat the Ashtongue Channelers as fast as possible.
- Defeat the Shade of Akama once he is freed.
Tanks
- Be quick to grab the attention of Ashtongue Forces as they spawn.
- Defeat the Shade of Akama once he is freed.
Stage One: Unleash the Shade
Shade of Akama
When the Shade of Akama reaches Akama, Stage Two will begin.
Ashtongue Channeler

Ashtongue Sorcerer
Ashtongue Spiritbinder


Ashtongue Rogue


Ashtongue Defender


Ashtongue Elementalist


Stage Two: The Shade of Akama
Shade of Akama
Defeating the Shade of Akama ends the encounter!
Akama


Loot
21 drops · item level 32 to 33 · 10 slots (Back, Feet, Finger, Hands, Held In Off-hand, Legs +4 more) · all Bind on Pickup
 Amice of Brilliant LightAmice of Brilliant Light
 Blind-Seers IconBlind-Seers Icon
 Flashfire Girdle
 Focused Mana Bindings
 Grips of Silent Justice
 Kilt of Immortal Nature
 Myrmidon's Treads
 Praetorian's Legguards
 Ring of Deceitful Intent
 Shadow-Walker's CordShadow-Walker's Cord
 Shoulders of the Hidden Predator
 Shroud of the Highborne
 Spiritwalker GauntletsSpiritwalker GauntletsThe Brutalizer
 The Seeker's WristguardsThe Seeker's Wristguards
 Wristbands of Divine Influence
Teron Gorefiend
Abilities & Strategy
Overview
Teron Gorefiend periodically marks a player with Shadow of Death, killing them instantly. The slain player then returns as a Vengeful Spirit, with the unique ability to hinder and destroy Shadowy Constructs that will otherwise decimate other players.
Damage Dealers
- Be prepared to become a Shadow of Death.
Healers
- Be prepared to become a Shadow of Death.
- Be quick to dispel Incinerate to avoid damage.
- Targets afflicted by Crushing Shadows are especially susceptible to Shadow damage.
Tanks
- Hold the attention of Teron Gorefiend.
 Shadow of Death
Shadowy Construct
Immune to all damage from players in the corporeal world.


Vengeful Spirit
Able to defeat the Shadowy Construct.


Loot
20 drops · item level 32 · 9 slots (Back, Chest, Feet, Hands, Head, Ranged +3 more) · all Bind on Pickup
 Belt of Divine Guidance
 Botanist's Gloves of GrowthBotanist's Gloves of GrowthCowl of BenevolenceGauntlets of EnforcementGauntlets of Enforcement
 Girdle of Lordaeron's FallenGirdle of Lordaeron's Fallen
 Insidious BandsInsidious Bands
 Rifle of the Stoic GuardianRifle of the Stoic Guardian
 Robe of the Shadow CouncilRobe of the Shadow Council
 Shadowmoon Destroyer's DrapeShadowmoon Destroyer's Drape
 Softstep Boots of TrackingSoftstep Boots of Tracking
 Soul CleaverSoul Cleaver
Gurtogg Bloodboil
Abilities & Strategy
Overview
As the fight progresses, the Gurtogg swaps between two modes that determine which abilities he uses. In one mode, he afflicts distant targets with deadly maladies, while in the other he fixates on a random player with his full might.
Damage Dealers
- Coordinate your positioning with group members to avoid getting too many stacks of Blood Boil.
Healers
- Coordinate your positioning with group members to avoid getting too many stacks of Blood Boil.
- Heal the ally that is targeted with Fel Rage.
Tanks
- Take turns tanking Gurtogg to keep the application of Acidic Wound in check.
Stage One: Boiling Blood


Stage Two: Fel Rage


Loot
25 drops · item level 32 · 12 slots (Back, Chest, Feet, Finger, Legs, One-Hand +6 more) · all Bind on Pickup
 Belt of Primal MajestyBelt of Primal Majesty
 Blood-Cursed ShoulderpadsFlashfire Girdle
 Garments of Temperance
 Girdle of Mighty ResolveGirdle of Mighty Resolve
 Girdle of Stability
 Leggings of Divine RetributionLeggings of Divine Retribution
 Messenger of FateMessenger of Fate
 Shadowmaster's Boots
 Shadowmoon InsigniaShadowmoon InsigniaShoulders of the Hidden Predator
 Shroud of Forgiveness
 Staff of Immaculate RecoveryStaff of Immaculate Recovery
 Unstoppable Aggressor's Ring
 Vest of Mounting AssaultVest of Mounting Assault
 Wand of Prismatic FocusWand of Prismatic FocusWristbands of Divine Influence
Reliquary of Souls
Abilities & Strategy
Overview
The Reliquary of Souls manifests three different Essences over the course of the encounter, each of which applies unique effects that must be handled differently. First, the Essence of Suffering always strikes the nearest player and afflicts the raid with Aura of Suffering. Second, the Essence of Desire afflicts the raid with Aura of Desire. Finally, players must defeat the Essence of Anger which afflicts the raid with Aura of Anger.
Damage Dealers
- Avoid heavily damaging yourself during Aura of Desire.
- Be aware of your threat whileSeethe is active.
Healers
- Watch your mana during Aura of Suffering.
- Quickly dispel Soul Drain.
- Regenerate Mana from the Enslaved Souls during the Intermission stage.
Tanks
- While the Essence of Desire is active, be careful of Deaden.
- Using a Taunt effect while the Essence of Anger is active will cause Seethe.
- Face the Essence of Anger away from allies to avoid damage from Soul Scream.
Stage One: Essence of Suffering


Intermission: Release Enslaved Souls
Enslaved Soul

Stage Two: Essence of Desire


Stage Three: Essence of Anger


Loot
28 drops · item level 1 to 32 · 10 slots (Feet, Hands, Head, Held In Off-hand, Neck, Ranged +4 more) · all Bind on Pickup
Blood-Cursed Shoulderpads Boneweave GirdleBoneweave Girdle
 Crown of Empowered FateCrown of Empowered Fate
 Dreadboots of the LegionDreadboots of the Legion
 Elunite Empowered BracersElunite Empowered BracersGirdle of Stability
 Gloves of Unfailing FaithGloves of Unfailing Faith
 Grips of DamnationGrips of Damnation
 Naaru-Blessed Life RodNaaru-Blessed Life Rod
 Naturewarden's TreadsNaturewarden's Treads
 Pendant of Titans
 The Wavemender's MantleThe Wavemender's Mantle
 Torch of the DamnedTorch of the Damned
 Touch of Inspiration
 Translucent Spellthread Necklace
 Fragment of Anger
 Fragment of Desire
 Fragment of Suffering
Mother Shahraz
Abilities & Strategy
Overview
Mother Shahraz will link allies together with Fatal Attraction while also dealing heavy damage to the raid with her Beams.
Damage Dealers
- Break the demonic link of Fatal Attraction by running away from allies.
- Avoid [Interrupting Shriek] by staying away from Mother Shahraz.
Healers
- Tanks will take heavy damage from Saber Lash.
- Break the demonic link of Fatal Attraction by running away from allies.
- Avoid [Interrupting Shriek] by staying away from Mother Shahraz.
Tanks
- Tanks take heavy damage from Saber Lash.


Beams
Every 30s Mother Shahraz will fire a random beam at nearby enemies.
Loot
30 drops · item level 1 to 33 · 8 slots (Chest, Feet, Head, Legs, Neck, One-Hand +2 more) · all Bind on Pickup
 Blade of SavageryBlade of SavageryFocused Mana Bindings
 Forest Prowler's HelmGarments of TemperanceGronnstalker's Spaulders
 Heartshatter BreastplateHeartshatter BreastplateHelm of Soothing Currents
 Helm of the Illidari Shatterer
 Illidari Shoulderpads
 Illidari ShoulderpadsKilt of Immortal NatureLeggings of Devastation
 Lightbringer Shoulderguards
 Mantle of the Malefic
 Mantle of the Tempest
 Nadina's Pendant of Purity
 Onslaught Shoulderguards
 Pauldrons of the Forgotten ConquerorPauldrons of the Forgotten ProtectorPauldrons of the Forgotten VanquisherShadowmaster's Boots
 Shoulderguards of the Broken SageShoulderpads of AbsolutionSkyshatter MantleSlayer's ShoulderpadsThunderheart Spaulders
 Undying Vigil Shoulderguards
 Sultry Grimoire
The Illidari Council
Abilities & Strategy
Overview
The Illidari Council consists of a powerful paladin, rogue, mage, and priest. They share health and bring their iconic abilities to bear against their foes.
Damage Dealers
- Melee damage dealers should avoid striking High Nethermancer Zerevor due to his Arcane Explosion.
- Interrupt Lady Malande's Circle of Healing.
Healers
- Allies afflicted with Veras's Envenom require urgent healing attention.
Tanks
- Hold the attention of Gathios the Shatterer and Veras Darkshadow.
- Keep Gathios the Shatterer away from the other members of the council to avoid buffing them with Devotion Aura.
Gathios the Shatterer
Blessings
Gathios can have one Blessing active at a time.


Judgments
Gathios will cast a Judgement based on which Seal he has active.


 Devotion Aura
 Consecration
 Hammer of Justice
Veras Darkshadow


High Nethermancer Zerevor


Loot
25 drops · item level 27 to 33 · 6 slots (Back, Head, Legs, Shoulder, Trinket, Waist) · all Bind on Pickup
Belt of Divine Guidance Cloak of the Illidari CouncilCloak of the Illidari Council
 Cowl of the Illidari High LordForest Prowler's Helm
 Gronnstalker's LeggingsHelm of the Illidari Shatterer
 Illidari Leggings
 Illidari Leggings
 Leggings of Absolution
 Leggings of the Forgotten ConquerorLeggings of the Forgotten ProtectorLeggings of the Forgotten Vanquisher
 Leggings of the Malefic
 Leggings of the Tempest
 Legwraps of the Broken Sage
 Lightbringer Legguards
 Madness of the BetrayerMadness of the Betrayer
 Onslaught Legguards
 Skyshatter Legguards
 Slayer's Legguards
 Thunderheart LegguardsUndying Vigil LegplatesVeil of Turning Leaves
Illidan Stormrage
Abilities & Strategy
Overview
Illidan wields his Warglaives at the start of the encounter, infecting foes with Parasitic Shadowfiend. Upon reaching 65% health, Illidan takes flight and throws the Warglaives of Azzinoth to the ground, each of which unleashes a Flame. The two Flames of Azzinoth must be defeated to bring Illidan to the ground. For the remainder of the encounter, Illidan periodically unleashes the power of the demonic force within him, using those dark powers to assault his foes, before returning to his natural form. At 30% health, Maiev arrives to assist in handling the Betrayer's final efforts to overpower his foes.
Damage Dealers
- Move away from allies when afflicted with Parasitic Shadowfiend.
- Quickly defeat the Flames of Azzinoth in Stage Two of the encounter.
Healers
- Move away from allies when afflicted with Parasitic Shadowfiend.
- Quickly defeat the Flames of Azzinoth in Stage Two of the encounter.
Tanks
- Use Active Mitigation defensive abilities to survive Shear.
- Move Illidan Stormrage to avoid damage taken from Flame Crash.
- In Stage Two, be quick to grab the attention of the Flames of Azzinoth.
Stage One: You Are Not Prepared


Stage Two: Flames of Azzinoth


Stage Three: The Demon Within


Stage Four: The Long Hunt
Illidan Stormrage
Maiev Shadowsong
Loot
40 drops · item level 27 to 33 · 11 slots (Back, Chest, Finger, Head, Main Hand, Off Hand +5 more) · all Bind on Pickup
 Warglaive of AzzinothWarglaive of Azzinoth
 Black Bow of the BetrayerBlack Bow of the Betrayer
 Bulwark of AzzinothBulwark of Azzinoth
 Chestguard of the Forgotten ConquerorChestguard of the Forgotten ProtectorChestguard of the Forgotten VanquisherCowl of the Illidari High Lord
 Crystal Spire of KaraborCrystal Spire of Karabor
 Cursed Vision of SargerasCursed Vision of SargerasFaceplate of the ImpenetrableFaceplate of the Impenetrable
 Gronnstalker's Chestguard
 Illidari Robe
 Illidari Robe
 Jerkin of the Broken Sage
 Lightbringer Chestguard
 Memento of TyrandeMemento of Tyrande
 Onslaught Chestguard
 Robe of the Malefic
 Robes of the Tempest
 Shard of AzzinothShard of Azzinoth
 Shroud of AbsolutionShroud of the Highborne
 Skyshatter Breastplate
 Slayer's Chestguard
 Stormrage Signet RingStormrage Signet Ring
 The Skull of Gul'danThe Skull of Gul'dan
 Thunderheart Tunic
 Undying Vigil Battleplate
 Zhar'doom, Greatstaff of the DevourerZhar'doom, Greatstaff of the Devourer
Quests
4 quests Blizzard’s quest data files under Black Temple, most for level 30:
- Reward:28 gold9 silver
- Reward:500 reputation with Ashtongue Deathsworn
- Reward:350 reputation with Ashtongue Deathsworn

More The Burning Crusade Raids
Other raids from the same expansion.