 TheWoWDB
Right before you get Baelgun Flamebeard, there's a Gate with 2 pressure sensors on ea side of it.
Standing in front of the gate are 2 Stoneskin Gatekeepers. If you use Control Undead on one of them, they have an ability that will turn something into stone. (As of this post, I can't find it).
After you have the closest one controlled, he will turn the other to stone.
Once he's Stoned, you can use Death Grip and pull him to one of the 2 pressure sensors. Walk over, stand on the other and the gates will open.You *Might* be able to run from one to the other, but I have not tested it.
Good Hunting!
Quest

The Call of Icecrown
Quest facts and objectives from the current retail game data.
The highest voted Wowhead comments for this page. They are community notes, not TheWoWDB comments.
Video Guide: https://www.youtube.com/watch?v=YQtu2gKW6pk
1. The Call of Icecrown (Scenario)
• Accept the quest, The Call of Icecrown, which will appear in your quest log shortly after turning in A Pact of Necessity.
• Click on the [npc=95854], which has opened for you, to be taken to Acherus: The Ebon Hold (now docked with [zone=7695]).Stage 1 - The Call of the North
• Once at Acherus: The Ebon Hold (Icecrown), listen/follow [npc=95193].
• After he is finished speaking, travel north to coords 59.7, 17.4.Stage 2 - The Gates Are Open
• Enter the gates of [zone=7695], ahead, at coords 59.5, 0.Stage 3 - Seek the Fragments
• Once in [zone=7695], defeat any [npc=94913] and [npc=95434] mobs you come across while heading to coords 51, 72.
• When you arrive at 47.7, 76.1, use Death Grip on the [npc=94913] channeling [spell=192033].
• When you arrive at 51, 72, 2 [npc=97320] will be guarding the entrance to the next room.
• Defeat each of the [npc=97320] while standing atop a pressure plate.
• If they don't die on top of a pressure plate, you may need to Death Grip one/both of them.
• Enter the next room and fight [npc=93948] at 51.8, 66.8.
• Run away when he begins casting [spell=192647] (it isn't interruptible).
• Collect the [item=127009] located near 52.0, 66.3 (on top of a frozen pedestal).
• Travel northeast to 60.3, 54.7 (3 o'clock position of the ring), where you will fight [npc=93949].
• Interrupt him with [spell=47528] or [spell=47476]/[spell=108194], when he begins casting [spell=192648].
• Collect the [item=127009] located near 60.2, 53.4 (on top of a frozen pedestal).• Travel northwest to 55.0, 40.8 (12 o'clock position of the ring), where you will fight [npc=93950].
• Interrupt, or step out of the way when he casts [spell=200669].
• Kite him out of the [spell=200679] to avoid taking this damage.
• Collect the [item=127009] located near 51.4, 41.1 (on top of a frozen pedestal).
• Travel south to 51.8, 46.3 (center of the ring), where you will fight [npc=93951].
• Interrupt [spell=79971].
• Collect the [item=127009] located near 51.5, 49.7 (on top of a frozen pedestal).Stage 4 - Travel to the Frozen Throne
• Travel south to 51.8, 53.5, and step on the Scourge Transporter, which will automatically bring you to the Frozen Throne.Stage 5 - Power Overwhelming
• Travel to 49.9, 51.2 and click on the [object=242502].
• Listen to the speech of [npc=36597], click on the [npc=100577] to purge the blades of the [npc=94982] and the [npc=93963].Stage 6 - The Purge
• [npc=93963] (Stage 1)
• Avoid standing in the pools left behind by [spell=189537].
• [npc=93963] (Stage 2) - Begins when the he reaches approximately 25% health, and lasts approximately one minute. You should only enter this phase a single time.
• During this stage, Arthas will become immune to all damage.
• When the [npc=93963] casts [spell=200816], he will call scourge mobs to him. You must kill the scourge before they reach the [npc=93963], and heal him.
• When this stage concludes, he will go back to Stage 1.
• [npc=94982]:
• While fighting the [npc=93963], observe the [spell=200694] cast by the [npc=94982] and stay out of their path
• [npc=95622]:
• Stay on the move and avoid standing in [npc=95622].Stage 7 - The Hungering Cold
• After defeating the [npc=93963], you will be transported back to the Frozen Throne.
• Collect your artifact weapon, the [object=247386].Stage 8 - Death's March (Final Stage)
• Ascend to throne of [npc=36597], to receive the [spell=190652].
• Click the Acherus Waygate, provided for you to be transported back to Acherus: The Ebon Hold.
• Travel southeast to coords 50.8, 50.0.
• Turn in the quest to [npc=93437].
[tbody]
Wowhead QuestSpecialization/NotesYour ProgressVideo Guide[quest=39757]
[/tbody]
FYI, Don't take the death gate to Dalaran. Just run through Ebon Hold straight past the death gate and the scenario will begin.
Quest facts
Quest ID38990
Check whether you have already completed this quest
in-game: /run print(C_QuestLog.IsQuestFlaggedCompleted(38990))
Requirements
ClassDeath Knight
Read from the Blizzard quest API.
What to do
WhereAcherus: The Ebon Hold, Acherus: The Ebon Hold, Dalaran
StorylineThe Blades of the Fallen Prince, step 1 of 1
Rewards60g 66s, 27,650 XP
Description
<A powerful presence again touches your thoughts.> I have ordered your brethren to Icecrown to prepare for the coming conflict, but I have a more important fate in mind for you. You, {name}, will be the hand of our vengeance! Use the Death Gate to return to Acherus and I shall reveal your role in this.
Where to go
Pins are the quest’s own POI points from the current retail client, projected onto the in-game zone map. The game marks one blob as the quest’s turn-in; the rest are objective areas. Points that fall outside a map’s window are dropped rather than guessed at.
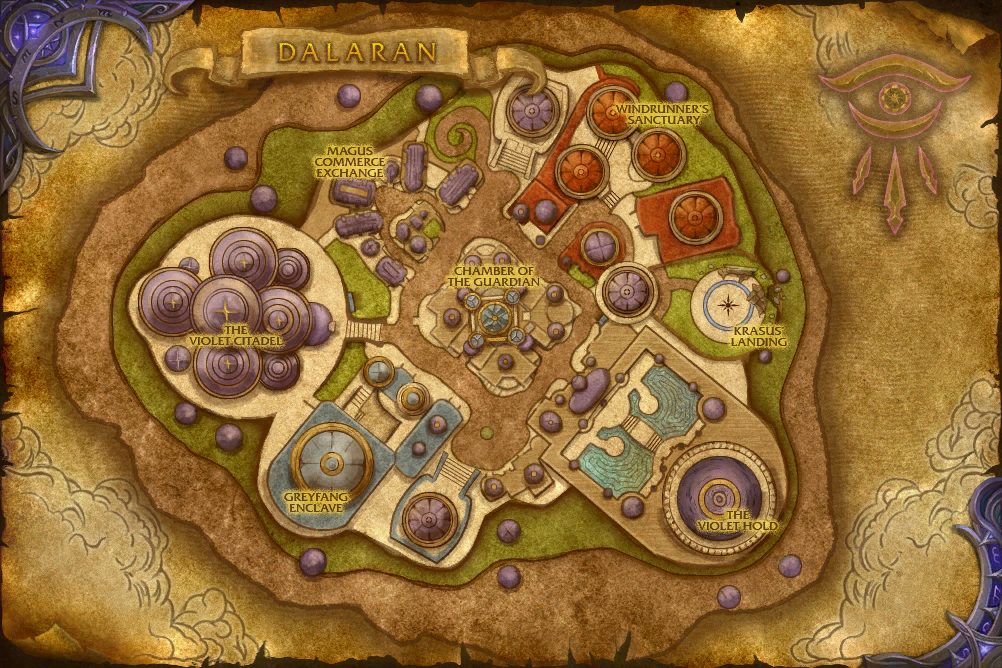 Objective area
In-game waypoint: /way #627 73.8 45.5
Coordinates
- Objective areaDalaran 73.8, 45.5
/way #627 73.8 45.5
Map coordinates of the pins above. An area the client draws as a shape is given by the centre of its points.
Nearby on the Acherus: The Ebon Hold map
- Our Next Move
- Plans and Preparations
- The Firstborn Rises
- The King Rises
- A Personal Request
- The Zealot Rises
- Rise, Champions
- Spread the Word
- Recruiting the Troops
- Troops in the Field
Other quests whose map markers the client places on Acherus: The Ebon Hold.
Getting there
Flight points closest to the quest’s turn-in marker on Acherus: The Ebon Hold:
- Acherus: The Ebon Hold
- Aalgen Point, Broken Shore
- Deliverance Point, Broken Shore
From the turn-in, the objective areas lie:
- Objective area
Straight-line distances in yards between the quest’s own map markers (QuestPOI) and the client’s flight-point positions (TaxiNodes); flight paths and terrain are not modelled.
Community notes from Wowhead · 31 comments
Top 3 shown aboveThe comments below were written by Wowhead users. They are community notes, not TheWoWDB comments. See them in context on Wowhead.
The top 3 are shown in Top Comments above. Read all 31 on Wowhead.
Money60 gold66 silver
Experience27,650 XP
Other quests on the Acherus: The Ebon Hold map
Storyline
The Blades of the Fallen Prince
Part 1 of 1.
Storyline order is the client’s own QuestLine data from the current retail build.
Where this quest fits
The storyline at a glance
The Blades of the Fallen Prince has 1 step, from The Call of Icecrown to The Call of Icecrown.
Maps its steps are placed on (steps per map): Acherus: The Ebon Hold (1).
Other storylines on the Acherus: The Ebon Hold map
- The Four Horsemen I
- The Four Horsemen IV
- Apocalypse
- Weapon of Legend
- Weapons of Legend
- The Maw of the Damned
Steps, storylines and map placement from the client’s QuestLine, prerequisite and QuestPOI data; neighbouring quest text is Blizzard’s own (quest API), shortened to its opening sentences.