 TheWoWDB
Raid - Battle for Azeroth
Azeroth
14 encounters, 72 boss abilities and 134 drops, with the Adventure Guide’s own ability and strategy notes for each fight. Every drop links to its item page; tradeable drops carry a live Auction House price.
While many of the greatest threats to peace in Azeroth are locked away in ancient vaults or perched atop soaring fortresses, others walk brazenly beneath the open sky. As self-preservation drives the wise to seek shelter from these terrors, glory awaits any brave heroes who wish to test their mettle against the most powerful of foes.
Quick Facts
| Type | Raid |
|---|---|
| Expansion | Battle for Azeroth |
| Encounters | 14 |
| Boss abilities | 72 |
| Drops | 134 |
| Item level | 10 to 85 |
| Tradeable drops | 0 |
| Difficulties | Normal |
Loot Table Value
Every one of Azeroth’s 134 drops is Bind on Pickup, so none of this loot can ever reach the Auction House. The table below the bosses is the complete reward list; its value is item level, not gold.
3D Model
First-party render from the game files. Model © Blizzard Entertainment.
Instance Map
The Adventure Guide places 2 bosses of Azeroth on 1 map. Numbers follow the encounter order; each links to that fight below.
Temple of Kotmogu
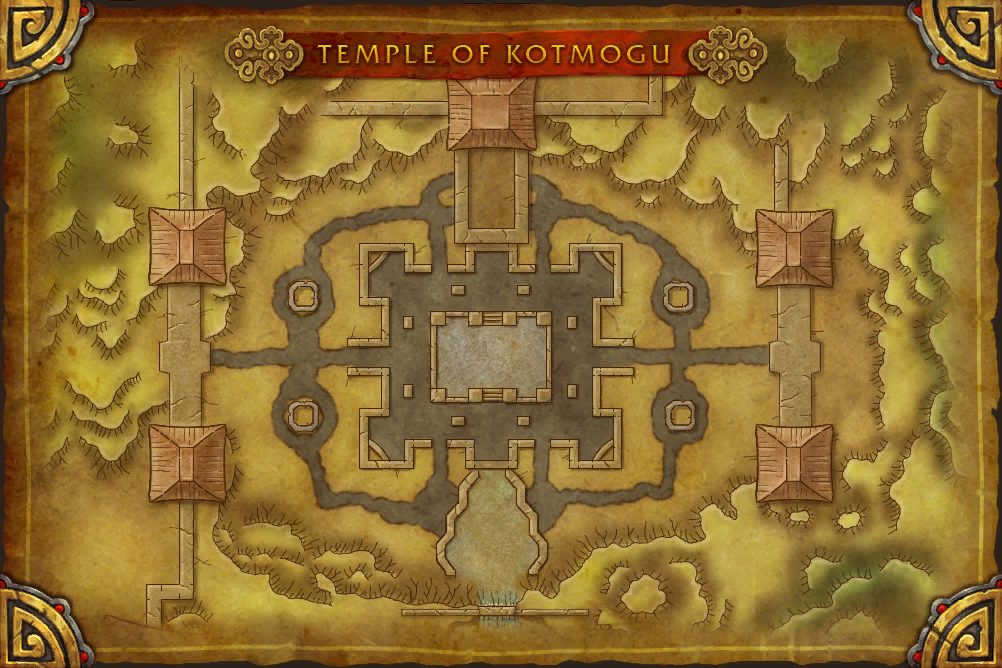 1The Lion's Roar / Doom's Howl
- 1 The Lion's Roar 42.8, 45.6
- 1 Doom's Howl 42.8, 45.6
Encounters
NNormal
T'zane
Animated by the powerful voodoo of the nearby Necropolis, T'zane stalks the swamps of Nazmir in search of more souls to consume.
Abilities & Strategy
Overview
Over the course of the encounter, T'zane will unleash the tormented spirits trapped within him to create avoidable effects.
Tanks
- Avoid standing in front of T'zane during Terror Wail.
- Avoid touching Coalesced Essence.
Healers
- Avoid standing in front of T'zane during Terror Wail.
- Move away from allies when affected by Consuming Spirits.
- Avoid touching Coalesced Essence.
Damage Dealers
- Avoid standing in front of T'zane during Terror Wail.
- Move away from allies when affected by Consuming Spirits.
- Avoid touching Coalesced Essence.


Loot
11 drops · item level 60 · 7 slots (Feet, Head, Legs, Shoulder, Trinket, Waist +1 more) · all Bind on Pickup


Ji'arak
This mighty pterrordax has a roost high up in the mountains of Zuldazar, where the air is too thin for most lungs to draw breath, and life struggles to take hold. Occasionally she descends upon the swamps below in search of heartier meals to bring back to her brood.
Abilities & Strategy
Overview
Ji'arak uses her massive wings to assault her foes with wind, drawing enemies in and pushing them away.
Healers
- Hurricane Crash inflicts lethal damage to all targets caught in the center.
- Storm Wing inflicts significant damage to all party members.
Tanks
- Protect allies from Ji'arak Broodling summoned by Matriarch's Call.
- Hurricane Crash inflicts lethal damage to all targets caught in the center.
Damage Dealers
- Hurricane Crash inflicts lethal damage to all targets caught in the center.
- Clutch can be interrupted by crowd control effects.


Loot
9 drops · item level 60 · 7 slots (Back, Chest, Feet, Hands, Head, Legs +1 more) · all Bind on Pickup


Hailstone Construct
Built by the original inhabitants of Drustvar, the Hailstone Construct was built to defend these lands from any invaders. However, years of dormancy have left it addled, and it now sees all residents as threats, vowing to destroy them all.
Abilities & Strategy
Overview
The Hailstone Construct uses a variety of attacks to chill its enemies, from inflicting Frost damage in its melee swings to massive AOE attacks that both slow and freeze anyone hit.
Tanks
- Ice-rimed Fists causes all of Hailstone Construct's attacks to cause Frost damage instead of Physical, so magical defenses will be handy.
- Use cover created by Permafrost Spike to avoid being frozen by Freezing Tempest.
- Move to avoid Glacial Breath.
Damage Dealers
- Use cover created by Permafrost Spike to avoid being frozen by Freezing Tempest.
- Move to avoid Glacial Breath.
Healers
- Use cover created by Permafrost Spike to avoid being frozen by Freezing Tempest.
- Move to avoid Glacial Breath.
- Tanks may required additional healing since Ice-rimed Fists causes all of Hailstone Construct's attacks to cause Frost damage instead of Physical.


Loot
11 drops · item level 60 · 8 slots (Chest, Feet, Hands, Legs, Shoulder, Trinket +2 more) · all Bind on Pickup


Warbringer Yenajz
Dark whispers shroud Stormsong Valley, as rumors of eldritch creatures spread throughout the countryside and families mark their doors with runes from the local scribes. Often dismissed as exaggeration, sometimes housewives' tales fall far short of the true horrors that lurk in the realm beyond our sight.
Abilities & Strategy
Overview
Warbringer Yenajz periodically calls down Reality Tears and draws players in to the center of Endless Abyss.
Tanks
- Avoid Reality Tear as they impact the ground.
- Quickly move away from Warbringer Yenajz when he casts Endless Abyss.
- Void Nova inflicts heavy unavoidable damage.
Healers
- Avoid Reality Tear as they impact the ground.
- Quickly move away from Warbringer Yenajz when he casts Endless Abyss.
- Void Nova inflicts heavy unavoidable damage.
Damage Dealers
- Avoid Reality Tear as they impact the ground.
- Quickly move away from Warbringer Yenajz when he casts Endless Abyss.
- Void Nova inflicts heavy unavoidable damage.


Loot
9 drops · item level 60 · 7 slots (Feet, Finger, Hands, Legs, Shoulder, Trinket +1 more) · all Bind on Pickup


Azurethos, The Winged Typhoon
Azurethos, the terror of the Kul'tiran seas, marshalls the power of wind to force enemies out of its roost, cause waterspouts, and capsize ships. He has earned his reputation as one of the deadliest beasts in Kul Tiras.
Abilities & Strategy
Overview
Azurethos attacks the party with the power of wind in an attempt to force them out of its roost.
Tanks
- Avoid Wing Buffet - and if you are hit by it, quickly re-establish threat.
- Move away from the boss when he begins casting Azurethos' Fury to make dodging tornados easier.
- Azurethos will move to a random player when casting Gale Force - be sure you are not standing in front of him when it goes off, or you risk being knocked off of the mountain!
Healers
- Move away from the boss when he begins casting Azurethos' Fury to make dodging tornados easier.
- Azurethos will move to a random player when casting Gale Force - be sure you are not standing in front of him when it goes off, or you risk being knocked off of the mountain!
Damage Dealers
- Move away from the boss when he begins casting Azurethos' Fury to make dodging tornados easier.
- Azurethos will move to a random player when casting Gale Force - be sure you are not standing in front of him when it goes off, or you risk being knocked off of the mountain!


Loot
11 drops · item level 60 · 7 slots (Chest, Feet, Hands, Head, Legs, Trinket +1 more) · all Bind on Pickup


Dunegorger Kraulok
Revered by all trolls, but the Zandalari especially, the bones of the giant reptiles of Zandalar dot the landscape. But as dark energies stir beneath the sands, sometimes that which was meant to remain dead, does not. Kraulok walks the sands once again, blinded by rage and the endless agony of his dying moments. Woe to those who find themselves in the beast's path.
Abilities & Strategy
Overview
Dunegorger Kraulok goes through periods of rapidly alternating casts of Sonic Bellow and Earth Spike. Avoid these attacks and press on to victory.
Damage Dealers
- When Dunegorger Kraulok Bellows he picks a random player and locks his facing until he finishes.
- Earth Spike damages everyone within 2 yards, and knocks victims up into the air.
- Ravenous Ranishu summoned through Shake Loose are Ravenous and will Swing Wildly.
Healers
- When Dunegorger Kraulok Bellows he picks a random player and locks his facing until he finishes.
- Earth Spike damages everyone within 2 yards, and knocks victims up into the air.
- Ravenous Ranishu summoned through Shake Loose are Ravenous and will Swing Wildly.
Tanks
- When Dunegorger Kraulok Bellows he picks a random player and locks his facing until he finishes.
- Earth Spike damages everyone within 2 yards, and knocks victims up into the air.
- Ravenous Ranishu summoned through Shake Loose are Ravenous and will Swing Wildly.


 Shake Loose
Ravenous Ranishu


Loot
10 drops · item level 10 to 60 · 8 slots (Back, Chest, Hands, Head, Legs, Trinket +2 more) · all Bind on Pickup


The Lion's Roar
The Lion's Roar is the pinnacle of Alliance engineering. Built to dominate the battlefield, this asset can carry legions of troops and decimate enemy fortifications. When deployed onto the field, there is nothing that can stop this behemoth's charge to victory.
Abilities & Strategy
Overview
The Lion's Roar is a mobile war vehicle that switches in and out of a siege mode. While sieged the Demolisher Cannon must be avoided while dealing with the War Machine's soldiers.
Damage Dealers
- Interrupt Battle Field Repair to stop the Lion's Roar from being healed.
Healers
- Stay spread so less allies are affected by splash damage dealt from Mortar Shot.
Tanks
- Interrupt Battle Field Repair to stop the Lion's Roar from being healed.
- Tank Lion's Shield Bearer away from Lion's Engineer, to allow them to be interupted.
Stage: Mobile Battle Vehicle


Stage: Seiged Battle Station


Loot
11 drops · item level 60 · 4 slots (Chest, Head, Shoulder, Trinket) · all Bind on Pickup


Doom's Howl
Doom's Howl was created from stolen Alliance engineering plans. Used to transport hordes of troops into the worst combat conditions, this gigantic vehicle can also transform into a powerful siege platform capable of decimating enemy fortifications.
Abilities & Strategy
Overview
Doom's Howl is a mobile war vehicle that switches in and out of a siege mode. While sieged the Demolisher Cannon must be avoided while dealing with the War Machine's soldiers.
Damage Dealers
- Interrupt Battle Field Repair to stop the Doom's Howl from being healed.
Healers
- Stay spread so less allies are affected by splash damage dealt from Mortar Shot.
Tanks
- Interrupt Battle Field Repair to stop the Doom's Howl from being healed.
- Tank Doom's Howl Shieldbearer away from Doom's Howl Engineer, to allow them to be interupted.
Stage: Mobile Battle Vehicle
Stage: Seiged Battle Station
Loot
11 drops · item level 60 · 4 slots (Chest, Head, Shoulder, Trinket) · all Bind on Pickup


Ivus the Forest Lord
Summoned by the night elves in times of desperation, Ivus the Forest Lord has wielded his raw strength against the Horde time and again. Now he has returned from Alterac Valley to stand in defense of his home and crush any who threaten it.
Abilities & Strategy
Overview
Ivus the Forest Lord often uses abilities to attack several players at random and will retreat to the safety of his Petrified Bark when at low health.
Tanks
- Ivus will cast Frost Breath in your direction, leaving a Frost Patch on the ground beneath you.
- Lunar Strike will leave a few clear areas on initial impact before spreading.
- Wisps summoned while Ivus is Petrified fixate on players at random and cannot be controlled through threat generation.
Healers
- Hurl Boulder will hit players at random.
- Lunar Strike will leave a few clear areas on initial impact before spreading.
- Wisps will channel Ancient Spark on a random player until they are dispatched.
Damage Dealers
- Hurl Boulder hits players at random.
- Lunar Strike will leave a few clear areas on initial impact before spreading.
- Ivus will remain immune to damage while Petrified. Dispatch all active Wisps to make Ivus end the Petrification.


Loot
11 drops · item level 60 · 7 slots (Chest, Feet, Hands, Head, Shoulder, Trinket +1 more) · all Bind on Pickup


Ivus the Decayed
Once a staunch ally in Alterac Valley, Ivus the Forest Lord succumbed to the Horde's defilement after returning to defend Darkshore. Even in decay, with his mind twisted by dark magic, he would rather be cut down than cede even a single inch of the forest to his enemies.
Abilities & Strategy
Overview
Ivus the Decayed often uses abilities to attack several players at random and will retreat to the safety of his Petrified Bark when at low health.
Tanks
- Ivus will cast Plague Breath in your direction, leaving a Plagued Bog on the ground beneath you.
- Fungal Bloom will leave a few clear areas on initial impact before spreading.
- Plaguelings summoned while Ivus is Petrified fixate on players at random and cannot be controlled through threat generation.
Healers
- Hurl Blight will hit players at random.
- Fungal Bloom will leave a few clear areas on initial impact before spreading.
- Plaguelings will channel Devour on a random player until they are dispatched.
Damage Dealers
- Hurl Blight will hit players at random.
- Fungal Bloom will leave a few clear areas on initial impact before spreading.
- Ivus will remain immune to damage while Petrified. Dispatch all active Plaguelings to make Ivus end the Petrification.


Loot
11 drops · item level 60 · 7 slots (Chest, Feet, Hands, Head, Shoulder, Trinket +1 more) · all Bind on Pickup


Ulmath, the Soulbinder
Ulmath, the Soulbinder, seeks to enthrall the restless spirits of Nazjatar. If left unchecked, it will amass an unstoppable undead force bound to its malevolent will.
Abilities & Strategy
Overview
Ulmath is a powerful Merciless One with ultimate control of two minions, Moon Priestess Liara and Guardian Tannin.
Tanks
- Reposition targets to mitigate incidental damage from Void Dance.
- Keep Ulmath's minions within 75 yards of Ulmath to avoid Soul Tether.
- Avoid Void Dance and flee from Mental Collapse.
Healers
- Void Dance and Mental Collapse can cause significant, avoidable raid damage.
- Avoid Void Dance and flee from Mental Collapse.
Damage Dealers
- Forlorn Fate causes Ulmath and his minions to share damage taken.
- Avoid Void Dance and flee from Mental Collapse.


Loot
10 drops · item level 72 · 5 slots (Back, One-Hand, Ranged, Trinket, Two-Hand) · all Bind on Pickup


Wekemara
Summoned from the depths by an ancient naga ritual, Wekemara arises once more to wreak havoc upon the surface.
Abilities & Strategy
Overview
Wekemara utilizies bioelectricity to unleash devastating attacks on its enemies.
Healers
- Electric Discharge and Shock Burst inflict substantial damage to all allies.
- Bioelectric Blast inflicts massive damage to all targets caught in the impact.
- Move away from allies when affected by Shock Burst.
Tanks
- Prevent Spawn of Wekemara from attacking allies.
- Bioelectric Blast inflicts massive damage to all targets caught in the impact.
- Move away from allies when affected by Shock Burst.
Damage Dealers
- Defeat Spawn of Wekemara to force Wekemara to emerge.
- Bioelectric Blast inflicts massive damage to all targets caught in the impact.
- Move away from allies when affected by Shock Burst.


Submerge
Upon reaching 50% health, Wekemara will submerge and summon Spawns of Wekemara.

Spawn of Wekemara


Loot
9 drops · item level 72 · 6 slots (Chest, Feet, Head, Shoulder, Trinket, Waist) · all Bind on Pickup


Grand Empress Shek'zara
With the awakening of N'Zoth, Shek'zara, empress of the mantid, pledged her swarm to the old god's will. In service of her dark master, she unleashed her forces upon the Vale of Eternal Blossoms to claim Pandaria in N'Zoth's name.
Abilities & Strategy
Overview
Grand Empress Shek'zara uses her powerful voice and Zara'thik Swarmguard to overwhelm enemies.
Healers
- Seek protection inside of a Sound Barrier during Force and Verve.
- Avoid sound waves emitted during Song of the Empress.
Tanks
- Protect allies from Mantid summoned by Summon Swarmguard.
- Seek protection inside of a Sound Barrier during Force and Verve.
- Avoid sound waves emitted during Song of the Empress.
Damage Dealers
- Defeat waves of Mantid summoned by Summon Swarmguard.
- Seek protection inside of a Sound Barrier during Force and Verve.
- Avoid sound waves emitted during Song of the Empress.


Loot
5 drops · item level 85 · 3 slots (Finger, Head, Legs) · all Bind on Pickup


Vuk'laz the Earthbreaker
Plumbing the forgotten depths of Azeroth, Prophet Skitra unearthed a devastating aqir known as Vuk'laz the Earthbreaker. Now freed from its subterranean slumber, Vuk'laz turns its destructive power against those who oppose N'Zoth.
Abilities & Strategy
Overview
Vuk'laz is a living weapon of war that attempts to overcome its enemies with devastating physical attacks. As the battle rages Vuk'laz summons scarabs to its aid from beneath the Writhing Sands.
Damage Dealers
- Position carefully when Vuk'laz creates a Tremor Wave.
- Quickly dispatch scarabs that emerge from the Writhing Sands.
Healers
- Position carefully when Vuk'laz creates a Tremor Wave.
- Crushing Claws inflicts heavy unavoidable damage.
Tanks
- Position carefully when Vuk'laz creates a Tremor Wave.
- Crushing Claws inflicts heavy unavoidable damage.

 Writhing Sands
Aqir Scarab
Aqir Scarabs emerge from the sands to swarm and overwhelm players.


Loot
5 drops · item level 85 · 3 slots (Finger, Head, Legs) · all Bind on Pickup


More Battle for Azeroth Raids
Other raids from the same expansion.