 TheWoWDB
Raid - Legion
Broken Isles
15 encounters, 76 boss abilities and 113 drops, with the Adventure Guide’s own ability and strategy notes for each fight. Every drop links to its item page; tradeable drops carry a live Auction House price.
This area once stood as the cradle of elven civilization, centered around the ancient elven capital of Suramar, until the Sundering tore the land apart. While the power of the Nightwell preserved the city of Suramar, the surrounding lands bear the scars of that catastrophic event. But now Gul'dan has awakened the Tomb of Sargeras, and from the tauren camps in the peaks of Highmountain, to the druidic groves of Val'sharah, to vrykul settlements that dot Stormheim, the Isles live in the shadow of the Legion.
Quick Facts
| Type | Raid |
|---|---|
| Expansion | Legion |
| Encounters | 15 |
| Boss abilities | 76 |
| Drops | 113 |
| Item level | 50 |
| Tradeable drops | 0 |
Loot Table Value
Every one of Broken Isles’s 113 drops is Bind on Pickup, so none of this loot can ever reach the Auction House. The table below the bosses is the complete reward list; its value is item level, not gold.
3D Model
First-party render from the game files. Model © Blizzard Entertainment.
Instance Map
The Adventure Guide places 12 bosses of Broken Isles on 2 maps. Numbers follow the encounter order; each links to that fight below.
Temple of Kotmogu
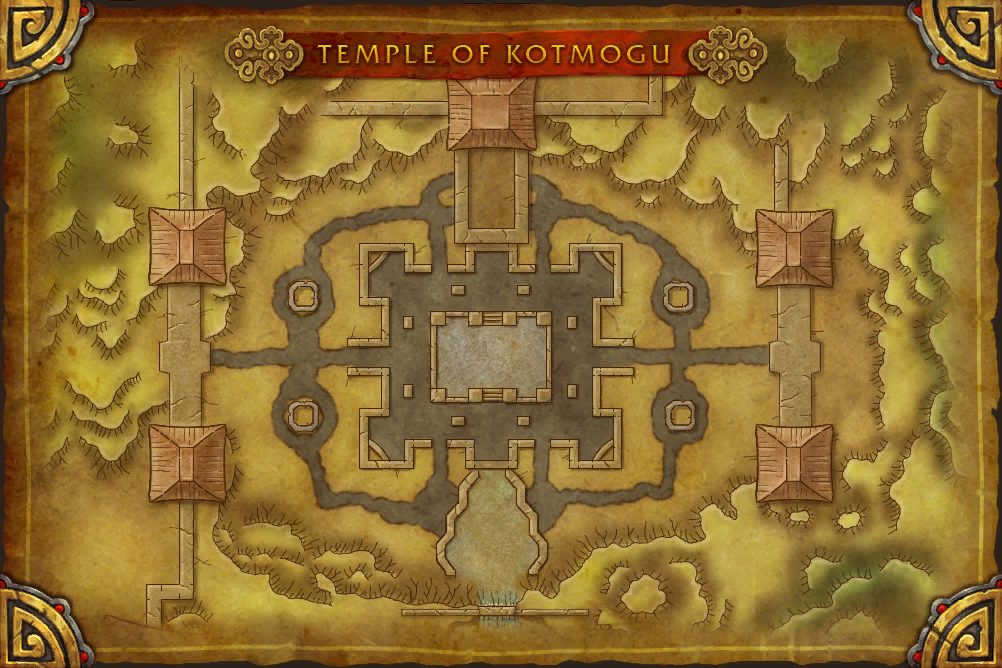 1Ana-Mouz2Apocron3Calamir4Drugon the Frostblood5Humongris / Na'zak the Fiend6Levantus7Nithogg8Shar'thos9Si'vash10The Soultakers11Withered J'im
- 1 Ana-Mouz 31.5, 66.7
- 2 Apocron 61.0, 61.2
- 3 Calamir 56.6, 67.5
- 4 Drugon the Frostblood 36.4, 48.8
- 5 Humongris 42.8, 45.6
- 6 Levantus 43.5, 66.4
- 5 Na'zak the Fiend 42.8, 46.2
- 7 Nithogg 29.3, 35.0
- 8 Shar'thos 56.3, 41.7
- 9 Si'vash 88.0, 30.9
- 10 The Soultakers 69.1, 26.7
- 11 Withered J'im 49.4, 53.2
Black Temple
Encounters
Nithogg
The great dragon Nithogg was once of the Thorignir, having left the brood shortly after they swore fealty to the titan keepers. Nithogg believed that one day he would be more powerful than even the keepers, and refused to be their subject. Instead, he took up roost in the mountain Nastrondir, where he raises his brood and terrorizes the nearby lands whenever the mood strikes him.
Abilities & Strategy
Overview
Over the course of the encounter, Nithogg uses his powerful breath attack and a muscular tail! Avoid standing in front or behind him.
Damage Dealers
- Be sure not to be too close when Static Sparks die as they burst in an Unstable Explosion.
- Do not stand in front of or behind Nithogg to avoid Storm Breath and Tail Lash.
- When Nithogg reaches 80%, 60%, 40%, and 20% health, avoid standing in Crackling Jolt.
Healers
- Do not stand in front of or behind Nithogg to avoid Storm Breath and Tail Lash.
- When Nithogg reaches 80%, 60%, 40%, and 20% health, avoid standing in Crackling Jolt.
Tanks
- Face Nithogg away from your allies to avoid hitting them with Storm Breath.
- When Nithogg reaches 80%, 60%, 40%, and 20% health, avoid standing in Crackling Jolt.


 Static Charge
Static Spark


Loot
7 drops · item level 50 · 3 slots (Back, Finger, Head) · all Bind on Pickup


The Soultakers
Sent by Helya to raid the crypts of noble vrykul kings, this trio of raiders and their crew has found their way into the Tomb of the Old Kings and seek to claim the souls that rest there.
Abilities & Strategy
Overview
Over the course of the encounter, each of the Soultakers gains energy. As each Soultaker reaches 100 energy, they unleash a devastating attack.
Damage Dealers
- Avoid being caught between Reaver Jdorn and his target during Seadog's Scuttle.
- Quickly kill the Cursed Crewmen before Captain Hring completes the cast of Shatter Crewman.
- Do not stand in the rifts opened by Soultrapper Mevra during Soul Rend.
Healers
- Avoid being caught between Reaver Jdorn and his target during Seadog's Scuttle.
- Do not stand in the rifts opened by Soultrapper Mevra during Soul Rend.
Tanks
- Avoid being caught between Reaver Jdorn and his target during Seadog's Scuttle.
- Quickly gain threat on all of the Cursed Crewmen after they are summoned.
- Do not stand in the rifts opened by Soultrapper Mevra during Soul Rend.
Captain Hring


Reaver Jdorn


Soultrapper Mevra


Loot
7 drops · item level 50 · 3 slots (Neck, Trinket, Waist) · all Bind on Pickup


Shar'thos
This guardian of the glades has been beset by the Nightmare's corruption. Where once he breathed life into the woods, he now leaves a trail of decay and destruction in his wake.
Abilities & Strategy
Overview
While fighting Shar'thos, positioning is very important. Avoid standing behind or directly in front of Shar'thos, as it will leave you vulnerable to Nightmare Breath or Tail Lash.
Damage Dealers
- Stay spread to decrease chaining damage from Dread Flame.
Healers
- Stay spread to decrease chaining damage from Dread Flame.
Tanks
- Avoid moving Shar'thos erratically to avoid exposing allies to Nightmare Breath or Tail Lash.


Loot
7 drops · item level 50 · 3 slots (Back, Chest, Neck) · all Bind on Pickup


Levantus
Her abyssal slumber disturbed, Levantus surfaced to find the isles teeming with strange demons. The fel magic seeping into the surrounding waters have left her in an extremely ornery mood.
Abilities & Strategy
Overview
Levantus uses a variety of attacks that are very difficult to dodge when swimming through water. Remember to use Gust of Wind often to avoid damage!
Damage Dealers
- Grab the water walking ability from Gust of Wind to maintain your mobility while fighting Levantus.
- Run around Levantus while she casts Massive Spout to avoid taking massive damage.
Healers
- Grab the water walking ability from Gust of Wind to maintain your mobility while fighting Levantus.
- Run around Levantus while she casts Massive Spout to avoid taking massive damage.
Tanks
- Swim around Levantus while she casts Massive Spout to avoid taking massive damage.
- Try to stay in melee range as often as possible to prevent Levantus from using Rampaging Torrent.


Loot
7 drops · item level 50 · 3 slots (Finger, Hands, Neck) · all Bind on Pickup


Humongris
Humongris has always had the dream of wielding magic. After finding he had no aptitude in the arcane arts, Humongris instead settled for wielding a wizard. Humongris sought out and captured the mage Padawsen and now wields him as a wand, using threats of violence and a tightening grip to hurl magic around the battlefield.
Abilities & Strategy
Overview
All of Humongris's attacks deal area damage. Try to remain spread to decrease his overall damage.


Loot
7 drops · item level 50 · 3 slots (Back, Shoulder, Trinket) · all Bind on Pickup


Calamir
A being of immense magical power, Calamir was called forth by the ancient exemplars in their howling rage. Imbued with the powers of Fire, Frost, and Arcane, Calamir eradicates those who dare to stand in his way.
Abilities & Strategy
Overview
Calamir shifts between using Ancient Rage: Fire, Ancient Rage: Frost, and Ancient Rage: Arcane to pummel its foes. Be careful, as each of the schools provide very different threats!
Damage Dealers
- Back away while Calamir casts Howling Gale to avoid taking unnecessary damage.
- Move away from other players while afflicted with Burning Bomb to avoid blowing them up.
Healers
- Dispel players afflicted by Burning Bomb to prevent them from blowing up others.
- Avoid Arcanopulse to not get stunned.
Tanks
- Back away while Calamir casts Howling Gale to avoid taking unnecessary damage.
- Avoid Arcanopulse to not get stunned.


Loot
7 drops · item level 50 · 3 slots (Feet, Finger, Neck) · all Bind on Pickup


Na'zak the Fiend
The alpha of the Fal'dorei, this terrifying monstrosity lurks deep within the Falanaar Tunnels. As he churns through the rubble, he uncovers ley-infused stones and feeds upon their arcane energy to sustain himself, biding his time for more worthy prey.
Abilities & Strategy
Overview
During the fight, Na'zak the Fiend shakes Ley-Infused Rubble loose from the ceiling, and begins to absorb its energy with Absorb Leystones. For each Leystone still on the ground when he finishes casting, Na'zak gains a charge of Ley Infusion.
Damage Dealers
- Do not stand in front of the boss during Corroding Spray.
- Collect Ley-Infused Rubble before Na'zak absorbs their energy.
- Attack allies encased by Web Wrap to free them.
Tanks
- Face Na'zak the Fiend away from allies to avoid hitting them with Corroding Spray.
Healers
- Do not stand in front of the boss during Corroding Spray.
- Collect Ley-Infused Rubble before Na'zak absorbs their energy.
- Allies take massive damage during Ley Infusion


Loot
7 drops · item level 50 · 2 slots (Finger, Legs) · all Bind on Pickup


Drugon the Frostblood
Drugon the Frostblood has terrorized the tribes of Highmountain from atop its frozen peaks for ages. Now, seeing opportunity in the chaos, this powerful ettin descends from his perch to claim the region for himself.
Abilities & Strategy
Overview
As the fight progresses, Drugon hurls Avalanche at random enemy target destinations. Targets hit by this ability become Frozen and take increased damage from following attacks.
Damage Dealers
Healers
- Allies affected by Frozen take increased damage from all attacks.
- Heal allies being gripped by Snow Plow.
- Avoid getting hit by Avalanche.
Tanks
- Face Drugon away from allies to avoid hitting them with Snow Crash.
- Avoid standing in front of Drugon during Snow Plow.


Loot
7 drops · item level 50 · 3 slots (Back, Trinket, Wrist) · all Bind on Pickup


Ana-Mouz
This foul imp mother rests deep within Felsoul Hold, immersed in a pool of pure Fel energy. Her children swarm around her, as she soaks in the fetid air and corrupts anything that comes within her grasp.
Abilities & Strategy
Overview
Ana-Mouz uses various area-denial abilities to limit where enemies can safely stand. Additionally, she summons Lesser Minions.
Damage Dealers
- Avoid standing in Fel Geysers.
- Do not stand in front of the boss during Impish Flames.
- Kill Lesser Minions summoned by Gaseous Breath.
Tanks
- Face Ana-Mouz away from allies to avoid hitting them with Impish Flames.
- Avoid standing in Fel Geysers.
Healers
- Avoid standing in Fel Geysers.
- Do not stand in front of the boss during Impish Flames.
- Dispel Mother's Embrace to prevent your allies from being charmed.


Loot
7 drops · item level 50 · 3 slots (Back, Chest, Finger) · all Bind on Pickup


Flotsam
Flotsam emerged from the ocean depths to sate his hunger. The first to cross his path were the swamp murlocs of Shipwreck Cove, which Flotsam devoured by the dozens. Despite consuming most of their tribe, these creatures worshipped the giant as a god, and continued feeding him family and friends until the beast passed out. When he awakens, Flotsam will expand his menu to include everyone within the region.
Abilities & Strategy
Overview
As the fight progresses, Flotsam hurls Jetsam at random targets. Once the boss has full energy, he uses Getsam to damage all enemies and destroys any Jetsam on the field, inflicting additional damage to nearby targets. Flotsam also uses Yaksam to summon Regurgitated Marshstompers that will fixate random targets and continually spray Oozing Bile.


 Yaksam
Regurgitated Marshstomper
Spit up during the encounter and begin attacking random enemies.


Loot
7 drops · item level 50 · 3 slots (Back, Finger, Hands) · all Bind on Pickup


Withered J'im
Cast out from the sanctuary of Suramar, this nightfallen wandered the coastline as his body deteriorated, and his sanity along with it. Just as he was about to lose the last vestiges of personhood, he sensed a radiating energy from a nearby cave. Within, he found a shard of power originating from the Nightwell itself. It sustains and empowers him, but also warps the flow of time and space nearby. It has broken his mind completely. Now, no one enters the cave of Withered J'im. Even fools know better.
Abilities & Strategy
Overview
Withered J'im himself is frail, but those in his presence gain Withered Presence, reducing their damage by 90%. Withered J'im draws power from an Unstable Manashard nearby, creating volatile gouts of arcane energy and leverages that energy to create copies of himself.
Damage Dealers
- Avoid getting hit by Nightshifted Bolts.
- Defeat Nightstable Energy to reduce area denial.
- Avoid attacking J'im when he is afflicted with Resonance.
Healers
- Avoid getting hit by Nightshifted Bolts.
Tanks
- Avoid getting hit by Nightshifted Bolts.
- Be aware, J'im's Resonance can create many additional enemies.


Loot
7 drops · item level 50 · 4 slots (Back, Finger, Head, Trinket) · all Bind on Pickup


Brutallus
The pit lord Brutallus is a veteran of many battles, including the most recent battle at the Sunwell. His tactics are rarely sophisticated, often relying on pure force to dominate enemy armies.
Abilities & Strategy
Overview
Brutallus' Meteor Slash is devastating unless its damage is shared between many enemies. Avoid taking damage from Crashing Embers, especially when affected by Meteor Slash.
Damage Dealers
- Stand near your allies when Brutallus casts Meteor Slash.
- Avoid taking damage from Crashing Embers, especially when affected by Meteor Slash.
Tanks
- Face Brutallus toward a large group of allies when he casts Meteor Slash.
Healers
- Stand near your allies when Brutallus casts Meteor Slash.
- Prioritize allies affected by Meteor Slash for heavy healing if they are affected by Crashing Embers.


Loot
9 drops · item level 50 · 6 slots (Hands, Head, Legs, Neck, Shoulder, Wrist) · all Bind on Pickup


Malificus
A creature of pure malice, Malificus incites terror in the hearts of all those who oppose him. Portents of his arrival come in the form of mass panics among citizens, and death cults celebrating the end of days.
Abilities & Strategy
Overview
Players affected by Incite Panic will spread Incite Panic to nearby allies.
Damage Dealers
- Avoid standing in pools of Virulent Infection.
- Avoid enemies who are fleeing due to Incite Panic.
Tanks
- Avoid enemies who are fleeing due to Incite Panic.
Healers
- Avoid standing in pools of Virulent Infection.
- Avoid enemies who are fleeing due to Incite Panic.


Loot
10 drops · item level 50 · 7 slots (Back, Chest, Feet, Hands, Head, Legs +1 more) · all Bind on Pickup


Si'vash
Si'vash commands the fury of the sea, bringing its power to bear on those too close to shore. Her fierce Si'vashi Honor Guard travel with her across Azeroth's oceans, eager for vulnerable harbors to destroy.
Abilities & Strategy
Overview
Tidal Wave is slow moving, but massive. It cannot be avoided by moving at the last minute.
Damage Dealers
- Dodge Tidal Wave by watching the sea for incoming waves.
- Avoid Submerge stuns, especially as waves crash over the beach.
Tanks
- Dodge Tidal Wave by watching the sea for incoming waves.
- Gather the Si'vashi Honor Guard before they harm your allies.
Healers
- Dodge Tidal Wave by watching the sea for incoming waves.


Si'vashi Honor Guard


Loot
9 drops · item level 50 · 6 slots (Chest, Finger, Head, Legs, Shoulder, Waist) · all Bind on Pickup


Apocron
Built by the Legion thousands of years ago, Apocron has heralded the end for countless civilizations. With each world conquered, the reaver's power grows, ensuring the next realm it encounters will be put to flame.
Abilities & Strategy
Overview
Apocron's Felfire Missiles are particularly deadly and should be avoided at all costs.
Damage Dealers
- Move out of melee range when Quake is being cast.
- Dodge Felfire Missiles.
Tanks
- Save a defensive ability for Sear.
Healers
- Dodge Felfire Missiles.


Loot
8 drops · item level 50 · 6 slots (Chest, Feet, Finger, Hands, Shoulder, Waist) · all Bind on Pickup


More Legion Raids
Other raids from the same expansion.