 TheWoWDB
Take my death gate or open your own.Blizzard is at it once again.
Quest

Return to Acherus
Quest facts and objectives from the current retail game data.
The highest voted Wowhead comments for this page. They are community notes, not TheWoWDB comments.
That is every comment on this page.
Quest facts
LevelLevel 45
LocationAcherus: The Ebon Hold, Acherus: The Ebon Hold, Pit of Saron
CategoryDeath Knight Campaign
Quest ID45331
Check whether you have already completed this quest
in-game: /run print(C_QuestLog.IsQuestFlaggedCompleted(45331))
Requirements
ClassDeath Knight
Read from the Blizzard quest API.
Description
You've grown a lot since we last met, {name}. Now that we have the harness, let's see if Mograine has a plan to use it.
Where to go
Pins are the quest’s own POI points from the current retail client, projected onto the in-game zone map. The game marks one blob as the quest’s turn-in; the rest are objective areas. Points that fall outside a map’s window are dropped rather than guessed at.
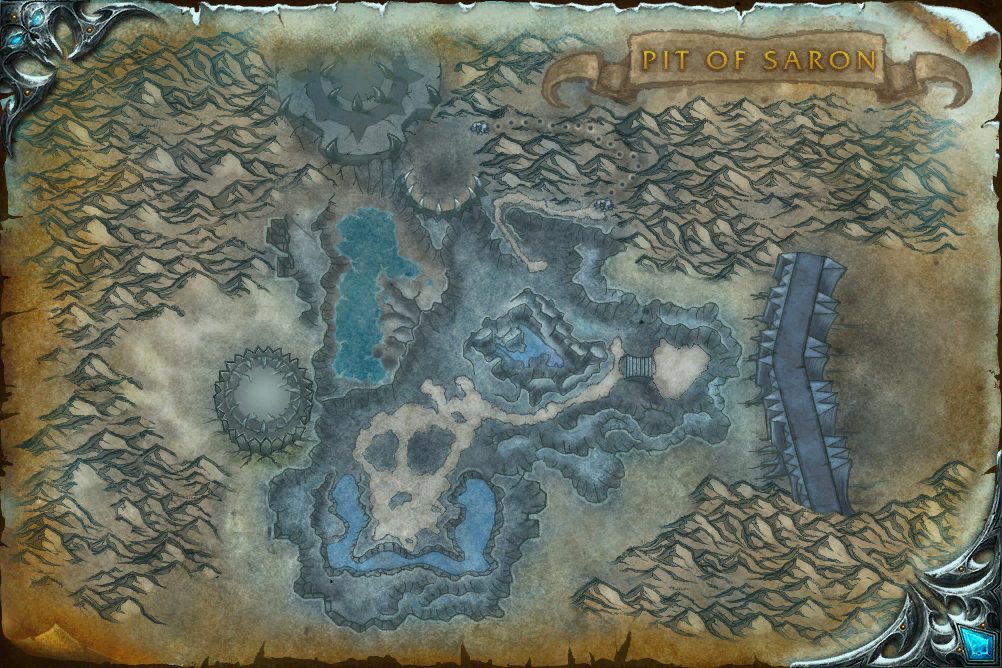 Objective area
In-game waypoint: /way #823 47.8 19.3
Coordinates
- Objective areaPit of Saron 47.8, 19.3
/way #823 47.8 19.3
Map coordinates of the pins above. An area the client draws as a shape is given by the centre of its points.
Nearby on the Acherus: The Ebon Hold map
- The Call of Icecrown same spot
- The Dead and the Damned same spot
- The Call of Vengeance same spot
- Champion: Darion Mograine same spot
- Neltharion's Lair: Braid of the Underking about 100 yards
- Darkheart Thicket: The Nightmare Lash about 100 yards
- Maw of Souls: Maul of the Dead about 100 yards
- Blades of Destiny about 180 yards
- A Weapon For Every Occasion about 180 yards
- Knights of the Ebon Blade about 180 yards
Quests whose map markers the client places closest to this one on Acherus: The Ebon Hold, nearest first. Distances are straight lines between the markers.
Getting there
Flight points closest to the quest’s turn-in marker on Acherus: The Ebon Hold:
- Acherus: The Ebon Hold
- Aalgen Point, Broken Shore
- Deliverance Point, Broken Shore
From the turn-in, the objective areas lie:
- Objective area
Straight-line distances in yards between the quest’s own map markers (QuestPOI) and the client’s flight-point positions (TaxiNodes); flight paths and terrain are not modelled.
Community notes from Wowhead · 1 comment
Top 1 shown aboveThe comments below were written by Wowhead users. They are community notes, not TheWoWDB comments. See them in context on Wowhead.
All 1 comment on this page are shown in Top Comments above.
 Order Resourcesx 2,000
Money2 gold2 silver
Experience775 XP
Reward details
Currency: Order Resources x 2,000
Used to recruit troops, run missions, and research upgrades for your order hall.
Item facts are the current retail client’s (ItemSparse); the specialisations for a pick-one item are the ones the Blizzard quest API lists; faction and currency text is the client’s own. Lowest listed price = the US commodity auction house now.
Storyline
The Four Horsemen IV
Part 4 of 11.
Previous: Severing the Sveldrek · Next: The Peak of Bones
- 1Making Preparations
- 2Harnessing Power
- 3Severing the Sveldrek
- 4Return to Acherus
- 5The Peak of Bones
- 6From Bones They Rise
- 7Thorim's Flame
- 8The Bonemother
- 9On Daumyr's Wings
- 10We Ride!
- 11Champion: Minerva Ravensorrow
Storyline order is the client’s own QuestLine data from the current retail build.
Where this quest fits
Before this quest
Taken from the storyline's own step order.
- Severing the Sveldrek
So here's the order of things, as far as I've been told. Mortal walks into Icecrown. Mortal is brutally defeated. Mortal gets raised as Scourge. These fools can't expect to trounce in here, do whatever they want, and leave without any consequence. Time to make them truly as mindless as they act.
After this quest
Taken from the storyline's own step order.
- The Peak of Bones
While you were gone, we strategized what to do with the harness. We can utilize its power to bind the spirits of deceased drakes to you, raising them under your will as loyal soldiers. I sent Minerva to Thorim's Peak in Stormheim, where she has found a brood of deceased Thorignir.
The storyline at a glance
The Four Horsemen IV has 11 steps, from Making Preparations to Champion: Minerva Ravensorrow.
Maps its steps are placed on (steps per map): Acherus: The Ebon Hold (3), Stormheim (3), Pit of Saron (2), Broken Shore (2).
Other storylines on the Acherus: The Ebon Hold map
- The Four Horsemen I
- Apocalypse
- Weapon of Legend
- Weapons of Legend
- The Blades of the Fallen Prince
- The Maw of the Damned
Steps, storylines and map placement from the client’s QuestLine, prerequisite and QuestPOI data; neighbouring quest text is Blizzard’s own (quest API), shortened to its opening sentences.