 TheWoWDB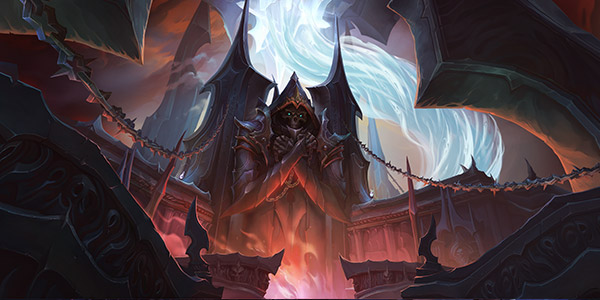
Raid - Shadowlands
Sanctum of Domination
10 encounters, 233 boss abilities and 234 drops, with the Adventure Guide’s own ability and strategy notes for each fight. Every drop links to its item page; tradeable drops carry a live Auction House price.
For eons the Jailer was bound within The Maw. Now, his endless armies gather as he expands its boundaries to consume Oribos. In the face of annihilation, Bolvar marshals his last remaining allies to charge into the heart of Torghast and confront the Jailer where he is most powerful.
Quick Facts
| Type | Raid |
|---|---|
| Expansion | Shadowlands |
| Encounters | 10 |
| Boss abilities | 233 |
| Drops | 234 |
| Item level | 1 to 233 |
| Tradeable drops | 0 |
| Difficulties | Normal, Heroic, Mythic |
Difficulties and Lockouts
Sanctum of Domination has 4 difficulties in the game data: Normal, Heroic, Mythic and Looking For Raid save you to a weekly lockout.
| Difficulty | Players | Level range | Lockout |
|---|---|---|---|
| Normal | 30 | 60 | Weekly |
| Heroic | 30 | 60 | Weekly |
| Mythic | 20 | 60 | Weekly |
| Looking For Raid | 30 | 60 | Weekly |
Raid Finder splits Sanctum of Domination into 4 wings:
- The Jailer's Vanguard
- The Dark Bastille
- Shackles of Fate
- The Reckoning
Loot Table Value
Every one of Sanctum of Domination’s 234 drops is Bind on Pickup, so none of this loot can ever reach the Auction House. The table below the bosses is the complete reward list; its value is item level, not gold.
Where It Is
One entrance is in The Maw at 69.7, 32.0; One entrance is in The Maw at 68.8, 32.2.
 Entrance 69.7, 32.0
The Maw, from the game’s own world map art. The framed marker is the Adventure Guide entrance.
 Entrance 68.8, 32.2
The Maw, from the game’s own world map art. The framed marker is the Adventure Guide entrance.
3D Model
First-party render from the game files. Model © Blizzard Entertainment.
Instance Map
The Adventure Guide places 10 bosses of Sanctum of Domination on 5 maps. Numbers follow the encounter order; each links to that fight below.
Sanctum of Domination
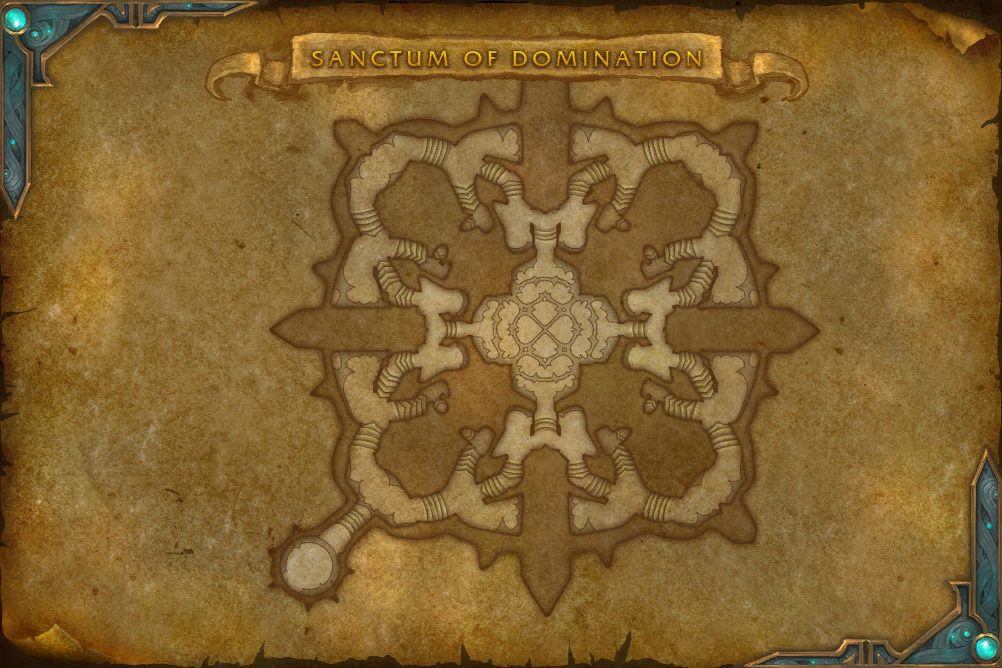 1The Tarragrue
- 1 The Tarragrue 54.5, 49.3
Sanctum of Domination
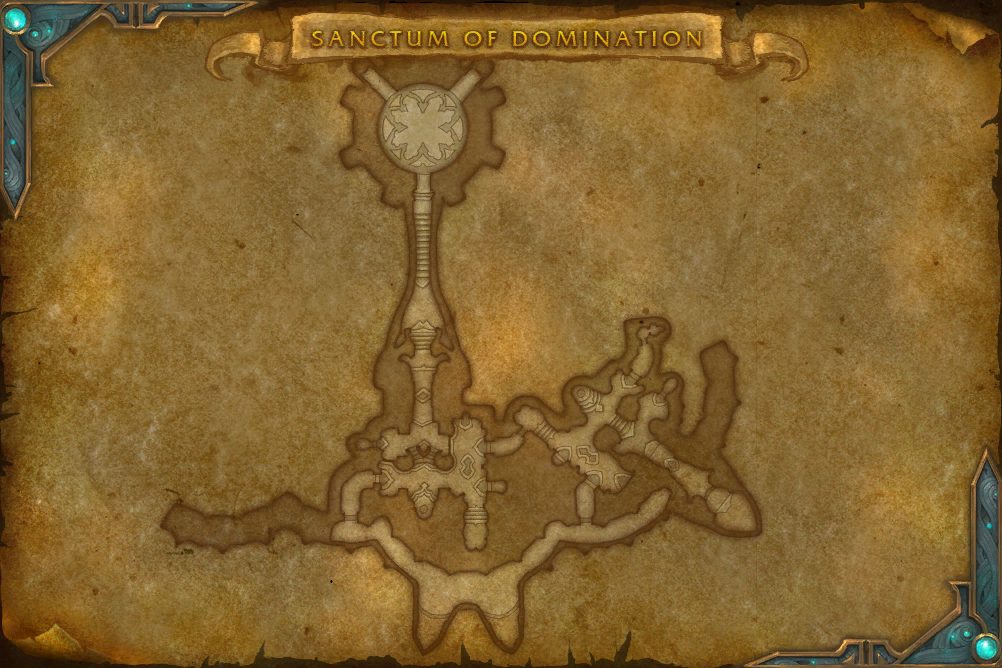 2The Eye of the Jailer3The Nine
- 2 The Eye of the Jailer 46.7, 94.2
- 3 The Nine 42.2, 19.3
Sanctum of Domination
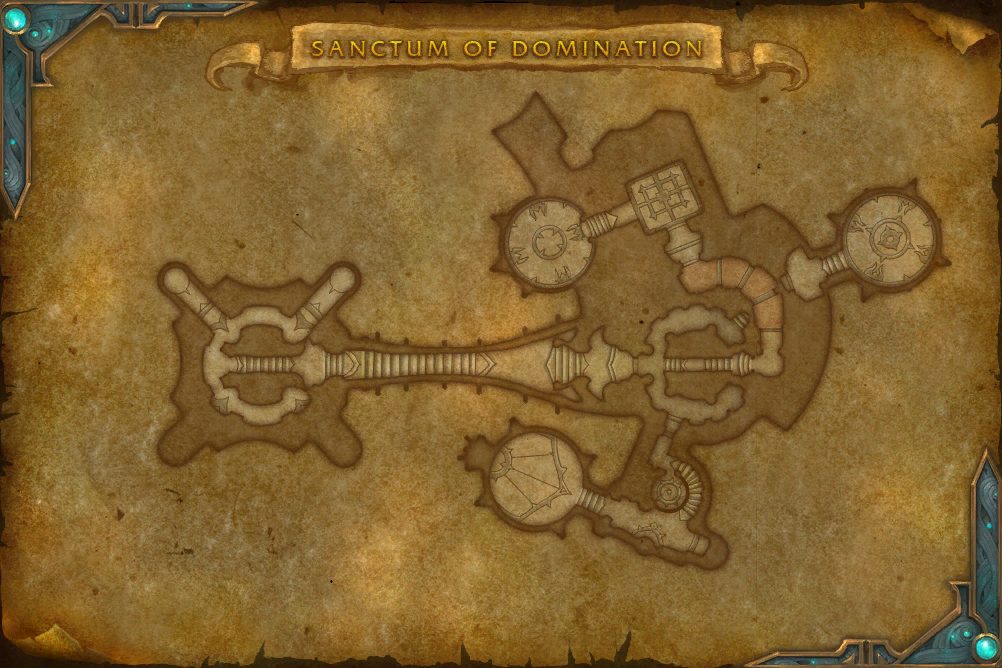 4Remnant of Ner'zhul5Soulrender Dormazain6Painsmith Raznal
- 4 Remnant of Ner'zhul 88.8, 35.7
- 5 Soulrender Dormazain 53.5, 71.6
- 6 Painsmith Raznal 66.3, 29.7
Sanctum of Domination
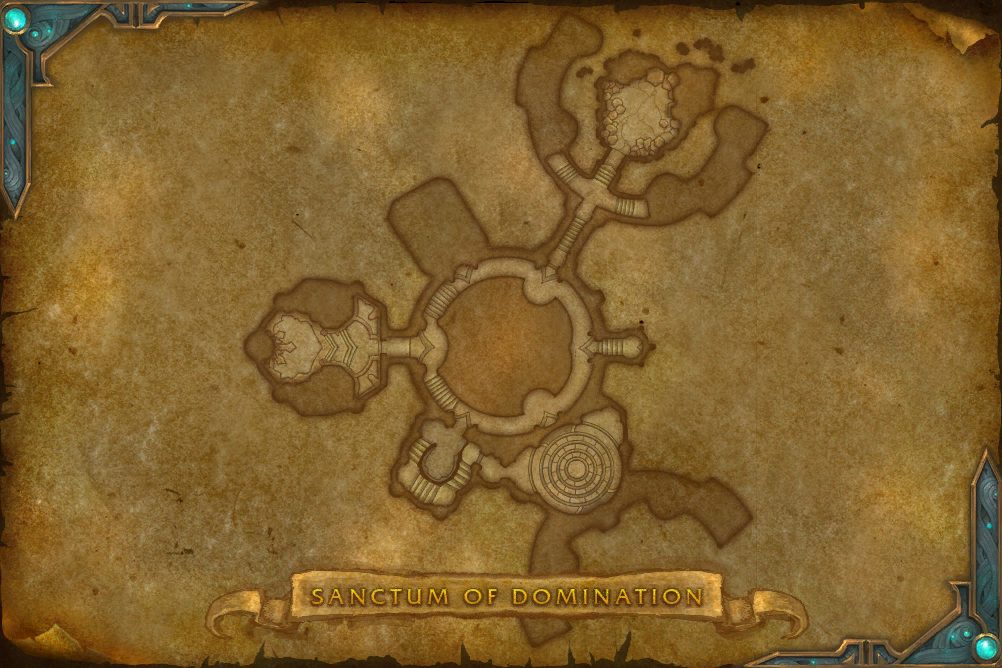 7Guardian of the First Ones8Fatescribe Roh-Kalo9Kel'Thuzad
- 7 Guardian of the First Ones 64.3, 15.8
- 8 Fatescribe Roh-Kalo 57.5, 70.3
- 9 Kel'Thuzad 29.7, 52.2
Sanctum of Domination
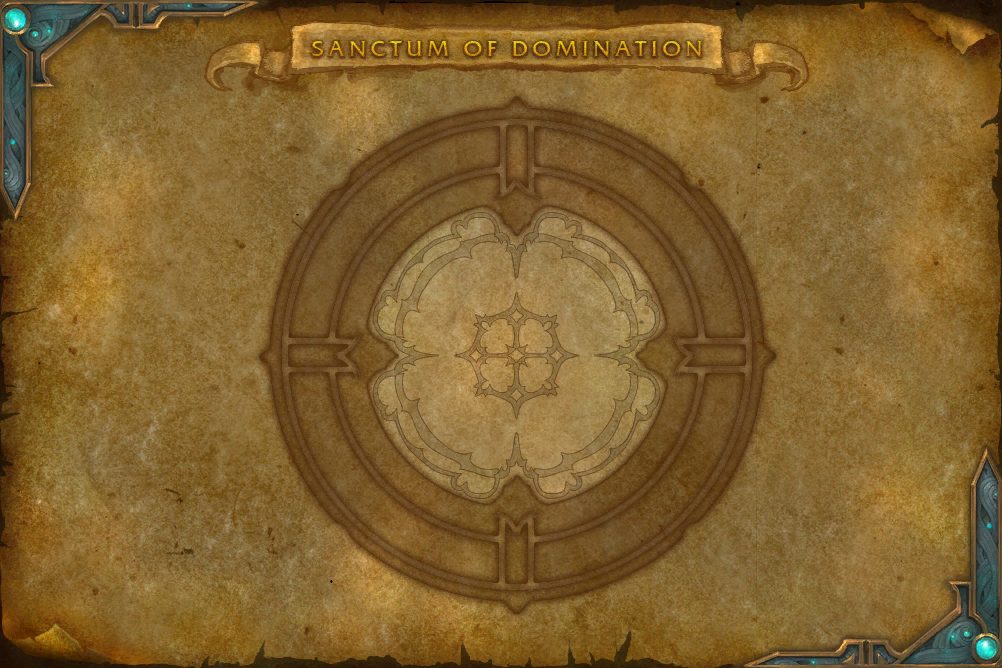 10Sylvanas Windrunner
- 10 Sylvanas Windrunner 51.7, 53.1
Encounters
NNormalHHeroicMMythic
The Tarragrue
The Jailer's relentless beast, the Tarragrue, has stalked the halls of Torghast since its first spire was raised. Countless victims have felt their souls trampled to ash by this monstrosity, which now awaits the mortal champions breaching the threshold of the tower.
Abilities & Strategy
Overview
Infused Goliaths defend the outer perimeter before The Tarragrue, offering potent Anima Powers when defeated. In battle, The Tarragrue attempts to pick off defenseless targets with Chains of Eternity while gathering power. Upon reaching 100 energy, The Tarragrue dissolves into Torghast's Hungering Mist and stalks its prey with a series of crushing assaults. At 10% health remaining, the Jailer removes Anima Powers from all players and sends The Tarragrue into a wild frenzy.
Tanks
- Crushed Armor stuns the current target and applies a large Physical damage vulnerability.
- There is a gap in Hungering Mist that can be used to avoid damage.
Damage Dealers
- Chains of Eternity stuns and then destroys the first player caught in a line.
- There is a gap in Hungering Mist that can be used to avoid damage.
Healers
- Dispel players afflicted with Predator's Howl.
- Chains of Eternity stuns and then destroys the first player caught in a line.
- There is a gap in Hungering Mist that can be used to avoid damage.
Stage One: Confronting the Terror
 Chains of Eternity

 Hungering Mist
 Remnant of Forgotten Torments
In Mythic difficulty, the Jailer summons forth two forgotten Torments and their afflictions on players last until The Tarragrue is defeated.


 Predator's Howl

 Fury of the Ages
 Grasp of Death
 Overpower

Stage Two: The Desperate Hour

Loot
23 drops · item level 145 to 226 · 10 slots (Chest, Feet, Hands, Legs, Neck, One-Hand +4 more) · all Bind on Pickup
 Cavalier Oathbreaker's Grasps
 Champion's Gruesome Greaves
 Clasps of the Unfortunate Troubadour
 Colossus Slayer's Hauberk
 Elethium-Bladed GlaiveMistwrap Manacles
 Moriaz's Spare Targe
 Periapt of Pristine Preservation
 Phantasma-Forged Striders
 Smuggler's Plundered Pauldrons
 Sorcerer's Headlong Legwraps
 Tome of Monstrous Constructions
 Carnivorous Stalkers
 Ferocious Appetite
 Fleeting Wind
 Fueled by Violence
 Incessant Hunter
 Inner Fury
 Lost in Darkness
 Nature's Focus
 Rabid Shadows
 Well-Placed Steel
 Wrench Evil
The Nine
The dark pact Sylvanas struck with the val'kyr forged her bond with the Jailer. Through the years, these winged sisters faithfully served the Dark Lady, even if it meant sacrificing themselves on her behalf. Now Sylvanas calls her nine val'kyr to fight for her one last time.
Abilities & Strategy
Overview
Kyra and Signe begin the assault on the ground, using Wings of Rage and Reverberating Refrain when their energy reaches 100. Meanwhile, Skyja commands the other val'kyr to strike from the skies. When she reaches 100 energy, she casts Call of the Val'kyr to call assistance from her fallen companions. When Kyra or Signe reach low health, Skyja lands and continues the battle.
Tanks
- Unending Strike inflicts more damage to all players the more applications it has.
- Annhylde's Bright Aegis protects all val'kyr remaining within it.
Damage Dealers
- Arthura's Crushing Gaze inflicts high damage, split evenly among players struck.
- Signe's Song of Dissolution can inflict very high damage if not interrupted.
- Formless Mass will continually attempt to cast Siphon Vitality.
Healers
- Arthura's Crushing Gaze inflicts high damage, split evenly among players struck.
- Fragments of Destiny jump to the nearest player upon being dispelled, and is only removed when all fragments exist on a single player.
Stage One: The Unending Voice
Kyra and Signe stand as a first line of defense, preventing intruders from continuing.
Kyra, The Unending
Kyra stands at the ready with her blade, prepared to strike down her foes.
 Wings of Rage
Formless Mass
Kyra calls forth a formless mass of Maw energy that only exists to devour life.
 Unending Strike
Signe, The Voice
Signe speaks to lost souls, twisting their thoughts.


 Fragments of Destiny

 Call of the Val'kyr


Stage Two: The First of the Mawsworn
When Kyra or Signe reach 5% health remaining, Skyja enters the fray and takes matters into her own hands. When Kyra or Signe reach 10% health remaining, Skyja enters the fray and takes matters into her own hands. When Kyra or Signe reach 15% health remaining, Skyja enters the fray and takes matters into her own hands. When Kyra or Signe reach 20% health remaining, Skyja enters the fray and takes matters into her own hands.
Skyja, The First
Skyja was the first to swear fealty to the powers of the Maw.
Fragments of Destiny
 Word of Recall
In Mythic difficulty, Word of Recall periodically calls the spirits of Kyra and Signe to the battlefield.
 Link Essence
 Pierce Soul
Resentment
Call of the Val'kyr
Loot
23 drops · item level 10 to 226 · 9 slots (Feet, Finger, Hands, Legs, One-Hand, Shoulder +3 more) · all Bind on Pickup
 Agatha's Gothic Greaves
 Aradne's Lancer LegguardsBrynja's Mournful Wristwraps
 Daschla's Defiant Treads
 Jotungeirr, Destiny's CallKyra's Unending Protectors
 Mantle of Arthura's Chosen
 Sanctum Gloomcharger's Reins
 Scrawled Word of Recall
 Shard of Annhylde's Aegis
 Signe's Sonorous Scramaseax
 Skyja's Revenant Fury
 Sworn Oath of the Nine
 Deadly Chain
 Exaltation
 Fel Celerity
 Flame Accretion
 Focused Lightning
 Precise Alignment
 Rising Sun Revival
 Royal Decree
 Serrated Glaive
 Unleashed Frenzy
Kel'Thuzad
The nefarious Kel'Thuzad awaits at the apex of the soul river, allowing the lich to draw upon an unlimited well of power. All his countless schemes and machinations have led to this final confrontation, where he has plotted the mortal champions' ultimate demise in service of his true master.
Abilities & Strategy
Overview
Kel'Thuzad can only be truly defeated once his phylactery is destroyed. Until then, when Kel'Thuzad reaches 0 health remaining he calls forth his minions to protect him while the phylactery opens and empowers him. During this window, players may enter the phylactery and attempt to destroy the Remnant of Kel'Thuzad. Once fully recovered, Kel'Thuzad gains a stack of Necrotic Surge and engages the players once more. When the Remnant is destroyed, the phylactery shatters and Kel'Thuzad summons a Deep Freeze to unleash all his power before death can finally take him.
Damage Dealers
- Soul Shards continuously cast Piercing Wail inflicting damage to the raid.
- Enemies alive at the end of Stage Two receive Necrotic Empowerment.
- Kel'Thuzad cannot be defeated while the Remnant of Kel'Thuzad is alive.
Healers
- Frost Blast roots players during moments when mobility is paramount.
- Sinister Miasma continually stacks damage on players within the phylactery.
Tanks
- Each Soul Shard created applies Soul Exhaustion to its summoner which cannot be removed until it is absorbed.
- Unstoppable Abominations inflict heavy damage.
Stage One: Chains and Ice
Kel'Thuzad is a master of frost and shadow and until the phylactery is destroyed, remains immortal.
 Howling Blizzard
 Dark Evocation
 Soul Fracture

 Glacial Wrath
Glacial Spike
Once summoned, the Glacial Spike loses 5% health every 2 sec. Upon death the spike erupts, causing Frozen Destruction.
 Oblivion's Echo
Frostbound Devoted
These skeletal constructs move towards a random player and detonate if they reach them.
 Frost Blast

Ice Shard
Stage Two: The Phylactery Opens
When Kel'Thuzad is defeated, the phylactery opens and restores him to life once more. While open, players can enter the phylactery to battle the last remnant of Kel'Thuzad's soul. It is during this time Kel'Thuzad uses March of the Forsaken to summon his minions to protect his exposed phylactery.
 Sinister Miasma
Necrotic Surge
In Mythic difficulty, Kel'Thuzad starts with applications of Necrotic Surge.
 Necrotic Empowerment
 Vengeful Destruction
 March of the Forsaken
Unstoppable Abomination
The Unstoppable Abomination's unholy strength allows it to inflict punishing melee attacks.
Soul Reaver
Soul Reaver's periodically unleash Banshee's Cry.
 Undying
Remnant of Kel'Thuzad
At 60% and 20% health, the Remnant of Kel'Thuzad attempts to destroy anyone reamining within the phylactery with Undying Wrath and interrupts Kel'Thuzad's cast of Vengeful Destruction.
 Foul Winds
Shadow Fissure
In Mythic difficulty, Shadow fissures create Shadow Pools.
 Freezing Blast
 Glacial Winds
 Undying Wrath
 Soul Marked
Stage Three: The Final Stand
With the phylactery destroyed, true death awaits. Kel'Thuzad unleashes his full power to make his violent last stand.
Sinister Miasma
Deep Freeze
 Onslaught of the Damned
Unstoppable Abomination
The Unstoppable Abomination's unholy strength allows it to inflict punishing melee attacks.
Soul Reaver
Soul Reaver's periodically unleash Banshee's Cry.
Frostbound Devoted
These skeletal constructs move towards a random player and detonate if they reach them.
March of the Forsaken
Soul Reaver
Soul Reaver's periodically unleash Banshee's Cry.
Frost Blast
Ice Shard
Loot
26 drops · item level 1 to 233 · 9 slots (Head, Legs, Neck, One-Hand, Shoulder, Trinket +3 more) · all Bind on Pickup
Bands of the Fallen House Ceremonial Construct Clasp
 Elite Aranakk Breeches
 Forbidden Necromantic TomeFrame of the False Margrave
 Interplanar Keystone
 Jaithys, the Prison Blade
 Maledict Opus
 Relic of the Frozen Wastes
 Resonant Silver Bell
 Sash of Duplicitous MagicsSpaulders of the Crooked Confidant
 The Devouring Cold
 Valorous Visage of Krexus
 Vyraz's Parade Cuffs
 Chilled to the CoreCryo-Freeze
 Deadly Tandem
 Eradicating Blow
 Floral Recycling
 Holy Oration
 Inspiring Presence
 Mawsworn Minion
 Quick Decisions
 Untempered Dedication
 Withering Bolt
Sylvanas Windrunner
With Oribos in peril, a desperate battle at the pinnacle of the Sanctum begins. Standing between the Jailer and the mortals who would stop him is Sylvanas Windrunner. With no masks left to wear, the Banshee Queen unleashes her full power to protect the Banished One while his ultimate plan unfolds.
Abilities & Strategy
Overview
Azeroth's champions battle Sylvanas at the pinnacle of the Sanctum of Domination, across the vastness between the Maw and the Eternal City, and within the Arbiter's chamber. Players first encounter Sylvanas atop Torghast. Upon reaching 83% health, she rips apart chunks of the tower itself. As the Jailer envelops Oribos in the Maw, players pursue him with the aid of Thrall, Jaina Proudmoore, and Bolvar Fordragon, forging new paths and defeating Mawforged commanders while Sylvanas harrows from all sides in Banshee Form. Within the Crucible, the Banished One executes his grand plan. Our allies confront the dominated Anduin Wrynn while Sylvanas engages players directly.
Damage Dealers
- While under the effects of Windrunner, spells and abilities strike Sylvanas where she cast Windrunner.
- Sylvanas' Rive, Ruin, and Raze are deadly if not avoided.
Healers
- Shadow Dagger inflicts significant damage to affected targets.
- Sylvanas' Rive, Ruin, and Raze are deadly if not avoided.
Tanks
- Sylvanas rarely gives ground. She casts Ranger Shot exclusively if her threat target has moved out of range of her Ranger Strike.
- Ranger's Heartseeker and Banshee's Weapons, Banshee's Heartseeker and Banshee's Blades, can inflict high damage in a short period of time.
- Ranger's Heartseeker and Banshee's Heartseeker can inflict high damage in a short period of time.
Stage One: A Cycle of Hatred
"We have forgotten what makes us strong." Players battle against Sylvanas atop Torghast while the Jailer remains elusive.


Intermission: A Monument to our Suffering
"You are unfit to wear this crown." Upon reaching 83% health, Sylvanas chains all players with Domination Chains, then casts Rive, destroying the tower itself.


Stage Two: The Banshee Queen
"What are we if not slaves to this torment?" Sylvanas enters Banshee Form, taking to the skies to waylay players' pursuit of the Jailer as he ascends. Thrall and Jaina lend their aid, and cast Call Earth and Channel Ice, respectively, after defeating the Mawforged commanders.
Sylvanas Windrunner


Forces of the Maw
The Jailer's forces continually flood into the fray. Defeating their Mawforged leaders allows Thrall and Jaina to progress.
 Hymn of the End
Mawsworn Vanguard
Mawsworn Hopebreaker
Mawforged Souljudge
Mawforged Summoner
Mawforged Goliath
Mawforged Colossus
Stage Three: The Freedom of Choice
"Nothing can stop what is to come." Sylvanas follows the players' traversal, greeting them for the final showdown between Death and inevitability in the Jailer's master plan.


Loot
26 drops · item level 30 to 233 · 12 slots (Back, Chest, Feet, Finger, Head, One-Hand +6 more) · all Bind on Pickup
 Rae'shalare, Death's Whisper
 Dark Ranger's Quiver
 Desecrator's Keening Wristwraps
 Edge of Night
 Epaulets of the Master RangerGreaves of Haunting Ruination
 Guard of the Sundered Defender
 Old Warrior's Soul
 Spires of Broken Hope
 Tarnished Insignia of Quel'Thalas
 Veil of the Banshee Queen
 Vengeance's Reins
 Windrunner's Baldric
 Witherheart Studded Breastplate
 Ashen Juggernaut
 Carnivorous Instinct
 Deeper Daggers
 Evasive Stride
 Growing Inferno
 Infernal Brand
 Lingering Plague
 Mind Devourer
 Resilience of the Hunter
 Shake the Foundations
 Templar's Vindication
 Unrelenting Cold
The Eye of the Jailer
When Azeroth was young, Odyn traded his eye to Mueh'zala to peer into the Shadowlands. Vain Odyn was deceived, for the Jailer twisted the Eye to serve his own ends. The Eye's unwavering gaze allows the Jailer to see all that transpires within his domain--and perhaps others as well.
Abilities & Strategy
Overview
The Eye of the Jailer fights players directly on the platform at first. Upon reaching 66%, and 33% health remaining, the Eye of the Jailer unleashes two of its Deathseeker Eyes to assault players on the platform and retreats to fight from a distance. When all of its Deathseeker Eyes have been defeated the Eye of the Jailer becomes enraged, unleashing Immediate Extermination and beginning its final assault.
Tanks
- Deathlink will damage other people in the raid for the amount of damage you take.
- Spreading Misery will always hit the Deathseeker Eye's primary target and one other random target.
- Deathseeker Eyes will repeatedly cast Suffering if brought too close to each other.
Damage Dealers
- If Deathseeker Eyes do not die together, the dead one will continuously pulse Suffering.
- Desolation Beam will chain to other targets nearby on cast, increasing damage with each leap.
- Dragging Chains is reduced by each target hit by the effect.
Healers
- Deathlink will damage other people in the raid for the amount of damage the primary target takes.
- Slothful Corruption slows down ranged and casting speeds but does not slow down melee attack speed.
- Immediate Extermination will eventually make healing impossible.

Stage One: His Gaze Upon You


Stage Two: Double Vision


Stage Three: Immediate Extermination

Loot
22 drops · item level 1 to 226 · 9 slots (Chest, Feet, Hands, Held In Off-hand, One-Hand, Trinket +3 more) · all Bind on Pickup
Airborne Abductor's VambracesCoiled Stygian Grapnel Gazepiercer
 Grasps of the Clairvoyant Sage
 Greaves of Extermination
 Guarm's Lost Chew Toy
 Loyal Kvaldir's HandwrapsMawsworn Eviscerator's CuirassStygian Lance of Passage
 Titanic Ocular Gland
 Eye of Extermination
 Artifice of the Archmage
 Blood Bond
 Corrupting Leer
 Expurgation
 Eye of Allseeing
 Fade to Nothing
 Light's Inspiration
 Marksman's Advantage
 Safeguard
 Tumbling Technique
 Well-Honed Instincts
Painsmith Raznal
Painsmith Raznal is a sadistic mastermind who has spent eons perfecting the deadly traps found in Torghast. He relishes the screams of his victims as a testament to his skill, listening with malignant delight as they echo through the tower's desolate halls.
Abilities & Strategy
Overview
The Painsmith's chamber is built from deadly spikes that erupt from the floor, activated by his weapons' attacks. Upon reaching 70% and 40% health remaining Raznal will leap to his anvil to forge a new weapon, allowing him to activate spikes in devious new combinations.
Tanks
- Deadly spikes erupt from the floor when Painsmith Raznal throws his weapon.
- Cruciform Axe, Reverberating Hammer, and Dualblade Scythe inflict massive damage to nearby players upon impact.
- Shadowsteel Embers are created while Raznal is occupied with Forge Weapon.
Damage Dealers
- Deadly spikes erupt from the floor when Painsmith Raznal throws his weapon.
- Spiked Balls roll across the chamber and inflict massive damage to anyone caught in their path.
- Shadowsteel Chains inflict damage to nearby players and knock them back.
- Shadowsteel Chains inflict damage to nearby players.
Healers
- Deadly spikes erupt from the floor when Painsmith Raznal throws his weapon.
- Reverberating Hammer, Cruciform Axe, and Dualblade Scythe inflict massive damage to nearby players upon impact.
- Shadowsteel Chains inflict damage to nearby players and knock them back.
- Shadowsteel Chains inflict damage to nearby players.
Stage One: A Chamber of Agony
The Painsmith wields an Instrument of Pain amidst razor sharp spikes that erupt from the floor.
Instruments of Pain
The Painsmith wields a weapon of his own crafting, starting with the Cruciform Axe.


 Spiked
 Spiked Balls
 Shadowsteel Chains
 Flameclasp Trap

Stage Two: The Screaming Anvil
Upon reaching 70% and 40% health remaining the Painsmith leaps to his anvil and begins to craft a new Instrument of Pain.
 Shadowsteel Embers
In Mythic difficulty, the Painsmith's forging creates Shadowsteel Horrors.
Shadowsteel Horror
Twisted monstrosities that eventually burn out with a Final Scream.
 Black Flames

Spiked Balls
Loot
23 drops · item level 145 to 226 · 7 slots (Chest, Finger, Hands, Head, Legs, One-Hand +1 more) · all Bind on Pickup
 Cruciform Veinripper
 Ebonsoul ViseExacting MindslicerFlameclasp-Scorched LegguardsGuillotine GauntletsHangman's KnotbindersLeggings of the Screaming Flames
 Miniature Breaking Wheel
 Sacrificer's Sacramental Cassock
 Shadowsteel Demoralizer
 Shadowsteel Facecage
 Tormented Rack Fragment
 Debilitating Malady
 Duplicitous Havoc
 Enkindled Spirit
 Flame Infusion
 Master Flame
 Nimble Fingers
 Pyroclastic Shock
 Roaring Fire
 Stellar Inspiration
 Unnerving Focus
 Xuen's Bond
Remnant of Ner'zhul
Intended to herald the Jailer's reign on Azeroth, the first Lich King, Ner'zhul, proved unworthy in his master's eyes. The last remnants of the fallen orc's twisted soul were encased in spiked shadowsteel, condemned to everlasting torment for his failure. All who cross his path will share in his suffering.
Abilities & Strategy
Overview
The Remnant of Ner'zhul periodically manifests Orbs of Torment that inflict damage to all players until they're destroyed and thrown from the platform. At 80%, 60%, and 30% health remaining, a piece of the armor encasing the Remnant of Ner'zhul shatters, increasing the intensity of Aura of Spite.
Tanks
- The Remnant of Ner'zhul uses Suffering when reaching 100 energy.
- Orbs of Torment take reduced damage until struck with Suffering.
- Malevolence knocks back all players from the position of the victim upon removal.
Damage Dealers
- Orbs of Torment take reduced damage until struck with Suffering.
- Torment will inflict damage to all players until Orbs of Torment are thrown off the edge of the platform.
- Malevolence knocks back all players from the position of the victim upon removal.
Healers
- Torment will inflict damage to all players until Orbs of Torment are thrown off the edge of the platform.
- Malevolence knocks back all players from the position of the victim upon removal and inflicts signifcant damage to the raid.
- Malevolence can be dispelled.
Orb of Torment
Torments players until it is carried to the edge of the platform and thrown off.


 Shatter
In Mythic difficulty, each of the piece of shattered armor drops to the ground and duplicates one of the Remnant of Ner'zhul's spell casts.
Helm of Suffering
At 80% health remaining, the Helm of Suffering drops to the ground and will duplicate casts of Suffering.
Gauntlet of Malice
At 60% health remaining, the Gauntlet of Malice drops to the ground and will duplicate casts of Grasp of Malice.
Rattlecage of Agony
At 30% health remaining, the Rattlecage of Agony drops to the ground and will duplicate casts of Malevolence.


Loot
21 drops · item level 145 to 226 · 7 slots (Chest, Hands, Head, Neck, One-Hand, Trinket +1 more) · all Bind on Pickup
 Betrayer's Shadowspike
 Cap of Writhing MalevolenceCrest of the Fallen
 Cuirass of the Lonely CitadelDark Tormentor's Gaze
 Gnarled Staff of the Elder Shaman
 Grasps of Ancestral WhispersHood of Vengeful Possession
 Shadowed Orb of Torment
 Weathered Talisman of the Shadowmoon
 Whispering Shard of Power
 Ambidexterity
 Celestial Effervescence
 Convocation of the Dead
 Fel Commando
 Harmony of the Tortollan
 Mortal Combo
 Power Unto Others
 Shivering Core
 Spiritual Resonance
 Tough as Bark
Soulrender Dormazain
Soulrender Dormazain extracts anima from the hellaciously brutish captives of Torghast to fuel the Jailer's armies. Dormazain has never met a soul he couldn't break, but his latest victim is proving resistant to the usual methods. Feeding on this captive's unending rage, Dormazain will enjoy spending millennia finding his weaknesses.
Abilities & Strategy
Overview
As Dormazain inflicts Torment to Garrosh Hellscream, he gains energy. Upon reaching 100 energy, Dormazain performs Tormented Eruptions.
Damage Dealers
- Snapping all Warmonger Shackles binding Garrosh interrupts Hellscream.
- Mawsworn Agonizers cast Agonizing Nova and become more powerful if allowed to reach 100 energy or Garrosh, gaining Defiance.
- Brand of Torment inflicts damage to allies and Mawsworn.
Healers
- Snapping all Warmonger Shackles binding Garrosh will interrupt Hellscream.
- Tormented Eruptions inflicts heavy damage.
- Brand of Torment inflicts damage to allies and Mawsworn.
Tanks
- Snapping all Warmonger Shackles binding Garrosh interrupts Hellscream.
- Tormented Eruptions inflicts heavy damage.
- Ruinblade increases Physical damage taken.

Warmonger Shackles
 Unleashed Tyranny
 Hellscream
16 In Heroic difficulty and Mythic difficulties, Hellscream also causes all players to flee in fear.
Soul Manacles


Mawsworn Overlord
Mawsworn Overlords move inexorably towards Garrosh, empowering nearby Mawsworn with Infuse Defiance. If allowed to reach Garrosh, Mawsworn Overlords empower all Mawsworn with [Defiant.

Mawsworn Agonizer
Mawsworn Agonizers attempt to advance towards Garrosh to continue the task of tormenting him. Upon reaching Garrosh or 100 energy, the become suffused with Defiance, becoming immune to crowd control effects and dealing increased damage.


Loot
24 drops · item level 1 to 226 · 9 slots (Back, Feet, One-Hand, Ranged, Shoulder, Trinket +3 more) · all Bind on Pickup
Agonizing Spiked Belt Cloak of Scarred HonorCruel Overlord's ShacklesDecanter of Endless HowlingDormazain's Tenderizer
 Hellscream's RequiemPauldrons of Tyrannical DefianceRagebound Leg IronsRuinous Warchief's Shoulderguards
 Soulrent Outrider's RecurveTormented Shadowcleft BootsTrenchant Warmonger Treads
 Irongrasp
 Brutal Vitality
 Chilled Resilience
 Diabolic Bloodstone
 Flash of Clarity
 Flow of Time
 Grounding BreathLasting Spirit
 Light's Barding
 Shattered Restoration
 Stiletto Staccato
 Vital Accretion
Guardian of the First Ones
Pulled by the Jailer's chains from a distant, unknown realm, this malfunctioning guardian seeks to protect the inscrutable knowledge known as "cyphers". It uses the last of its power to obliterate any who would attempt to plunder the secrets of its enigmatic makers.
Abilities & Strategy
Overview
Over the course of the encounter, the Guardian of the First Ones depletes its energy reserve. When the Guardian's Energy reaches 0 it activates Purging Protocol until it can link with an Energy Core.
Tanks
- Standing in Radiant Energy greatly reduces the effects of Unstable Energy.
- The Guardian will activate Energizing Link while standing near an Energy Core.
- The Guardian gains significant attack speed while Purging Protocol is active.
Damage Dealers
- Standing in Radiant Energy greatly reduces the effects of Unstable Energy.
- Threat Neutralization inflicts substantial Arcane damage to the targeted player and nearby allies.
Healers
- Standing in Radiant Energy greatly reduces the effects of Unstable Energy.
- Purging Protocol inflicts increasing Arcane damage to all players until the Guardian links with an Energy Core.
- Threat Neutralization inflicts substantial Arcane damage to the targeted player and nearby allies.

 Elimination Pattern
 Sunder
 Obliterate
In Mythic difficulty, the Guardian depletes 20 energy if Obliterate fails to hit at least 4 players.

 Threat Neutralization
In Mythic difficulty, striking an Energy Core with this effect restores energy.


Loot
24 drops · item level 145 to 226 · 10 slots (Back, Chest, Feet, Legs, One-Hand, Ranged +4 more) · all Bind on Pickup
Ancient Colossus Chassis Directional Meltdown Projector
 Disintegration-Proof WaistbandEnigmatic Energy CircuitHyperdense GreavesInfinity's Last Bulwark
 Pylon of the Great PurgeReactive Defense Matrix
 Salvaged Fusion AmplifierSandals of Sacred Symmetry
 Self-Replicating TissueTorch of Eternal KnowledgeUnstable Energizer Boots
 Adaptive Armor Fragment
 Echoing Call
 Hack and Slash
 Heavy Rainfall
 Insatiable Appetite
 Layered Mane
 Move with Grace
 Poisoned Katar
 Resplendent MistShielding Words
 Tempest Barrier
Fatescribe Roh-Kalo
Once a fatescribe entrusted with Korthia's countless secrets, the Mawsworn seized Roh-Kalo and bound him to the Jailer's will. With Torghast's power at his disposal, Roh-Kalo seeks to author a new fate for the Shadowlands.
Abilities & Strategy
Overview
Fatescribe Roh-Kalo calls upon his attackers' fates, singling them out with Call of Eternity and building elaborate patterns of destruction with Fated Conjunction. At 70% and 40% health remaining, the Fatescribe uses Realign Fate to activate the Loom of Fates and draw from its considerable power. Realigning the runes to their true positions interrupts Darkest Destiny and forces the Fatescribe to resume his assault once more. When the Fatescribe's attempts are interrupted twice, he adds Extemporaneous Fate to his repertoire.
Tanks
- The damage from Invoke Destiny is reduced the farther other players are from the eruption.
- Shade of Destiny will trigger Overwhelming Burden if it reaches melee range with its target.
- When Fatescribe Roh-Kalo first strikes a new melee target, he will cast Diviner's Probe several times, inflicting significant damage to his current target.
Damage Dealers
- Call of Eternity erupts after a short time, inflicting damage to all nearby allies.
- Assist in moving the Loom of Fates to prevent Darkest Destiny.
- Call of Eternity erupts after a short time, leaving behind an Echo of Eternity and inflicting damage to all nearby allies.
- Runic Affinity allows the manipulation of the Loom of Fates to prevent Darkest Destiny.
- Grim Portent will erupt for massive damage if any selected players are not within their rune on expiration.
Healers
- When Fatescribe Roh-Kalo first strikes a new melee target, he will cast Diviner's Probe several times, inflicting significant damage to his current target.
- Call of Eternity inflicts heavy damage in the build-up to eruption.
- Assist in moving the Loom of Fate to counteract Realign Fate and Extemporaneous Fate.
- Call of Eternity erupts after a short time, leaving behind an Echo of Eternity and inflicting damage to all nearby allies.
- Runic Affinity allows the manipulation of the Loom of Fates to prevent Darkest Destiny.
- Grim Portent will erupt for massive damage if any selected players are not within their rune on expiration.
Stage One: Scrying Fate
Fatescribe Roh-Kalo twists fate itself into a weapon, reading players and spells to exploit their predictable weaknesses.
 Grim Portent
Invoke Destiny
Shade of Destiny
The Shade of Destiny binds its target with a Burden of Destiny, causing the Shade to move inexorably toward its target. Upon death, the Shade of Destiny shatters into several Fatespawn Anomalies.
 Diviner's Probe
 Twist Fate
 Fated Conjunction
 Call of Eternity
Stage Two: Defying Destiny
Fatescribe Roh-Kalo activates the Loom of Fates, seeking to invoke the players' Darkest Destiny.
The Loom of Fates


Realign Fate


Stage Three: Fated Terminus
Desperate to gain an advantage, Fatescribe Roh-Kalo begins shaping an Extemporaneous Fate in addition to his other abilities.

Loot
22 drops · item level 145 to 226 · 9 slots (Chest, Finger, Hands, Head, Held In Off-hand, Legs +3 more) · all Bind on Pickup
Binding of Dark Destinies Carved Ivory KeepsakeConjunction-Forged ChainmailCowl of Haunting PrecognitionDemigaunts of PredestinationDiviner's Draped FineryFateforged LegplatesFate-Threaded BindingsGloves of Forsaken Purpose
 Oscillating OuroborosRecord of Collapsing Realities
 Weave of Warped Fates
 Arcane Prodigy
 Brutal Projectiles
 Demonic Momentum
 Felfire Haste
 Front of the Pack
 Resolute Defender
 Sleight of Hand
 Swift Penitence
 Swift Transference
 Thunderous Paws
Quests
2 quests Blizzard’s quest data files under Sanctum of Domination, all for level 60:
- Reward:51 gold48 silver

Achievements
38 achievements tied to Sanctum of Domination, worth 310 achievement points in total.
 Sanctum of Domination Guild RunDefeat the following bosses in the Sanctum of Domination on Normal difficulty or higher while in a guild group.10
- Heroic: Sanctum of Domination Guild RunDefeat the following bosses in the Sanctum of Domination on Heroic difficulty or higher while in a guild group.10
 Mythic: Sylvanas Windrunner Guild RunDefeat Sylvanas Windrunner in the Sanctum of Donination on Mythic difficulty while in a guild group.10
- Sanctum of DominationDefeat the following bosses on any difficulty.10
- Heroic: Sanctum of DominationDefeat the following bosses on Heroic difficulty.10
- Mythic: Sanctum of DominationDefeat the following bosses on Mythic difficulty.10
 The Jailer's VanguardDefeat the following bosses in the lower floors of the Sanctum of Domination.10
 The Dark BastilleDefeat the following bosses in the wings of the Sanctum of Domination.10
 Shackles of FateDefeat the following bosses in the upper tiers of the Sanctum of Domination.10
- The ReckoningAscend to the summit and confront Sylvanas Windrunner in the Sanctum of Domination.10
 Mythic: The TarragrueDefeat The Tarragrue in the Sanctum of Domination on Mythic difficulty.10
- Mythic: The Eye of the JailerDefeat The Eye of the Jailer in the Sanctum of Domination on Mythic difficulty.10
- Mythic: The NineDefeat The Nine in the Sanctum of Domination on Mythic difficulty.10
 Mythic: Soulrender DormazainDefeat Soulrender Dormazain in the Sanctum of Domination on Mythic difficulty.10
 Mythic: Remnant of Ner'zhulDefeat Remnant of Ner'zhul in the Sanctum of Domination on Mythic difficulty.10
- Mythic: Painsmith RaznalDefeat Painsmith Raznal in the Sanctum of Domination on Mythic difficulty.10
 Mythic: Guardian of the First OnesDefeat Guardian of the First Ones in the Sanctum of Domination on Mythic difficulty.10
 Mythic: Fatescribe Roh-KaloDefeat Fatescribe Roh-Kalo in the Sanctum of Domination on Mythic difficulty.10
- Mythic: Kel'ThuzadDefeat Kel'Thuzad in the Sanctum of Domination on Mythic difficulty.10
- Mythic: Sylvanas WindrunnerDefeat Sylvanas Windrunner in the Sanctum of Domination on Mythic difficulty.Title: Breaker of Chains10
- Hall of Fame: Sylvanas (Horde)Among the first one hundred Horde guilds worldwide to defeat Sylvanas Windrunner on Mythic difficulty.Title: Famed Bane of the Banshee Queen
 Name A Better Duo, I'll WaitDefeat The Tarragrue after entering the mists and reuniting Moriaz with Buttons in the Sanctum of Domination on Normal difficulty or higher.10
- Hall of Fame: Sylvanas (Alliance)Among the first one hundred Alliance guilds worldwide to defeat Sylvanas Windrunner on Mythic difficulty.Title: Famed Bane of the Banshee Queen
 Eye Wish You Were HereDefeat the Eye of the Jailer after using the Scavenged S.E.L.F.I.E. Camera to take a picture of the Eye of the Jailer and the entire raid after it has cast Immediate Extermination in the Sanctum of Domination on Normal difficulty or higher.10
 To the NinesDefeat The Nine after forming a Shard of Destiny from 9 or more Fragments of Destiny in the Sanctum of Domination on Normal difficulty or higher.10
- Tormentor's TangoDefeat Soulrender Dormazain after /taunting Garrosh Hellscream before combat begins and avoiding all Torment impacts in the Sanctum of Domination on Normal difficulty or higher.10
 I Used to Bullseye Deeprun Rats Back HomeDefeat the Remnant of Ner'zhul after scoring three goals in the Sanctum of Domination on Normal difficulty or higher.10
 Whack-A-SoulDefeat Painsmith Raznal after activating the Burning Gibbets in the Sanctum of Domination on Normal difficulty or higher.10
 Knowledge is PowerDefeat the Guardian of the First Ones after enlightening and defeating Vazzaren the Seeker in the Sanctum of Domination in Normal difficulty or higher.10
 Flawless FateDefeat Fatescribe Roh-Kalo without taking damage from Fate Fragments, Fated Conjunction, or the explosions from Call of Eternity and Echo of Eternity on Normal difficulty or higher.10
- Together ForeverDefeat Kel'Thuzad after thawing the Remnant's heart in the Sanctum of Domination on Normal difficulty or higher.10
 This World is a PrismDefeat Sylvanas Windrunner after activating the Focusing Prism in the Sanctum of Domination on Normal difficulty or higher.10
- Ahead of the Curve: Sylvanas WindrunnerDefeat Sylvanas Windrunner in the Sanctum of Domination on Heroic difficulty or higher, before the release of the next raid tier.
- Cutting Edge: Sylvanas WindrunnerDefeat Sylvanas Windrunner in the Sanctum of Domination on Mythic difficulty, before the release of the next raid tier.
 Coming to TermsDefeat Anduin Wrynn after defeating Anduin's Grief in the Sepulcher of the First Ones on Normal difficulty or higher.10
- Fate of DominationDefeat the following bosses on any difficulty while Sanctum of Domination is a Fated raid.
- Heroic: Fate of DominationDefeat the following bosses on Heroic difficulty while Sanctum of Domination is a Fated raid.
- Mythic: Fate of DominationDefeat the following bosses on Mythic difficulty while Sanctum of Domination is a Fated raid.
More Shadowlands Raids
Other raids from the same expansion.