 TheWoWDB
Raid - The War Within
Liberation of Undermine
8 encounters, 239 boss abilities and 118 drops, with the Adventure Guide’s own ability and strategy notes for each fight. Every drop links to its item page; tradeable drops carry a live Auction House price.
Despite the best efforts of the united cartels, Jastor Gallywix has holed himself away in The Gallagio and called in every favor ever owed to him... leaving a mountain of would-be oppressors between the goblins of Undermine and the Chrome King. Gazlowe and the rest of goblinkind will need to find their way into the casino to rid themselves of Gallywix for good.
Quick Facts
| Type | Raid |
|---|---|
| Expansion | The War Within |
| Encounters | 8 |
| Boss abilities | 239 |
| Drops | 118 |
| Item level | 1 to 623 |
| Tradeable drops | 5 |
| Difficulties | Mythic |
Difficulties and Lockouts
Liberation of Undermine has 5 difficulties in the game data: Normal, Heroic, Mythic and Looking For Raid save you to a weekly lockout; Story can be run again at any time.
| Difficulty | Players | Level range | Lockout |
|---|---|---|---|
| Normal | 30 | 80 | Weekly |
| Heroic | 30 | 80 | Weekly |
| Mythic | 20 | 80 | Weekly |
| Looking For Raid | 30 | 80 | Weekly |
| Story | 5 | 75+ | None |
Raid Finder splits Liberation of Undermine into 4 wings:
- Shock and Awesome
- Maniacal Machinist
- Two Heads Are Better
- The Chrome King
Loot Table Value
5 of Liberation of Undermine’s 118 drops are tradeable, and 5 of those are on the Auction House right now. The richest is Formula: Enchant Weapon - Authority of the Depths at 23,400g (median across 54 realms).
| Tradeable drop | Median price | Cheapest listing | Listed on |
|---|---|---|---|
| Formula: Enchant Weapon - Authority of the Depths | 23,400 gold | 2,500 gold | 54 realms |
| Design: Magnificent Jeweler's Setting | 18,824 gold | 3,000 gold | 42 realms |
| Pattern: Adrenal Surge Clasp | 16,615 gold | 500 gold | 61 realms |
| Pattern: Duskthread Lining | 12,523 gold | 777 gold | 48 realms |
| Plans: Siphoning Stiletto | 8,051 gold | 250 gold | 55 realms |
Median is the middle price across every connected realm that currently lists the item, from our own Auction House scan, updated within the hour.
Where It Is
The entrance to Liberation of Undermine is in Undermine at 42.1, 50.4.
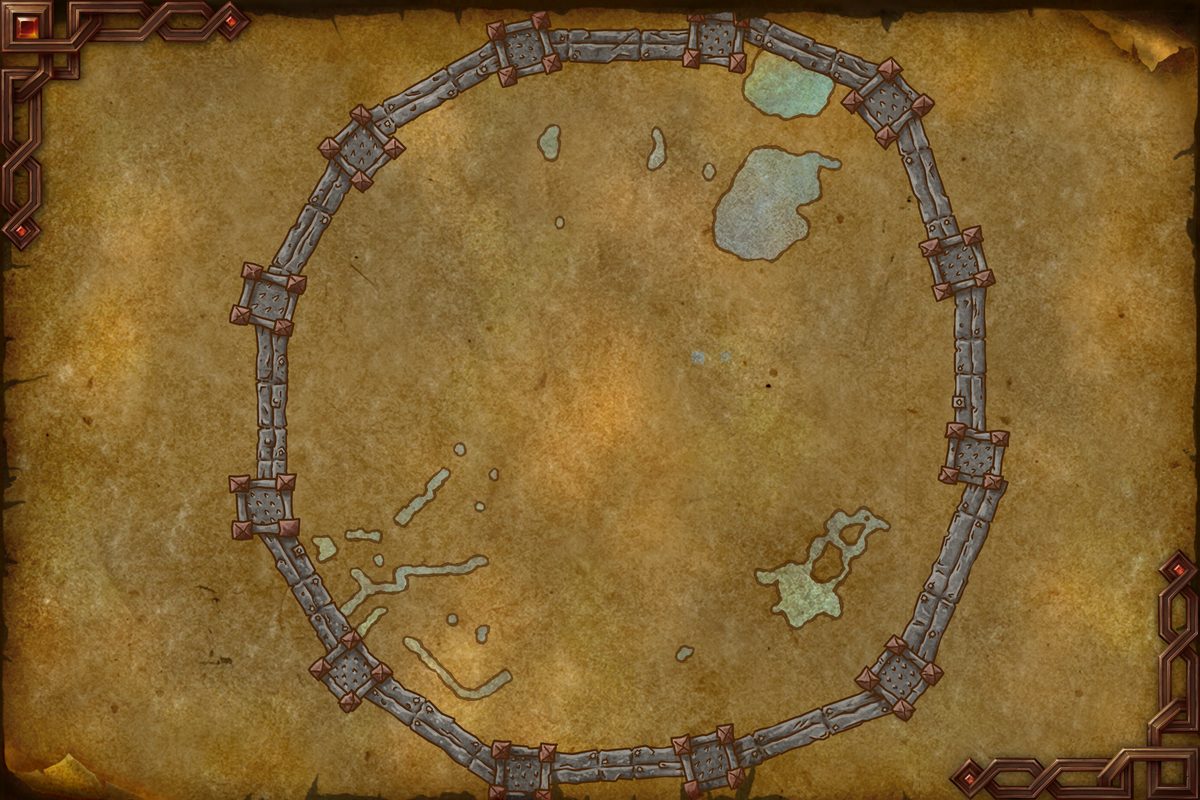 Worldsoul Memory: Early Cartel WarsWorldsoul Memory: Kaja'mite ContactD.R.I.V.E.Primrose Crankshaft, Riot SchedulerSidestreet SluiceSpecial Assignment: Boom! Headshot!Special Assignment: Security DetailSurge PricingTeleporter to DornogalEntrance 42.1, 50.4
Undermine, from the game’s own world map art. The framed marker is the Adventure Guide entrance; gold diamonds are the zone’s landmarks.
3D Model
First-party render from the game files. Model © Blizzard Entertainment.
Instance Map
The Adventure Guide places 8 bosses of Liberation of Undermine on 4 maps. Numbers follow the encounter order; each links to that fight below.
Undermine
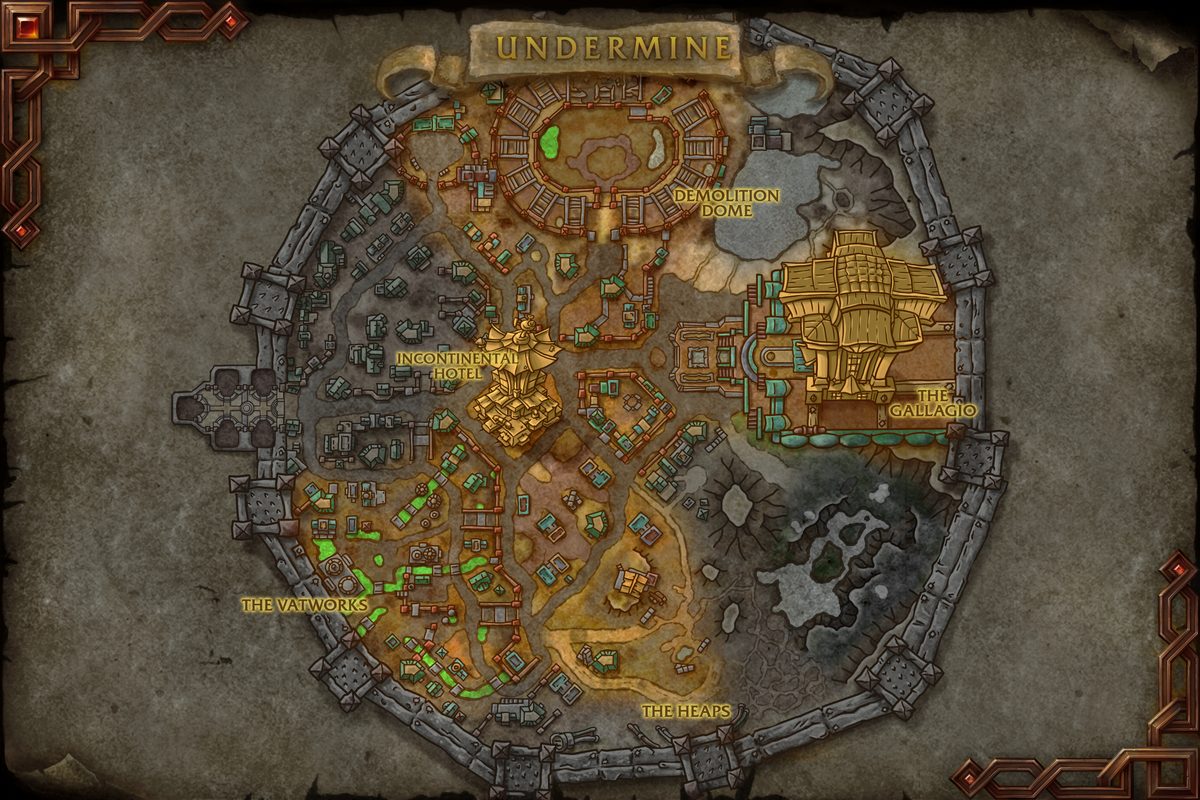 1Vexie and the Geargrinders2Cauldron of Carnage3Rik Reverb4Stix Bunkjunker5Sprocketmonger Lockenstock
- 1 Vexie and the Geargrinders 47.3, 45.9
- 2 Cauldron of Carnage 50.6, 18.8
- 3 Rik Reverb 36.5, 19.0
- 4 Stix Bunkjunker 56.6, 79.4
- 5 Sprocketmonger Lockenstock 28.9, 78.9
Undermine
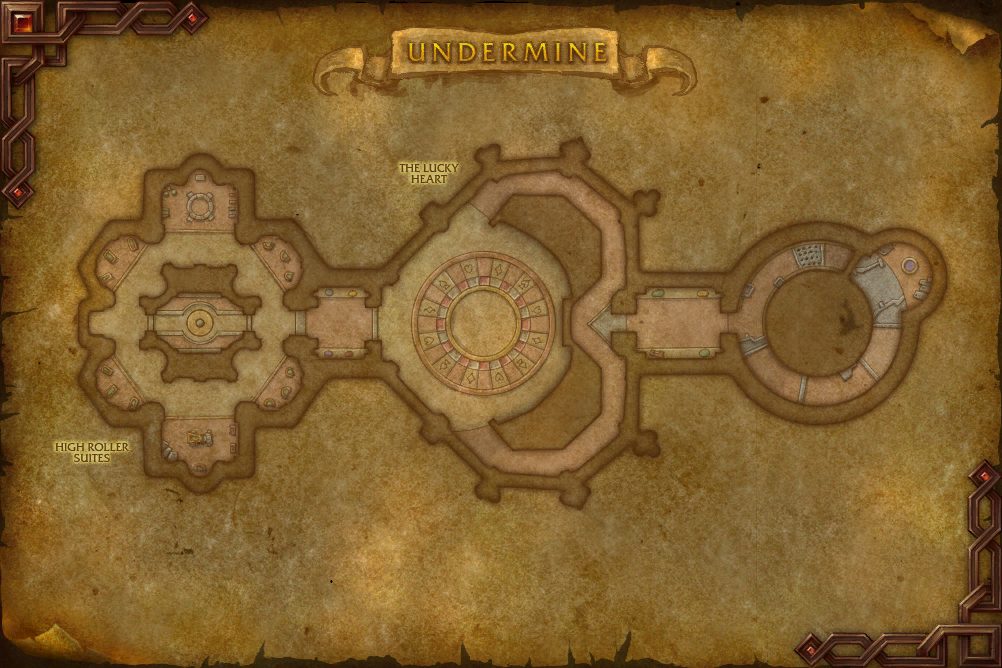 6The One-Armed Bandit
- 6 The One-Armed Bandit 50.0, 49.1
Undermine
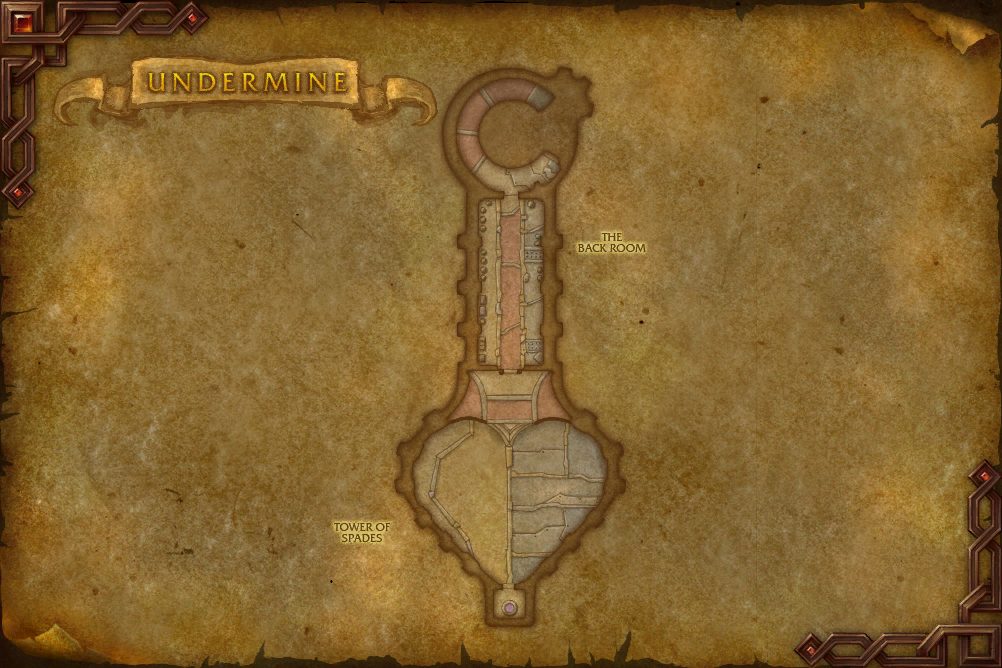 7Mug'Zee, Heads of Security
- 7 Mug'Zee, Heads of Security 51.2, 76.2
Undermine
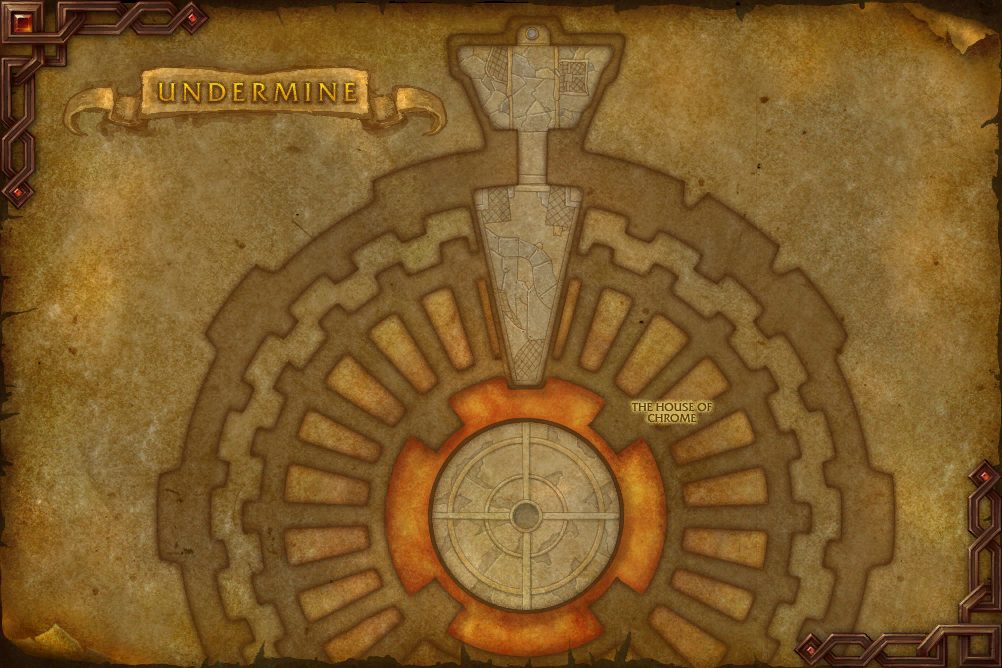 8Chrome King Gallywix
- 8 Chrome King Gallywix 52.7, 78.0
Encounters
MMythic
Vexie and the Geargrinders
Vexie Fullthrottle has been paving a path of terror through the hearts of anyone her gang encounters. Answering Gallywix's call for aid, she and her crew are here to repay an old favor, and add a few new grease stains to Undermine's streets.
Abilities & Strategy
Overview
The Geargrinder begins the encounter encased in Protective Plating, slowly generating energy in preparation for Unrelenting CAR-nage. While atop her war-tank, Vexie calls in Geargrinder Bikers to assist her. When a biker is defeated they surrender their ride, allowing players to unleash a Blaze of Glory and removing an application of Protective Plating. Once all Protective Plating is removed, the Geargrinder suffers a Mechanical Breakdown. While broken down, Vexie begins to Tune-Up the war-tank and calls Pit Mechanics to Repair the Geargrinder. Once fully repaired Vexie commands the Geargrinder to continue its assault!
Tanks
- Defeated Geargrinder Bikers surrender their bikes, allowing for Blaze of Glory.
- Vexie's Tune-Up and Pit Mechanics' Repair the Geargrinder's Protective Plating.
- Tank Buster leaves an Oil Slick at the caster's location.
Damage Dealers
- Defeated Geargrinder Bikers surrender their bikes, allowing for Blaze of Glory.
- Vexie's Tune-Up and Pit Mechanics' Repair the Geargrinder's Protective Plating.
- Mechanical Breakdown causes the Geargrinder to take increased damage.
Healers
- Defeated Geargrinder Bikers surrender their bikes, allowing for Blaze of Glory.
- Spew Oil inflicts moderate damage to afflicted players.
- While the Geargrinder suffers from a Mechanical Breakdown all players take damage from Backfire.
- Mechanical Breakdown causes the Geargrinder to take increased damage.
Stage One: Fury Road
The Geargrinder
 Protective Plating
 Unrelenting CAR-nage
 Call Bikers
 Spew Oil
In Heroic and Mythic difficulties, Spew Oil leaves behind an Oil Slick.
 Incendiary Fire
 Bomb Voyage!
 Tank Buster
In Heroic and Mythic difficulties, Tank Buster leaves behind an Oil Slick.
Stage Two: Pit Stop
The Geargrinder


Loot
14 drops · item level 1 to 623 · 11 slots (Back, Chest, Feet, Head, Legs, One-Hand +5 more) · 1 tradeable


Cauldron of Carnage
Throughout history there have been many epic wars, but none more explosive than the rivalry between the galvanic gorilla Torq the Tempest, and the molten mechasaur Flarendo the Furious. Tonight, all bets are off when these two champions clash in the cauldron for a showdown that threatens to tear Undermine in two! Witness the carnage or be the shame of goblin kind.
Abilities & Strategy
Overview
Flarendo and Torq put on a show for the audience, throwing Scrapbombs and afflicting arena combatants with Static Charge. Upon reaching 100 energy, Flarendo and Torq come together in a Colossal Clash!
Tank
- Blistering Spite and Galvanized Spite increase over time as players fight Flarendo and Torq.
- Eruption Stomp and Overload Burst inflict heavy damage.
- Flarendo and Torq take reduced damage while affected by Raised Guard.
Damage Dealers
- Blistering Spite and Galvanized Spite increase over time as players fight Flarendo and Torq.
- Static Charge erupts into a Static Discharge once it builds to maximum charge.
- Scrapbomb will inflict massive damage to the raid if no player is hit.
Healers
- Blistering Spite and Galvanized Spite increase over time as players fight Flarendo and Torq.
- Scrapbomb inflicts damage split evenly among players in its explosion radius.
- Colossal Clash inflicts heavy damage to all players


Flarendo the Furious
 Blistering Spite
 Scrapbomb
On Heroic and Mythic difficulties, Scrapbombs leaves behind a Molten Pool after exploding.
 Molten Phlegm
 Blastburn Roarcannon
On Mythic difficulty, Blastburn Roarcannon fires three beams in a cone.
 Eruption Stomp
Torq the Tempest
 Galvanized Spite

 Static Charge
 Thunderdrum Salvo
 Voltaic Image
On Mythic difficulty, Voltaic Images also detonates upon expiration.

 Lightning Bash
Loot
14 drops · item level 623 · 8 slots (Feet, Finger, Held In Off-hand, One-Hand, Ranged, Trinket +2 more) · all Bind on Pickup
 Competitor's Battle Cord
 Crowd Favorite
 Dreadful Bloody Gallybux
 Faded Championship Ring
 Flarendo's Pilot Light
 Galvanic Graffiti Cuffs
 Heaviestweight Title Belt
 Hotstep Heel-TurnersMystic Bloody Gallybux
 Superfan's Beater-Buzzer
 Torq's Big Red Button
 Tournament ArcVenerated Bloody GallybuxZenith Bloody Gallybux
Rik Reverb
Rik Reverb loves the boom of an explosion, the crackle of a firework and most importantly, the sound of his own voice. From his flying sonic resonator, Rik serves as Gallywix's partying promoter by enthralling the citizens of Undermine with addictive and deadly goblin beats.
Abilities & Strategy
Overview
Rik Reverb places entrancing amplifiers around the yard during Amplification. Upon reaching full power, the amplifiers go Haywire. Upon reaching 100 energy, Rik unleashes Blaring Drops from his sonic resonator and causes each amplifier to Blowout.
Tanks
- Rik Resonates additional power to nearby amplifiers.
- Sonic Blast inflicts Sonic damage in a frontal cone and applies Tinnitus. Sonic damage cannot be blocked or reduced by Armor.
- Amplifier Blowouts knock players into the air as Rik generates deadly Blaring Drops.
Damage Dealers
- Activating amplifiers drains their energy but applies Lingering Voltage.
- Rik gains a nullifying Sound Cloud in Stage Two.
- Amplifier Blowouts knock players into the air as Rik generates deadly Blaring Drops.
Healers
- Activating amplifiers drains their energy but applies Lingering Voltage.
- Faulty Zap inflicts damage to nearby players.
- Amplifier Blowouts knock players into the air as Rik generates deadly Blaring Drops.
Stage One: Party Starter
 Amplification!
Amplifier
The amplifier gains power over time.
 Echoing Chant
 Resonant Echoes
In Mythic difficulty, players hit by Resonant Echoes while already under its effect become entranced.
 Sound Cannon
In Mythic difficulty, Sound Cannon damage is split evenly among players in its path. Players become entranced if the target is brought below 75%.

 Faulty Zap
In Mythic difficulty, Faulty Zap causes a Static Jolt when afflicted players collide.

 Sparkblast Ignition

 Resonance
 Sonic Blast

Stage Two: Hype Hustle!
Rik encases himself in a barrier of sound as he overloads his amplifiers.


Loot
14 drops · item level 1 to 623 · 7 slots (Feet, Neck, One-Hand, Shield, Trinket, Waist +1 more) · 1 tradeable
 Dreadful Polished Gallybux
 Frontman's Wondrous Wall
 Killer Queen's WristflickersMystic Polished Gallybux
 Pattern: Duskthread Lining
 Pyrotechnic Needle-Dropper
 Remixed Ignition Saber
 Reverb Radio
 Rik's Walkin' Boots
 Sash of the Fierce Diva
 Semi-Charmed Amulet
 Underparty Admission BraceletVenerated Polished GallybuxZenith Polished Gallybux
Stix Bunkjunker
It could be said that no city service is more essential than garbage collection... or at least that's what Stix Bunkjunker would like you to believe. Stix and his cleanup crew have been finding inventive ways to dispose of the city's unwanteds and unmentionables for as long as anyone can remember.
Abilities & Strategy
Overview
Stix assaults the players while slowly gaining energy. Upon reaching 100 energy Stix uses Electromagnetic Sorting, pulling Garbage Piles and Discarded Doomsplosives from the landfill while selecting several players to become Rolling Rubbish. Eventually, Stix forces his mech into Overdrive and operates at Maximum Output until defeated.
Tanks
- Meltdown inflicts major damage to Stix's current target, especially if they are affected by Demolish.
- Scrapmasters and Junkyard Hyenas can be absorbed by Rolling Rubbish, depositing them wherever the ball is destroyed.
- Discarded Doomsplosive inflicts devastating raidwide damage if not absorbed by Rolling Rubbish.
Damage Dealers
- Scrapmasters and Junkyard Hyenas can be absorbed by Rolling Rubbish, depositing them wherever the ball is destroyed.
- Incinerator can turn nearby garbage piles into Hot Garbage.
- Discarded Doomsplosive inflicts devastating raidwide damage if not absorbed by Rolling Rubbish.
Healers
- Electromagnetic Sorting inflicts significant raidwide damage.
- Incinerator can turn nearby garbage piles into Hot Garbage.
- Discarded Doomsplosive inflicts devastating raidwide damage if not absorbed by Rolling Rubbish.


Cleanup Crew
Stix calls in his Cleanup Crew to help dispose of unwelcome visitors.


 Overdrive
 Overcharged Bolt
 Trash Compactor
 Maximum Output
In Mythic difficulty, Maximum Output increases the number of Scrapmasters summoned as part of Stix's Cleanup Crew.
Loot
13 drops · item level 1 to 623 · 6 slots (Hands, Head, Legs, One-Hand, Trinket, Two-Hand) · all Bind on Pickup


The One-Armed Bandit
The One-Armed Bandit is the premiere slot machine in Gallywix's casino. All the delightful device asks is that you play fairly and don't cheat. The rules by which it determines this are an enigmatic mystery, although the one-armed punishment it dispenses cannot be missed.
Abilities & Strategy
Overview
The One-Armed Bandit assaults players while slowly gaining energy. Upon reaching 100 energy, it uses Spin to Win! to call upon Reel Assistants bearing various symbol Tokens. Defeating these assistants and depositing their tokens within the One-Armed Bandit determines the result. After all of the valid combinations have been rolled, the One-Armed Bandit overloads and takes control of its own reels using Cheat to Win! in a final attempt to destroy its enemies.
Tanks
- The Big Hit inflicts high damage and leaves behind a Shocking Field.
- Activating a Shock Coil causes Explosive Shrapnel to inflict high damage and absorb nearby Shocking Fields.
- If two tokens are not deposited or a repeat combination is detected during Spin to Win!, the One-Armed Bandit uses Fraud Detected!.
Damage Dealers
- Reel Assistants called forth from Spin To Win! bear icons that can be slotted back into the One-Armed Bandit.
- If two tokens are not deposited or a repeat combination is detected during Spin to Win!, the One-Armed Bandit uses Fraud Detected!.
- Standing close to the Pay-Line chip will grant High Roller!.
Healers
- If two tokens are not deposited or a repeat combination is detected during Spin to Win!, the One-Armed Bandit uses Fraud Detected!.
- Foul Exhaust reduces the movement speed of all players and absorbs a large amount of healing.
- Standing close to the Pay-Line chip will grant High Roller!.
Stage One: That's RNG, Baby!
 Spin To Win!


 Pay-Line


 Foul Exhaust
 The Big Hit
In Mythic difficulty, The Big Hit also arcs lightning to extra players creating additional Shocking Fields.
Stage Two: This Game Is Rigged!
 Cheat to Win!


Pay-Line
Foul Exhaust
The Big Hit
In Mythic difficulty, The Big Hit also arcs lightning to extra players creating additional Shocking Fields.
Loot
15 drops · item level 623 · 9 slots (Chest, Feet, Finger, Held In Off-hand, One-Hand, Trinket +3 more) · all Bind on Pickup
 Best-in-Slots
 Bottom-Dollar Blouse
 Coin-Operated Girdle
 Dreadful Gilded Gallybux
 Dubious Table-Runners
 Gallagio Bottle Service
 Giga Bank-Breaker
 House of Cards
 Hustler's Ante-Uppers
 Miniature Roulette WheelMystic Gilded Gallybux
 Operator's Fraud Detector
 Random Number PerforatorVenerated Gilded GallybuxZenith Gilded Gallybux
Mug'Zee, Heads of Security
Buddies from the day they were born, Mug'Zee's two heads are the topper of a giant hulk of an ogre enforcer, specifically hired by Gallywix to oversee his casino's day-to-day activities. In recent weeks, Mug'Zee's been reassigned to keep anyone and everyone out of the Gallagio's innermost chambers.
Abilities & Strategy
Overview
The two heads of Mug'Zee, Mug and Zee, begin the encounter in a friendly contest to see who is in control. Whichever head has all the most players on their side of the arena becomes the Head Honcho, activating a unique set of abilities to unleash upon players. Upon reaching 40% remaining health, Mug and Zee combine their efforts and attack in unison granting them the use of all of their abilities at once.
Tanks
- Molten Gold Knuckles inflict heavy damage in front of Mug and apply Golden Drip to players hit.
- Damage from Double Whammy Shot is mitigated by the closest player hit.
Damage Dealers
- Earthshaker Gaols splits damage among all players within the effect, trapping them within earthen walls.
- Touching Unstable Crawler Mines causes them to explode, unleashing an Unstable Cluster Bomb and causing all players to suffer from Searing Shrapnel.
- Frostshatter Spears inflict lethal damage to the first player or Earthshaker Gaol wall they hit.
Healers
- Elemental Calamity and Uncontrolled Burn inflict persistent damage over time each time Mug'zee swaps which head is the Head Honcho.
- Mug'Zee gains Moxie the longer each head is in command.
- Frostshatter Spears inflict lethal damage to the first player or Earthshaker Gaol wall they hit.
Stage One: The Heads of Security
 Head Honcho
On Mythic difficulty, Mug'Zee can only swap Head Honcho when all players are on either side of the room.

Mug
 Earthshaker Gaol
 Frostshatter Boots
On Heroic and Mythic difficulties, a lethal Frostshatter Spear coalesces and launches towards affected players. On Mythic difficulty, Frostshatter Boots last indefinitely until coming into contact with a Hot Mess.
Stormfury Finger Gun
 Molten Gold Knuckles
Zee
 Unstable Crawler Mines
On Heroic and Mythic difficulties, the player triggering the Unstable Crawler Mine takes increased damage from Unstable Crawler Mines. On Mythic difficulty, Unstable Crawler Mine's inflict lethal damage to the player triggering it.
Goblin-guided Rocket
On Heroic and Mythic difficulties, players hit by Goblin-guided Rocket become afflicted with Radiation Sickness.
 Spray and Pray
Mk II Electro Shocker
Zee summons MK II Electro Shockers when he becomes the Head Honcho. On Mythic difficulty, MK II Electro Shockers gain Electro-Charged Shield until hit by Stormfury Finger Gun.
 Double Whammy Shot
Intermission: Bulletstorm
Upon reaching 40% health both heads decide to work together unleashing a series of Static Charges and Bulletstorms before their final, combined, assault begins.


Stage Two: The Head Honcho
Mug'Zee
Mug'Zee joins forces as the Head Honcho and gains access to all of their abilities from Stage One.
 Bloodlust
 Moxie
Moxie
Double-Minded Fury
Earthshaker Gaol
Frostshatter Boots
On Heroic and Mythic difficulties, a lethal Frostshatter Spear coalesces and launches towards affected players. On Mythic difficulty, Frostshatter Boots last indefinitely until coming into contact with a Hot Mess.
Stormfury Finger Gun
Molten Gold Knuckles
Unstable Crawler Mines
On Heroic and Mythic difficulties, the player triggering the Unstable Crawler Mine takes increased damage from Unstable Crawler Mines. On Mythic difficulty, Unstable Crawler Mine's inflict lethal damage to the player triggering it.
Goblin-guided Rocket
On Heroic and Mythic difficulties, players hit by Goblin-guided Rocket become afflicted with Radiation Sickness.
Spray and Pray
Mk II Electro Shocker
Zee summons MK II Electro Shockers when he becomes the Head Honcho. On Mythic difficulty, MK II Electro Shockers gain Electro-Charged Shield until hit by Stormfury Finger Gun.
Double Whammy Shot
Loot
16 drops · item level 1 to 623 · 11 slots (Chest, Feet, Hands, Legs, Neck, One-Hand +5 more) · 1 tradeable
 Big Earner's Bludgeon
 "Bullet-Proof" Vestplate
 Capo's Molten Knuckles
 Cemented Murloc-Swimmers
 Design: Magnificent Jeweler's Setting
 Enforcer's Sticky Fingers
 Epaulettes of Failed Enforcers
 Gobfather's Gifted Bling
 Hired Muscle's Legguards
 Hitman's Holster
 Made Manacles
 Mug's Moxie Jug
 "Tiny Pal"
 Underboss's Tailored Mantle
 Wiseguy's Refused Offer
 Zee's Thug Hotline
Chrome King Gallywix
Having taken a 'strategic retreat,' Jastor Gallywix holed up in the halls of the Gallagio. Whatever Gallywix has been working on, it's guaranteed to be powerful, deadly, and capable of crushing any who oppose him.
Abilities & Strategy
Overview
Gallywix gains energy over time, activating The House of Chrome's Giga Coils at max capacity. Charged Giga Bombs brought to Giga Controls trigger a Giga Bomb Detonation. This causes a Control Meltdown which interrupts Gallywix's Giga Coils. Upon losing both Giga Controls a Sabotage Zone forms. Additionally, throughout the encounter Gallywix calls in the most overpaid Darkfuse Cronies to aid him. As the battle rages on Gallywix alters and augments his arsenal bringing maniacal mayhem.
Tanks
- Big Bad Buncha Bombs and Bigger Badder Bomb Blast additionally create 1500-Pound "Dud".
- Scatterblast Canisters and Bigger Badder Bomb Blast affect players in Gallywix's frontal direction.
- Dying Darkfuse Technicians drop Giga Bombs that go Giga BOOM! after 40 sec. Gallywix's Giga Blast detonates these immediately.
- Gallywix release all Trick Shots upon reaching 10 stacks or when changing primary targets.
Healers
- Player affected by Mechengineer's Canisters detonate on consumption or expiration causing a Canister Detonation.
- Dying Darkfuse Technicians drop Giga Bombs that go Giga BOOM! after 40 sec. Gallywix's Giga Blast detonates these immediately.
- Charged Giga Bombs brought to Giga Controls trigger a Giga Bomb Detonation causing Control Meltdown which interrupts Gallywix's Giga Coils.
- Giga Coils, Zagging Zizzler, and TOTAL DESTRUCTION!!! inflict significant damage.
Damage Dealers
- Big Bad Buncha Bombs and Bigger Badder Bomb Blast additionally trigger Sapper's Satchel and Overloaded Rockets.
- Dying Darkfuse Technicians drop Giga Bombs that go Giga BOOM! after 40 sec. Gallywix's Giga Blast detonates these immediately.
- Charged Giga Bombs brought to Giga Controls trigger a Giga Bomb Detonation causing Control Meltdown which interrupts Gallywix's Giga Coils.
- Sharpshot Sentry can inflict high damage with Shock Barrage when left uncontrolled.
Stage One: The House of Chrome
"Take a good look at what gold and goblins can getcha." Cornered in The House of Chrome Gallywix stands ready to blast foes.
Gallywix

Stage Two: Mechanical Maniac
"Supply and demand! Deal with it!" Gallywix moves about The House of Chrome calling in Darkfuse cronies.
Gallywix

Darkfuse Cronies
Darkfuse Technician
Upon death drops a Giga Bomb.
Sharpshot Sentry
Darkfuse Wrenchmonger
Intermission: Docked and Loaded
Upon reaching 50% health Gallywix drops into the arena Cratering any in his way, gaining Armageddon-class Plating and then casts Total Destruction!!! until interrupted. Gallywix drops into the arena Cratering any in his way, gaining Armageddon-class Plating and then casts Total Destruction!!! until interrupted.


Stage Three: What an Arsenal!
"You certainly don't get your likeness carved into the side of a mountain by letting others push you around" Gallywix continues to pummel his enemies with his upgraded arsenal.
Gallywix
 Bigger Badder Bomb Blast
 Tick-Tock Canisters
 Giga Coils
Suppression
 Venting Heat
Greedy Goblin's Armaments
Darkfuse Cronies
Darkfuse Technician
Upon death drops a Giga Bomb.
Stage One: What an Arsenal!
"You certainly don't get your likeness carved into the side of a mountain by letting others push you around" Gallywix pummels his enemies with his upgraded arsenal.
Gallywix
Bigger Badder Bomb Blast
 Combination Canisters
 Giga Blast
Giga Coils
Suppression
Venting Heat
Greedy Goblin's Armaments
Darkfuse Cronies
Giga-Juiced Technician
Upon death drops a Discharged Giga Bomb.
Darkfuse Wrenchmonger
 Party Crashing Rocket
Loot
18 drops · item level 1 to 623 · 13 slots (Chest, Feet, Finger, Hands, Head, Legs +7 more) · 1 tradeable
 Capital Punisher
 Chromebustible Bomb Suit
 Cutthroat Competition Stompers
 Darkfuse Racketeer's Tricorne
 Dealer's Covetous Chain
 Deep-Pocketed Pantaloons
 Excessively Bejeweled Curio
 Eye of Kezan
 Formula: Enchant Weapon - Authority of the DepthsGallywix's Iron Thumb
 Golden Handshakers
 Illicit Bankroll Bracers
 Keys to the Big G
 Paydirt Pauldrons
 Prototype A.S.M.R.
 "Streamlined" Cartel Uniform
 The Jastor DiamondTitan of Industry
Sprocketmonger Lockenstock
As one of Gallywix's top minds, Sprocketmonger Lockenstock cannot say no to innovation, meaning that his list of inventions stretches far longer than the conveyor belts in his refinery. Constantly looking to simultaneously cut both corners and costs, Lockenstock's always searching for new markets to test out his gadgets.
Abilities & Strategy
Overview
Sprocketmonger Lockenstock prepares a demonstration for the players while slowly gaining energy. Conveyor belts around the factory produce explosive new technology for Lockenstock to Activate Inventions!. Upon reaching 100 energy, Lockenstock prepares a Beta Launch of an improved contraption, infusing it with void powers before renewing his assault.
Tanks
- Each application of Gravi-Gunk increases all damage taken.
- The damage of Pyro Party Pack is reduced the further the target is from other players.
- Foot-Blasters cause an Unstable Explosion that increases damage taken by Unstable Explosion for a short duration.
Damage Dealers
- Foot-Blasters cause an Unstable Explosion that increases damage taken by Unstable Explosion for a short duration.
- Players designated as Screw Ups periodically drop drills at their location.
- Wire Transfer inflicts significant damage to players standing within the effect
Healers
- Sonic Ba-Boom applies a damage over time effect to all players.
- Foot-Blasters cause an Unstable Explosion that increases damage taken by Unstable Explosion for a short duration.
- Voidsplosion inflicts significant damage to all players and absorbs healing taken.
Stage One: Assembly Required
 Activate Inventions!
Goblin Inventions
Empowered Inventions
 Polarization Generator


Foot-Blasters
In Mythic difficulty, Foot-Blasters spawn with Posi-Polarization or Nega-Polarization. Contact with an opposite polarity or Goblin Inventions will trigger a Polarized Catastro-Blast.
Wire Transfer
 Screw Up

 Sonic Ba-Boom
 Blisterizer Mk. II
 Pyro Party Pack
 Gravi-Gunk
Stage Two: Research and Destruction


Loot
14 drops · item level 1 to 623 · 8 slots (Back, Feet, Hands, One-Hand, Trinket, Two-Hand +2 more) · 1 tradeable
 Alphacoil Ba-Boom Stick
 Dreadful Greased Gallybux
 GIGADEATH Chainblade
 Gravi-Gunk Handlers
 Mister Lock-N-Stalk
 Mister Pick-Me-UpMystic Greased Gallybux
 Pattern: Adrenal Surge Clasp
 Refiner's Conveyor Belt
 Rushed Beta Launchers
 Test Pilot's Go-Pack
 Test Subject's ClaspsVenerated Greased GallybuxZenith Greased Gallybux
Quests
15 quests Blizzard’s quest data files under Liberation of Undermine, most for level 70 to 80:
- Reward:
- Reward:61 gold96 silver

Achievements
35 achievements tied to Liberation of Undermine, worth 320 achievement points in total.
- Liberation of Undermine Guild RunDefeat the following bosses in the Liberation of Undermine on Normal difficulty or higher while in a guild group.10
- Heroic Liberation of Undermine Guild RunDefeat the following bosses in the Liberation of Undermine on Heroic difficulty or higher while in a guild group.10
- Mythic: Chrome King Gallywix Guild RunDefeat Chrome King Gallywix in the Liberation of Undermine on Mythic difficulty while in a guild group.10
- Hold My Gear!Defeat Vexie and the Geargrinders after crashing a bike into the following objects in the Liberation of Undermine on Normal difficulty or higher.10
 Just /DanceDefeat Rik Reverb after activating both D.I.S.C.O.s during Hype Hustle in the Liberation of Undermine on Normal difficulty or higher.10
 Conveyor SlayerDefeat Sprocketmonger Lockenstock without being struck by Blazing Beam, Rocket Barrage, Mega Magnetize, Jumbo Void Beam, or Void Barrage in Liberation of Undermine on Normal difficulty or higher.10
 Garbage In, Garbage OutDefeat Stix Bunkjunker after absorbing or incinerating every Garbage Pile created by Electromagnetic Sorting before the next cast of Electromagnetic Sorting in Liberation of Undermine on Normal difficulty or higher.Title: Junkmaestro10
 One Rank HigherDefeat the One-Armed Bandit after activating one Chip Defense Machine in Liberation of Undermine on Normal difficulty or higher.Decor Reward: Gallagio L.U.C.K. Spinner10
- Two Ranks HigherDefeat the One-Armed Bandit after activating two Chip Defense Machines in Liberation of Undermine on Normal difficulty or higher.10
- Three Ranks HigherDefeat the One-Armed Bandit after activating three Chip Defense Machines in Liberation of Undermine on Normal difficulty or higher.10
- Best In ClassDefeat the One-Armed Bandit after activating all four Chip Defense Machines in Liberation of Undermine on Normal difficulty or higher.Title: The Reel Deal10
 A Good Day to Dye HardDefeat Mug'Zee, Heads of Security while all players are dyed the same color in Liberation of Undermine on Normal difficulty or higher.Toy: Pipeline Rerouter10
 Sleep with the FishesDefeat Mug'Zee, Heads of Security while all players have slept with the fishes in Liberation of Undermine on Normal difficulty or higher.10
 Scheming on a ThingDefeat Chrome King Gallywix after Giga Bomb Detonation-ing 3 Giga Controls during a single Giga Coils in Liberation of Undermine on Normal difficulty or higher.10
 Liberation of UndermineDefeat the following bosses on any difficulty.10
- Heroic: Liberation of UndermineDefeat the following bosses on Heroic difficulty.10
- Mythic: Liberation of UndermineDefeat the following bosses on Mythic difficulty.10
- Shock and AwesomeDefeat the following bosses that enthrall the masses within the Liberation of Undermine.10
 Maniacal MachinistDefeat the following bosses that threaten to dismantle the city within the Liberation of Undermine.10
 Beating the OddsDefeat the following bosses that control the casino within the Liberation of Undermine.10
 Fall of the Chrome KingDefeat the Chrome King within the Liberation of Undermine.10
 Mythic: Vexie and the GeargrindersDefeat Vexie in the Liberation of Undermine on Mythic difficulty.10
 Mythic: Cauldron of CarnageDefeat the Cauldron of Carnage in the Liberation of Undermine on Mythic difficulty.10
 Mythic: Rik ReverbDefeat Rik Reverb in the Liberation of Undermine on Mythic difficulty.10
 Mythic: Stix BunkjunkerDefeat Stix Bunkunker in the Liberation of Undermine on Mythic difficulty.10
 Mythic: Sprocketmonger LockenstockDefeat Sprocketmonger Lockenstock in the Liberation of Undermine on Mythic difficulty.10
 Mythic: The One-Armed BanditDefeat the One-Armed Bandit in the Liberation of Undermine on Mythic difficulty.10
 Mythic: Mug'Zee, Heads of SecurityDefeat Mug'Zee in the Liberation of Undermine on Mythic difficulty.10
- Mythic: Chrome King GallywixDefeat Gallywix in the Liberation of Undermine on Mythic difficulty.Title: Liberator of Undermine10
- Hall of Fame: Chrome King GallywixAmong the first two hundred guilds worldwide to defeat Chrome King Gallywix on Mythic difficulty.Title: Famed Slayer of The Chrome King
 Flarendo's Biggest FanDefeat the Cauldron of Carnage while being Flarendo's Biggest Fan in Liberation of Undermine on Normal difficulty or higher.10
 Torq's Biggest FanDefeat the Cauldron of Carnage while being Torq's Biggest Fan in Liberation of Undermine on Normal difficulty or higher.10
- Glory of the Liberation of Undermine RaiderComplete the Liberation of Undermine raid achievements listed below.Mount: Junkmaestro's Magnetomech10
- Ahead of the Curve: Chrome King GallywixDefeat Chrome King Gallywix in the Liberation of Undermine on Heroic difficulty or higher, before the release of the next raid tier.
- Cutting Edge: Chrome King GallywixDefeat Chrome King Gallywix in the Liberation of Undermine on Mythic difficulty, before the release of the next raid tier.
More The War Within Raids
Other raids from the same expansion.